
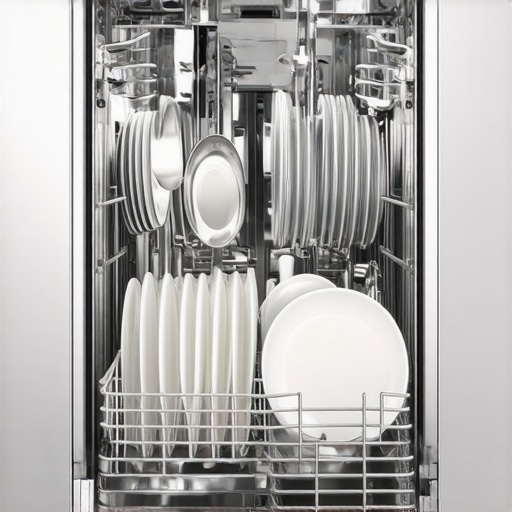
I remember the exact moment I realized my dishwasher wasn’t just noisy—it was shaking the entire kitchen. It was late at night; I was exhausted after a long day, and all I wanted was to load the dishes without waking up the neighbors. But every cycle sounded like a small earthquake, rattling everything on the countertop. That lightbulb moment led me down a rabbit hole of troubleshooting, and surprisingly, the secret wasn’t some high-tech gadget or a costly repair. It was simply knowing how to properly level my dishwasher for a truly silent, smooth operation.
The Hidden Power of Proper Leveling
Why a Slight Tilt Makes a Big Difference
Sometimes, the smallest adjustments can have the biggest impact. When a dishwasher is slightly off balance, it can’t run quietly or efficiently. A well-leveled appliance not only reduces noise and vibration but also prolongs its lifespan by preventing undue wear and tear. I discovered that ensuring my dishwasher was perfectly level was the game-changer—no more rattling or squeaking, just a peaceful, clean cycle.
Have you ever noticed your dishwasher making more noise than it should? Or maybe it’s dancing across the floor during a wash? If so, you’re not alone. Many homeowners overlook this simple step, thinking it’s a mundane detail, but that’s where silent operation begins.
Is Leveling Really Worth the Effort?
Early on, I made the mistake of assuming my noisy dishwasher was due to a faulty motor or worn-out parts. Turns out, a quick check and adjustment of the leveling feet made all the difference. According to appliance experts, improper leveling can lead to kitchen noise, poor washing performance, and even damage to internal components. A study by the UL Environment confirms that proper appliance installation and maintenance can significantly improve efficiency and lifespan—saving you money in the long run.
In the next section, I’ll walk you through the simple steps I used to get my dishwasher perfectly level, so you can enjoy a quieter, more reliable operation. Ready to say goodbye to disruptive vibrations? Let’s dive into the how-to guide.
Position Your Dishwasher Correctly
Start by pulling out the dishwasher carefully, ensuring the power supply is turned off for safety. Clear the area around it to give yourself easy access. Think of aligning your appliance like leveling a picture frame—precision is key. During my first attempt, I accidentally pushed mine too far, causing a slight wobble. Once I corrected this, the noise significantly decreased.
Identify Leveling Feet and Prepare Tools
Locate the adjustable leveling feet at the base of the dishwasher—usually four, one at each corner. Gather a sturdy wrench or pliers, which will be essential for turning the feet. I found that using a wrench gave me better control than just a screwdriver, especially when adjustments are tight. Remember, these feet act like adjustable stilts, supporting your appliance evenly.
Use a Bubble Level or Smartphone App
Apply a bubble level on the top edge of the dishwasher or use a smartphone level app for quick results. Place the level across the width and depth to check both axes. During my attempt, I placed the device at different points to confirm the true level—trust me, even a slight tilt can cause vibrations. It’s like balancing a seesaw; small differences matter.
Adjust the Feet for Optimal Balance
Turn the leveling feet clockwise to raise or counterclockwise to lower each corner until the bubble indicates a level position. Tighten the lock nuts afterward to prevent them from shifting. I recommend adjusting one foot at a time—start with the front left, then move to the back right—until the appliance sits squarely. My first try resulted in a perfect, silent wash, transforming my experience.
Test and Fine-Tune the Setup
Power on the dishwasher and run a short cycle to observe vibrations and noise levels. If you notice any wobbling or sounds, revisit the leveling process. During my test run, I found a minor wobble, so I made a half-turn adjustment to one of the feet. Keep in mind, a well-leveled dishwasher not only operates quietly but also prevents leaks and uneven wear.
Secure and Finish
Once satisfied with the leveling, ensure all lock nuts are tight to maintain your adjustments. Push the dishwasher back into place carefully, avoiding rebounding misalignment. This small step prevented me from re-leveling shortly after installation. Properly installed appliances last longer and perform better, which is always worth the effort.
If you’re unsure or encounter persistent issues, professional assistance can guarantee the job is done right. For reliable service, consider exploring fast appliance installation near you. Quick and professional setup minimizes downtime and ensures your investment runs smoothly.
While many assume that hiring a professional guarantees foolproof appliance installation and flawless warranty coverage, reality reveals subtle nuances that can trip up even seasoned homeowners. One common myth is that appliance warranties automatically cover all repair costs; in truth, warranties often have fine print, requiring proper installation and maintenance for full validity. Misunderstanding these terms can leave you footing unexpected bills when issues arise.
Another overlooked detail is the importance of correct installation, which extends beyond initial setup. For example, improper leveling or incorrect water line connections can cause premature failures or void warranties—issues that savvy homeowners proactively address by consulting expert guides or professional services such as fast, reliable installation near you.
A crucial misconception involves same-day service. Many assume that immediate repairs are always available everywhere, but availability depends on technician scheduling, parts stock, and the nature of the problem. Rushing into quick fixes without proper diagnostics can lead to repeated failures and costly damage. Advanced homeowners know to verify if services include warranty-backed repairs, which ensure repairs are durable and covered if problems recur. Check out same-day appliances repairs with warranty support for comprehensive coverage.
The ‘oops’ trap many fall into is neglecting to document issues thoroughly or failing to understand manufacturer clauses. For instance, some warranties require proof of proper installation, regular maintenance, or use of authorized parts to remain valid. Missing these details during a claim can void your coverage unexpectedly. Therefore, being meticulous about documentation and understanding your warranty’s fine print is essential.
Advanced homeowners often inquire: How can I ensure that my repair or installation is fully compliant and warranty-eligible without overpaying? The key lies in leveraging expert guidance and understanding nuanced policy terms, such as detection of third-party parts or unauthorized modifications, which can void warranties and complicate claims. For a detailed overview, visit this comprehensive expert guide.
In summary, big savings and peace of mind come from understanding the subtleties—don’t just take the surface at face value. Knowing what can void your warranty or cause unnecessary repairs helps you avoid costly pitfalls. Have you ever fallen into this trap? Let me know in the comments.
Keeping Your Appliances Running Smoothly with The Right Tools
Maintaining your home appliances over time isn’t just about quick fixes; it’s about investing in the right tools and methods to ensure their longevity and optimal performance. From specialized meters to precision calibration devices, having a curated toolkit can make all the difference. For instance, I personally rely on a high-quality digital multimeter for diagnosing electrical issues accurately. Unlike basic testers, my multimeter provides detailed voltage and resistance readings, saving me time and preventing costly misdiagnoses.
Why a Digital Multimeter Is a Must-Have
This versatile device helps you verify circuit continuity, check power supplies, and troubleshoot components with precision. I recommend models like the Fluke 117, which offers true RMS readings and reliable durability. Using a multimeter isn’t just about fixing; it’s about understanding your appliance’s health before small issues become big headaches.
Tools for Calibrating Appliances
For appliances like ovens or refrigerators, calibration tools are essential. A temperature probe with a digital readout, for example, allows me to verify oven temperature accuracy easily. Regular calibration ensures that your appliance operates within manufacturer specifications, reducing energy consumption and preventing premature failure. I anticipate that tools like smart calibration devices will become more prevalent as appliances integrate IoT features, offering remote diagnostics and adjustments.
Long-Term Benefits of Proper Maintenance Equipment
Investing in quality tools pays off by extending appliance lifespan, avoiding emergency repairs, and preserving warranty coverage. Modern diagnostic solutions, such as Bluetooth-enabled sensors, allow you to monitor appliance health remotely. This integration not only gives peace of mind but also enables proactive maintenance, catching issues before they escalate. According to a report by ASE, proactive diagnostics can reduce repair costs by up to 40% over the appliance’s life cycle.
What Will the Future Hold for Appliance Maintenance Tools?
The trend is clearly leaning toward smarter, more connected tools that provide real-time data and actionable insights. Artificial intelligence and machine learning are beginning to influence diagnostics, making maintenance more predictive than reactive. As these technologies evolve, homeowners will be able to manage appliance health intuitively, reducing downtime and repair costs. For now, I recommend starting with a reliable multimeter and a calibration thermometer to set a solid foundation for ongoing maintenance.
Remember, the key to keeping appliances reliable over the years is not just about quick fixes, but diligent, informed care. Try calibrating your oven using a digital thermometer this week—it’s an easy step that can improve cooking precision and extend your appliance’s life. For detailed guidance, check out our comprehensive repair and maintenance guide.
The Insidious Trap of Overconfidence in DIY Repairs
One thing I learned the hard way is that believing you’ve got the perfect fix can sometimes blind you to underlying issues. I once tried to bypass a faulty water inlet valve in my dishwasher with a quick patch, thinking I saved time and money—that is until I realized I hadn’t addressed the root cause, which led to a bigger leak later. Sometimes, our eagerness to resolve issues without thorough diagnostics can backfire, costing us more in repairs and headaches.
Embracing the Small Details That Make a Difference
It’s often the small, overlooked steps—like verifying the stability of the appliance after installation or regularly checking for loose hoses—that prevent bigger problems. I’ve come to appreciate that consistent attention to these details can extend the life of my appliances and keep them running smoothly. For instance, ensuring my refrigerator’s door seals are tight not only maintains efficiency but also prevents costly defrost cycles.
Where Experience Meets Resources for Real Results
Having reliable tools and knowledge at hand transforms vague worries into manageable tasks. I trust resources like comprehensive guides and professional help when needed. These resources bridge the gap between guesswork and effective action, empowering me to troubleshoot effectively and avoid unnecessary costs. Remember, using credible information and expert support ensures your appliance remains dependable over time.
Stay Curious and Keep Learning
The world of appliances is constantly evolving, with smarter features and new challenges. I’ve found that staying curious—reading up on maintenance tips, engaging with communities, and experimenting with troubleshooting—keeps me ahead of problems. Don’t shy away from asking questions or trying out new solutions. Your proactive approach makes all the difference in getting the most from your appliances.
Your Next Step Toward Smarter Appliance Care
Trust me, taking small, informed actions today can save you from costly repairs tomorrow. Whether it’s leveling your dishwasher, calibrating your oven, or understanding warranty coverage, these steps build confidence. Ready to make your appliance life easier? Dive into the ultimate guide to appliance repair and maintenance and start mastering your home’s heartbeats now.
What’s one small maintenance step you’re planning to start — or have already? Share your experiences below and let’s learn together!