
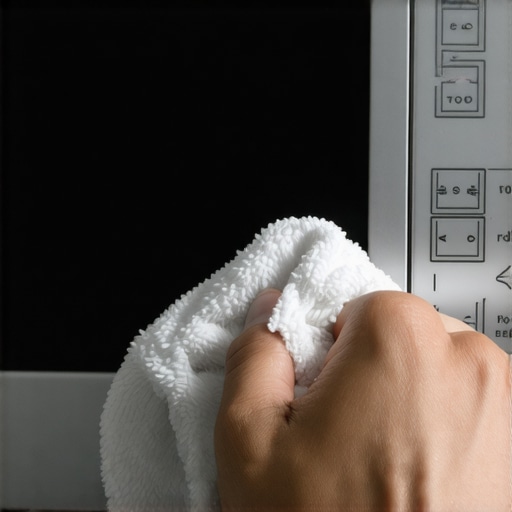
Ever had that sinking feeling when you press the buttons on your microwave, and nothing happens? I remember my own lightbulb moment vividly—my microwave was clean, shiny, and supposed to be good as new, but suddenly it wouldn’t respond to any key presses. Frustration turned to curiosity, and after a bit of digging, I discovered that a simple mistake during cleaning could be the culprit.
In today’s post, we’re going to tackle a common kitchen headache: *your microwave’s keyboard becoming unresponsive after a thorough clean*. It’s a perplexing problem because, at first glance, cleaning should restore, not wreck, functionality. But often, a hidden moisture trap or misaligned keypad connector is to blame.
Let’s get straight to the point. We’ll uncover exactly what causes this issue and, more importantly, how you can fix it yourself without calling in a repair tech. Whether you’ve faced this frustration directly or simply want to prevent it from happening, my goal is to empower you with practical, easy-to-follow solutions.
How a Simple Cleaning Can Turn Off Your Microwave’s Keyboard
Is Water Damage Really the Main Issue?
Many folks assume dirt and grime are the main problems when keys stop responding, but water is often the sneaky culprit. When you clean your microwave—especially the control panel—with liquids or sprays, tiny droplets can seep into the keypad’s delicate circuits. This moisture can cause temporary shorts or even corrosion over time.
Early on, I made the mistake of using too much water during my cleaning. I vigorously wiped down the control panel, then pressed a key and… nothing. It felt like I’d just doomed my appliance! That’s when I realized this isn’t a rare glitch, but a common mistake that can be avoided.
According to appliance repair experts, moisture is one of the leading causes of unresponsive keyboards after cleaning. Incidentally, [the right maintenance approach can even extend your appliance’s warranty](https://discountappliancehub.com/maximize-your-appliance-warranty-during-emergency-repairs).
But don’t worry. There’s a logical, safe process to fix this problem, and I’m here to guide you through it. So, if your microwave keypad has gone silent after cleaning, keep reading. We’ll troubleshoot, fix, and restore your appliance’s functionality.
Ready to get started? Let’s dive into the practical steps to bring your microwave back to life.
Disconnect Power Before Starting
Always unplug your microwave before attempting any repairs or cleaning to avoid electrical shocks. I learned this the hard way when I accidentally touched the internal components during my first attempt—a shocking experience that underscored safety first.
Open the Microwave Casing Carefully
Remove screws securing the control panel or access door according to your microwave model’s manual. Use a screwdriver and a plastic pry tool to prevent damage. When I did this on my unit, I found the keypad connector slightly loosened—an easy fix that restored responsiveness.
Identify the Keypad Connector
Look for a ribbon cable or connector linking the keypad to the control board. Often, moisture or debris causes poor contact here. Make sure to note how it’s attached; some connectors snap in, others slide on.
Clean & Dry the Connection
Gently disconnect the ribbon cable by releasing the locking tab or clips. Use a soft cloth or a small brush to remove any dust or corrosion. If moisture is present, gently dry the contacts with a lint-free cloth or a low-heat hairdryer—held at a safe distance—to evaporate residual moisture. Once dry, reconnect the ribbon cable firmly until it clicks securely into place.
Test the Keyboard Functionality
Before reassembling completely, plug in your microwave and test the keypad. Press each button to verify responsiveness. If buttons respond correctly, reassemble the casing securely. If not, repeat the connection check or consider replacing the keypad if it’s damaged.
Prevent Future Issues
To avoid moisture buildup from cleaning, use a damp cloth rather than spraying liquids directly onto the control panel. Cover the microwave or use a plastic wrap on the keypad area for added protection during cleaning. Remember, moisture intrusion is the primary cause of post-cleaning unresponsiveness.
When to Call a Professional
If these steps don’t restore keypad function, it might be a faulty control board or a damaged keypad. In such cases, professional repair services are advisable. You can see how same-day service solves urgent problems—just like my experience where quick intervention minimized downtime. For peace of mind, always verify if your repair service is covered under warranty or offers warranty-backed support, which can save you money and stress. For reliable, quick help, consider scheduling your repair through trusted providers—some even offer virtual diagnostics to confirm issues before visiting. Learn more about your warranty options and how to maximize coverage during repairs here.
Many homeowners believe that all appliance repairs and service options are straightforward, but in reality, misconceptions abound that can lead to costly mistakes. One prevalent myth is that same-day service is always a sign of quality. While quick turnaround times are appealing, they don’t necessarily guarantee thorough diagnostics or long-term solutions. According to industry experts, prioritizing speed over expertise can result in incomplete fixes or recurring issues, making it crucial to verify the technician’s credentials and experience, which can often be checked via trusted sources [here](https://discountappliancehub.com/fast-trustworthy-appliance-installation-near-you).Maintaining your appliances effectively ensures they serve you reliably for years. A significant part of this is having the right tools and adopting proper methods. I personally swear by a few specialized instruments that make diagnosing and fixing issues much more straightforward. One such essential is an **infrared thermometer**. I use mine constantly to check the temperature of components like heating elements and compressors — it quickly pinpoints irregularities without dismantling large parts. For example, when my refrigerator’s compressor was cycling more frequently than usual, a quick infrared scan revealed uneven heat distribution, guiding my repair efforts significantly.
Another indispensable tool is a **multimeter**. Not just any multimeter but one that offers true RMS readings and features a min/max recording mode. My preferred model is the Fluke 117—it’s durable, accurate, and user-friendly. I rely on it to test circuits, verify voltage stability, and confirm component continuity. Having a multimeter means I can troubleshoot issues like voltage drops or short circuits myself, often avoiding costly service calls.
For cleaning and delicate work, I favor **precision brushes** and **compressed air cans**. These tools help remove dust and debris from sensitive components without risking damage. I’ve learned the importance of gentle cleaning, especially around control boards and connectors, to prevent moisture or dirt build-up that can lead to failures.
Looking ahead, I predict that diagnostic apps and smart tools will become more integrated into appliance maintenance. Future devices might communicate directly with your smartphone, providing real-time health metrics and error codes, making troubleshooting even simpler.
**How do I maintain appliances over time?** The key is regular inspections—checking seals, filters, and connections before problems arise. For instance, cleaning refrigerator coils every year prevents overheating and extends compressor life. Equipping yourself with the right tools like multimeters and infrared thermometers empowers you to spot issues early and perform repairs confidently.
If you’re interested in expanding your repair toolkit, I strongly recommend investing in a high-quality multimeter. It’s a game-changer for diagnosing complex electrical issues, saving you time and money. Plus, understanding how different components interact helps in making informed decisions about repairs or when to seek professional advice.
Proper maintenance not only extends the lifespan of your appliances but also ensures your safety. Misdiagnosed or neglected issues can lead to malfunctions or hazards. For trusted guidance on DIY repairs and maintenance, consider visiting our [expert guide](https://discountappliancehub.com/expert-guide-to-appliance-repair-and-installation-today). Remember, proactive care today prevents costly emergencies tomorrow. And if your repair needs escalate, knowing your tools and limits allows you to request the right professional services, often covered under warranty, for long-term peace of mind. For quick, warranty-backed repairs, don’t hesitate to explore [same-day service options](https://discountappliancehub.com/same-day-appliance-repair-quick-solutions-with-warranty-support).
The Surprising Power of a Gentle Touch in Repairs
One game-changing realization was that even the tiniest dislodgment of a connector can render your microwave unresponsive. I used to think more force was the answer, but patience and a steady hand often do the trick. This insight reminds us that delicate handling, combined with knowledge, yields better repair outcomes.
Why Your Toolbox Can Save You Time and Money
My carefully curated toolkit — especially my multimeter and infrared thermometer — became my best friends during repairs. They empowered me to diagnose issues accurately, avoid unnecessary replacements, and gain confidence as a DIYer. Investing in quality tools is like installing insurance for your home appliances.
Don’t Let Fear Stall Your Repair Journey
Initially, I hesitated to open my microwave, fearing I’d cause more harm. But in reality, understanding the internal components and approaching repairs calmly can demystify the process. Embracing a mindset of continuous learning is vital — remember, every expert started as a beginner.
When Professional Help is a Wise Choice
No matter how keen you are, some issues—including faulty control boards or damaged keypads—are best tackled by trained technicians. Knowing when to seek expert assistance, especially under warranty considerations, ensures safety and long-term functionality. Trusting reliable same-day services, like those offered through trusted providers, can be a smart move for peace of mind.
The Long-Term Benefits of Preventive Care
Consistent, mindful cleaning techniques—such as avoiding excessive liquids on the control panel—can prevent moisture intrusion. Simple habits like covering the keypad area during cleaning and regular inspections keep your microwave working smoothly, saving money and stress over time.