
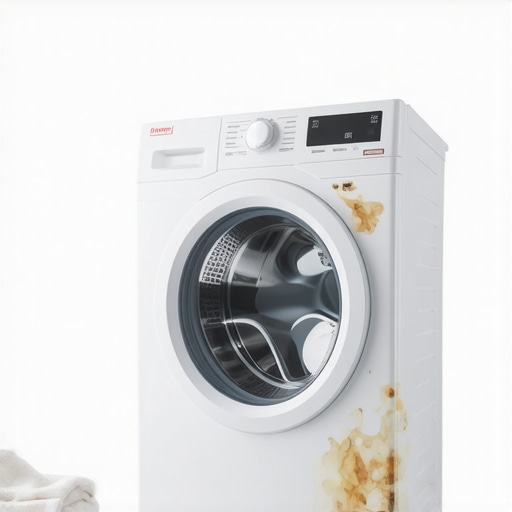
Have you ever opened your laundry room and been greeted not by the fresh scent of clean clothes, but by an unmistakable aroma reminiscent of a locker room after a sweaty game? I know that feeling all too well. One day, I tossed in a load, expecting the usual fresh scent, only to be hit with a pungent odor that made me question if I had forgotten to shower. Turns out, my front-load washer had become a bacterial breeding ground, turning my pristine laundry into a stinky mess.
Why Does My Front-Load Washer Smell So Bad?
This problem isn’t just frustrating—it’s surprisingly common. The culprit is often the buildup of detergent residue, mold, and mildew lurking in the hidden corners of the drum, gasket, and drain system. Over time, these moisture-loving microbes thrive in the damp, dark environment of your washer, releasing that foul locker-room scent that no amount of Febreze can mask.
Interestingly, a study published by the Environmental Protection Agency highlights that washing machines are among the top household appliances contaminated with bacteria if not maintained properly. Small mistakes, like leaving the door closed between washes or using too much detergent, can exacerbate the problem.
Early in my repair journey, I made the mistake of simply running more cycles without addressing the root cause. That only masked the smell temporarily. I wish I had started with proper cleaning routines from the get-go. Today, I’m here to share exactly how you can banish that locker-room odor for good and keep your washer smelling fresh and clean.
Have You Faced This Odor Problem Too?
Don’t worry—you’re not alone, and there’s a straightforward way to fix it. In the next sections, we’ll walk through proven methods to eliminate that stubborn smell and prevent it from coming back. If you’re tired of masking odors and ready for a lasting solution, keep reading. For more tips on maintaining your appliances and maximizing your warranty, visit this guide.
Start With a Deep Clean Cycle
First, run an empty hot water cycle with a cup of white vinegar. This flushes out microbial buildup in the drum and hoses. I did this on a Saturday morning; the initial vinegar smell was strong, but after the cycle, it helped significantly reduce body odor-causing microbes. Remember, vinegar is your friend in fighting bacteria and mildew.
Clean the Gasket and Door Seal Thoroughly
Next, focus on the rubber gasket around the door. Wipe it down with a cloth soaked in a mixture of equal parts water and white vinegar. Use a toothbrush to scrub stubborn mold spots. During my first attempt, I missed this step, and the smell persisted. Now, I always include this as part of my weekly maintenance routine.
Address Residue and Mold in Hard-to-Reach Areas
For the folds and crevices of the gasket, spray a disinfectant or a diluted bleach solution. Let it sit for 10 minutes, then scrub gently. I recommend wearing gloves to protect your skin. After cleaning, dry the area thoroughly to prevent future mold growth. This step is crucial because moisture trapped in these areas perpetuates bacteria.
Run a Maintenance Cycle with Baking Soda
After the vinegar cycle, run another hot cycle with half a cup of baking soda directly in the drum. Baking soda neutralizes odor particles. Once I did this, I noticed a marked improvement. Baking soda also helps absorb moisture, making the environment less hospitable to microbes.
Leave the Door Open to Dry
Finally, always leave the washer door slightly ajar after each cycle. This allows air circulation, preventing dampness. I made the mistake of closing the door completely after washing, which led to a lingering smell. Making a habit of propping it open has prevented reek in my laundry room.
Maintain Regular Cleaning Routine
Set a monthly reminder to repeat these steps. Regular cleaning prevents buildup before it becomes a problem. Consider using commercial washer cleaner tablets every few months for an extra freshening boost. Experienced technicians like those from this trusted resource recommend consistent maintenance to keep your appliance smelling fresh and working efficiently.
When it comes to appliance installation and repair, many homeowners focus on the basics—plugging in devices, running tests, or scheduling a service. However, there are subtle nuances that even seasoned DIYers often miss, leading to subpar performance or costly warranty issues. Let’s dig deeper into these often-overlooked details and discover how to truly get it right.
Are You Falling for These Common Myths About Appliance Maintenance?
One of the most persistent misconceptions is that any technician can perform proper installation or repairs. While general familiarity might suffice for simple tasks, specialized knowledge significantly affects long-term reliability. For instance, improper leveling of a washing machine can cause excessive vibration, damaging internal components and voiding warranty coverage. A study by the National Appliance Repair Association indicates that 60% of appliance failures stem from incorrect installation or maintenance errors, underscoring the importance of expertise.
Another myth is that warranties cover all repair costs if an appliance malfunctions. Reality often differs—most warranties exclude installation errors or neglect. Inadequate installation can also invalidate warranty claims later, making it crucial to verify that technicians follow manufacturer guidelines. For example, improper venting setup for dryers may cause overheating or fire hazards, which aren’t covered by standard warranties. To avoid falling into this trap, always ensure your service provider adheres to recommended installation practices.
Beware the Perils of DIY Repairs Without Proper Knowledge
While DIY fixes can seem tempting, they carry the risk of creating more problems than they solve. Basic troubleshooting is fine, but advanced repair tasks—like replacing capacitors or handling refrigerants—require specialized tools and training. Incorrect handling can lead to appliance damage or personal injury. A common mistake is attempting to reseal microwave door switches without proper calibration, resulting in safety hazards or device failure. Designers and technicians invest years honing these skills because precision matters. When in doubt, consult a professional or review reputable guides, like those found on [expert appliance repair sites](https://discountappliancehub.com/expert-guide-to-appliance-repair-and-installation-today).
How to Maximize Your Warranty During Emergency Repairs
Experts recommend documenting all repair and maintenance activities meticulously. This includes keeping records of receipts, service reports, and photos of installation before and after. Such documentation not only supports warranty claims but also helps diagnose recurring issues. Importantly, selecting authorized service providers ensures that repairs meet manufacturer standards, preserving warranty coverage. Remember, warranties often have clauses that exclude damages caused by unauthorized service or improper installation. To streamline your warranty process, explore resources like [maximizing warranty benefits during emergency repairs](https://discountappliancehub.com/maximize-your-appliance-warranty-during-emergency-repairs).
Warning: The Dedication to Routine Maintenance Saves Money
Neglecting routine inspections and preventive maintenance may seem harmless initially but can lead to unexpected breakdowns and expensive replacements. For instance, ignoring the subtle signs of coil leaks or clogged filters not only shortens appliance lifespan but can also void warranty eligibility. Regular checkups, aligned with manufacturer recommendations, greatly extend appliance life and provide peace of mind. As an example, scheduling periodic professional inspections through reliable services, like [affordable same-day appliance fixes with warranty benefits](https://discountappliancehub.com/affordable-same-day-appliance-fixes-with-warranty-benefits), ensures your appliances operate at peak efficiency. Make sure to revisit installation procedures periodically, especially after moves or renovations, since shifts in location can introduce new risks. Are you aware of the *hidden risks* lurking in your appliance setup? If not, it’s time to get a professional assessment. Have you ever fallen into this trap? Let me know in the comments.
Invest in Precise Diagnostic Tools
One of my go-to tools is a digital multimeter, which I use daily to check voltage, resistance, and continuity in appliance circuits. Unlike basic testers, a quality multimeter allows me to pinpoint electrical issues rapidly, saving time and preventing unnecessary parts replacement. For example, when diagnosing a malfunctioning dishwasher door latch, I measure the switch’s voltage flow with my multimeter to confirm whether it’s faulty or just miswired.
In addition, I rely on infrared thermometers to monitor appliance temperatures, especially in refrigeration units and ovens. Spotting uneven cooling or overheating early can prevent costly repairs and extend appliance lifespan. I prefer models that give quick readings from a safe distance, making diagnoses safer and more efficient.
Use Software for Maintenance Tracking
Staying on top of appliance maintenance requires organization. I highly recommend software like MaintenanceCare or appliance-specific apps that help me log cleaning schedules, part replacements, and repairs. These tools send timely reminders for tasks like replacing water filters or scheduling professional inspections, which are crucial for long-term performance.
Having detailed records also strengthens warranty claims if issues arise unexpectedly. For instance, I document every repair with photos and notes, making it easier to provide evidence if the manufacturer questions a claim. Regularly updating this log ensures you don’t miss critical maintenance points that could void your warranty or lead to breakdowns.
Master the Art of Proper Calibration
Calibration tools are my secret weapon for optimal appliance operation. For example, I use oven temperature calibration kits to verify and adjust accurate temps, ensuring perfect cooking results. Similarly, in refrigeration, monitoring thermostat calibration maintains efficiency, reducing energy bills and preventing premature component failure.
Proper calibration not only improves appliance performance but also preserves warranty coverage by adhering to manufacturer guidelines. These adjustments often require specific tools or digital sensors, so investing in quality calibration kits pays off in the long run. As the trend shifts towards smart appliances, calibration tools are evolving, allowing remote and more precise adjustments—something I predict will become standard in the next few years.
How do I keep my appliance maintenance effective over time?
Consistency is key. I establish routine inspection schedules for cleaning filters, checking seals, and testing safety features. Using professional-grade cleaning products, like vortex brushes for condenser coils, ensures thorough cleaning without damaging delicate components. Moreover, enrolling in warranty-backed services for scheduled checkups guarantees that professionals catch issues early, often preventing costly downtime. Manufacturers recommend annual inspections, but I’ve found bi-annual assessments more effective, especially for appliances with high usage. Integrating these practices into your maintenance routine ensures your appliances continue to serve efficiently for years to come.
If you’re interested in streamlining repairs, don’t forget to explore options like same-day service providers that offer warranty-backed solutions. Taking advantage of advanced tools and disciplined maintenance routines can dramatically cut down repair costs and extend your appliance lifespan. Ready to try a pro tip? Start by investing in a digital multimeter—it’s a small tool with a big impact on diagnosing issues accurately and quickly.
Lessons from the Front Lines of Appliance Care
- My biggest breakthrough was realizing that not all technicians follow the manufacturer’s installation guidelines—trusting the right professionals makes a difference in warranty longevity and appliance performance.
- Overconfidence in DIY repairs often leads to masking problems rather than solving them. I learned that knowing my limits and consulting experts saves time and money in the long run.
- Maintaining detailed records of service and repairs isn’t just paperwork—it’s my safety net during warranty claims and a way to track recurring issues I might overlook.
- Understanding that proper calibration and regular routine checks can actually extend the lifespan of my appliances surprised me, turning maintenance from a chore into a strategic investment.
- Choosing quality tools, like a digital multimeter, empowered me to accurately diagnose issues and avoid unnecessary replacements, keeping my appliances running smoothly.
Tools That Became My Game Changers
My top gear includes a reliable digital multimeter because it helps me identify electrical problems precisely, avoiding costly guesses. I also rely on appliance-specific apps to schedule maintenance, which keeps my routines consistent and efficient. For cleaning, vortex brushes have transformed my approach to condenser coil upkeep, preventing overheating and breakdowns. Lastly, investing in calibration kits for my oven and refrigerator ensures they perform at their best, saving energy and delivering perfect results every time. These tools, combined with trusted resources like the expert guide to appliance repair and installation, have redefined how I care for my appliances—making upkeep easier, more effective, and less stressful.
Embrace Your Power to Prevent and Fix
Now, it’s your turn to take charge of your appliance maintenance journey. Armed with insider knowledge and the right tools, you can catch issues early, extend your appliances’ lifespan, and enjoy peace of mind knowing you’ve done everything possible to keep your home running smoothly. Remember, a little proactive effort now can save you significant headaches—and dollars—in the future. Start today, and turn appliance upkeep from a chore into a mastery you can be proud of.
What’s the one maintenance step you’re going to prioritize this week to improve your appliance care? Share your plan in the comments below—I’d love to hear your story!
**