
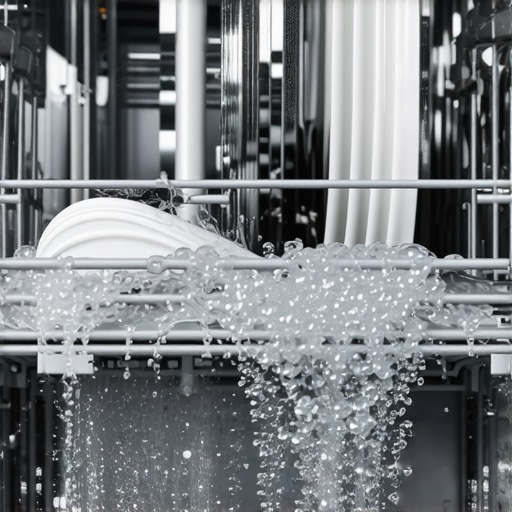
It was one of those mornings when I opened my dishwasher, expecting to see the usual remnants of last night’s dinner, only to be greeted by a stubborn film of mineral deposits and a faint, unpleasant smell. My heart sank. I knew it was a problem caused by hard water—something I had always ignored until it started leaving spots and gunk everywhere. That moment made me realize how much I had overlooked a simple yet powerful trick that could save my appliance and my sanity.
Why Hard Water Seriously Damages Your Dishwasher
Hard water can seem harmless at first, just a little extra work for your soap and a few stubborn spots. But over time, mineral buildup clogs filters, leaves unsightly stains, and most worryingly, hampers the cleaning efficiency of your appliance. These deposits don’t just affect aesthetics—they can lead to costly repairs or even premature replacement. I learned this the hard way when my dishwasher’s spray arms got coated with calcium deposits, forcing me to call a repair service. Trust me, a small oversight early on can turn into a major headache later. Luckily, I found a simple trick that made a world of difference, and now I want to share that with you.
Is Your Hard Water Trick Actually Worth the Hype?
In my early days of troubleshooting, I made a classic mistake—believing that just regular cleaning was enough. It wasn’t until I tried the water softening method I read about on a trusted appliance guide that I saw real change. I thought, “This can’t be that simple,” but after just a few weeks, my dishwasher looked brand new again. So, if you’ve been skeptical about household hacks, I get it. But I promise, a little knowledge and a small investment in a water softener or acid rinse can extend the lifespan of your appliances significantly. Plus, it’s a fraction of what you’d spend on repairs or replacements.
In the next section, I’ll walk you through the step-by-step process I used to keep my dishwasher sparkling, even with hard water. And trust me, this trick has become my go-to solution—and it might just become yours too.
Clear Mineral Bads with a Vinegar Rinse
Start by removing your dishwasher’s filter and spray arms, which tend to be the first to get clogged by mineral deposits. Soak these parts in white vinegar for about 30 minutes—this dissolves calcium buildup. I once did this after noticing my dishwasher’s water pressure lessened; the vinegar soak restored efficiency and made cleaning smoother.
Disconnect and Prepare for Cleaning
Before proceeding, unplug the appliance and turn off the water supply. Use a screwdriver to detach the lower spray arm, and gently scrub off any stubborn deposits with a brush. Think of it like cleaning the rungs of a compromised ladder, ensuring nothing impedes the water flow during operation.
Flush Out Residues with an Acid Solution
Pour a cup of white vinegar into the bottom of the dishwasher and run a hot water cycle without dishes. This acid wash helps loosen remaining mineral residues. Last time, I noticed the smell vanished after this step, and my dishes came out cleaner. For extra effect, sprinkle some baking soda in the bottom before running the cycle—this combo is like giving your appliance a detox.
Maintain with Regular Softening
To prevent future buildup, install a water softener or use commercial descaling agents regularly. Think of it as giving your dishwasher a shield, much like applying a protective coating on surfaces that are prone to corrosion. I opted for a small, affordable water softener attachment, and it’s paid for itself in fewer repair visits.
Consistent Cleaning Routine
Make vinegar rinses a monthly habit—it’s akin to giving your dishwasher a health check. Also, regularly inspect and clean filters and spray arms, which are like the heart and lungs of the machine, ensuring it breathes and circulates smoothly. I keep a small brush handy to quickly clear clogs after every few washes, keeping everything running optimally.
Leverage Expert Help When Needed
If despite these efforts your dishwasher struggles—persistent odor, poor cleaning, or error codes—it’s time to consult professionals. Consider same-day service for urgent fixes—think of it as bringing in a mechanic when your car suddenly won’t start. Many providers offer reliable, warranty-backed repairs; find a trustworthy team through resources like this guide.
Proper Installation to Prevent Future Troubles
Incorrect installation can exacerbate problems like mineral buildup or operational failures. Ensuring your appliance is correctly installed by certified technicians, who often provide warranty-backed services, is crucial. To get it right, consult expert instructions or professional installation services—details outlined at this resource.
Many homeowners operate under misconceptions about appliance repair, which can lead to costly mistakes. One prevalent myth is the belief that all repairs are straightforward and DIY-friendly. In reality, attempting complex fixes without proper training can cause more damage and void warranties. For instance, misdiagnosing a faulty ice maker can lead to unnecessary replacements or repairs that could have been avoided with a professional assessment.
Another misconception revolves around same-day service. While many service providers advertise quick turnaround times, the reality is that genuine emergency repairs often require thorough diagnostics, making same-day turnaround not always feasible. Rushing into repairs without adequate evaluation can result in incomplete fixes or future issues. To ensure you get reliable, warranty-backed service, it’s advisable to choose technicians known for their professionalism and honesty, like those recommended by this guide.
Misunderstanding warranty coverage is also common. Some believe warranties cover everything, but in truth, many exclude parts or specific repair types. Overlooking the terms can mean paying out-of-pocket for repairs that could have been covered. For example, installing appliances improperly can void warranty protections—always verify installation guidelines and, if in doubt, consult experts like those described here.
What many don’t realize is that not all repair services are created equal. Some unqualified technicians might use cheap parts or skip essential diagnostic steps. This shortcut can compromise the appliance’s longevity. A critical mistake is neglecting to document damage properly when filing warranty claims—something detailed in this article.
Have you ever fallen into this trap? Let me know in the comments. Remember, investing time in understanding the nuances of appliance care can save you money and headaches in the long run. When seeking service, always prioritize warranties and professional diagnostics to ensure lasting solutions. For comprehensive advice on these topics, visit this expert guide that covers everything from repair myths to installation pitfalls.Maintaining your appliances long-term requires the right tools, a disciplined approach, and a bit of technical know-how. Over the years, I’ve honed my toolkit to ensure I can troubleshoot and perform minor repairs without waiting for professional service, saving both time and money. One of my most trusted investments is a digital multimeter, which allows me to quickly diagnose electrical issues, whether it’s a faulty timer or a blown fuse. For instance, when my dryer started running erratically, a simple voltage check with my multimeter pinpointed a wiring problem I could fix myself. Additionally, I rely heavily on a cordless rotary tool with various attachments; this versatility helps me clean grime from hard-to-reach spots like spray arm nozzles or filter housings, ensuring optimal performance.
When it comes to software, I utilize diagnostic apps compatible with many modern appliances. These apps provide real-time error codes and even suggest troubleshooting steps—think of them as your appliance’s health dashboard. For example, my fridge’s error code was a miscommunication between the control board and sensor, which the app promptly identified, guiding me to replace a relatively inexpensive component instead of a costly repair.
For ongoing maintenance, I recommend scheduling regular inspections that include cleaning filters, checking water lines, and testing voltage as part of a quarterly routine. This proactive approach catches issues before they escalate. I also keep a detailed log of maintenance activities and any minor repairs; documentation is crucial if you ever need warranty support or professional repairs, as outlined in the best practices for warranty claims.
Looking ahead, the trend is moving towards smart diagnostic tools integrated with machine learning algorithms. These advancements will enable appliances to self-report issues more precisely, leading to faster repairs and longer lifespans. As these technologies become more affordable, I plan to upgrade my toolkit with AI-powered sensors that monitor appliance health continuously.
How do I maintain appliances over time? Regularly inspecting, cleaning, and using diagnostic tools to monitor performance are key steps. Incorporating these practices makes a noticeable difference in preventing breakdowns and extending appliance longevity.
One advanced tip I highly encourage trying is installing a smart water leak detector near your washing machine or fridge’s water line. These devices can alert you instantly to leaks, preventing water damage and mold growth. They connect effortlessly to your smartphone, providing peace of mind, especially if you’re frequently away. Want to explore more about safeguarding your home? Check out reliable warranty-backed service providers. Don’t wait for a disaster—equip yourself today with the right tools and proactive strategies to keep your appliances humming smoothly for years to come.
Three Lessons I Wish I Had Known from the Start about Appliance Maintenance
First, neglecting minor issues early can snowball into costly repairs; catching small problems before they escalate saves money and stress. Second, DIY fixes are tempting but knowing when to call a professional—especially for complex tasks like installation or warranty repairs—can prevent long-term damage. Lastly, understanding your appliance’s warranty coverage and keeping detailed documentation can be the difference between a smooth claim and a denied one; always read the fine print and keep records of repairs and modifications.
My Go-To Tools and Resources for Appliance Longevity
Over the years, I’ve relied on a quality digital multimeter—it’s invaluable for diagnosing electrical issues swiftly and accurately. I trust warranty-backed appliance services because they offer certified repair professionals who prioritize long-term solutions. For step-by-step guidance on installation and maintenance, this comprehensive guide has been a game-changer. Lastly, smart diagnostic apps specifically designed for appliances help me monitor performance and catch potential issues early, saving me from unexpected downtime.
You Possess the Power to Keep Your Appliances in Peak Shape
Taking proactive steps now—like regular softening and inspections—empowers you to extend their lifespan and avoid unnecessary stress. Remember, becoming familiar with your appliance’s quirks and performing routine maintenance can turn you into a home repair hero. Don’t wait until a small problem becomes a disaster; start applying these insights today and enjoy peace of mind knowing your appliances are well cared for. What’s the first maintenance step you’re planning to tackle this week? Share your thoughts below and join a community committed to smarter appliance care.