
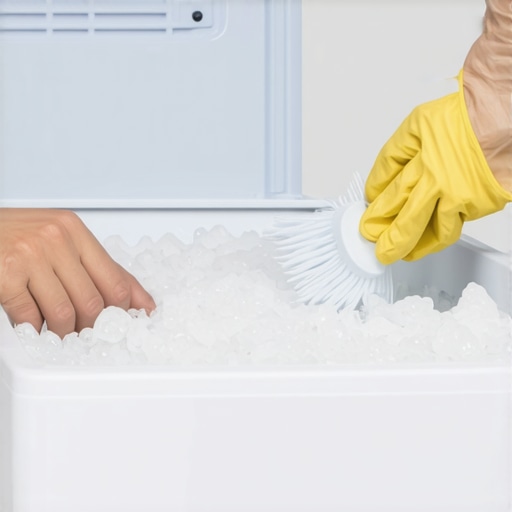
Ever opened your freezer only to find your ice cubes oddly tiny, thin, or in worse cases, completely absent? I had a real lightbulb moment when my ice maker started producing less and less ice, despite seemingly normal operation. That sinking feeling when you realize something’s off and you’re not quite sure what to do next. Turns out, the culprit was hidden debris clogging up the system, and I was about to learn the hard way that not all buildup is easy to spot.
Why a Dirty Ice Maker Can Ruin Your Summer Refreshments
Keeping your ice maker clean isn’t just about aesthetics or maintenance—it’s about ensuring your drinks stay cold and your appliance runs efficiently. Over time, mineral deposits, food particles, and other mysterious debris can accumulate inside the ice system, blocking flow and causing malfunction. A sneaky problem like this can lead to big headaches during the peak ice season. I found that neglecting this aspect of appliance care can turn a simple freezer task into a costly repair. Today, I promise to guide you through the essential steps to identify and clean those hidden deposits, so your ice maker works flawlessly again.
Is It Really Necessary to Dive Into That Frozen Niche?
I get it—who wants to get down on their hands and knees, inspecting every nook and cranny of a frosty machine? Early on, I thought just wiping the obvious parts would do the trick. That mistake cost me time and extra repairs. Relying solely on superficial cleaning won’t address the real issue. Clearing out those sneaky obstructions requires a proper approach. If you’ve ever wondered whether cleaning your ice maker is worth the effort, know this: a clean system improves ice quality, extends the lifespan of your appliance, and saves you money in the long run. For expert tips on maintaining your appliances, consider checking out [this comprehensive guide on appliance repair today](https://discountappliancehub.com/expert-guide-to-appliance-repair-and-installation-today). Today, we’ll tackle the DIY steps to get rid of stubborn debris and prevent future blockages.
Have you faced persistent ice production issues that cleaning hasn’t fixed? You’re not alone, and there’s a good reason to believe that regular maintenance can prevent these frustrations from ever happening again. So, let’s roll up our sleeves and get that ice maker working like new. The following sections will walk you through the practical, proven methods for deep cleaning your ice system without turning it into a full-blown repair project.
Unplug Your Appliance for Safety
Before diving into the cleaning process, always disconnect your ice maker from the power source. I remember accidentally powering up mine while cleaning, causing a small shock that could have been avoided. Unplugging ensures safety and prevents electrical mishaps during maintenance.
Remove and Disassemble Parts Carefully
Next, carefully remove the ice bin and any accessible components. Think of it like unclipping the inner lining of a jacket to access hidden pockets—gentle handling prevents damage. For my unit, I used a basic screwdriver to detach screws and gently lifted parts. Keep track of all pieces to reassemble smoothly.
Note on Familiarization: Consult Your Manual
If you’re unsure about disassembly, refer to your appliance manual or manufacturer website. I once cracked a plastic clip because I tried to force a part without guidance. Checking instructions avoids unnecessary breakage and clarifies which components are removable.
Prepare Cleaning Solutions
Mix a solution of warm water with mild dish soap or vinegar—both effective for breaking down mineral deposits and debris. For my unit, I used equal parts water and vinegar for a natural approach that left my ice maker squeaky clean without harsh chemicals. Never use abrasive cleaners that might scratch or damage components.
Scrub Internal Surfaces Methodically
Using a soft-bristled brush or cloth, scrub all accessible internal surfaces, especially focusing on corners where buildup collects. Remember, this process is similar to cleaning a coffee brewer’s internal parts—thoroughness prevents clogs. I used an old toothbrush to reach tight spots, which proved highly effective.
Pay Attention to Small Crevices
Minerals and debris often hide in tiny crevices or around sensors. Use a cloth or brush to dislodge anything stuck there. I once overlooked a tiny sensor soiled with mineral buildup; cleaning it restored proper function.
Clear and Flush the Water System
Pour the cleaning solution into the water reservoir or supply line. Run a few cycles (if your model allows) to flush out loosened debris. Think of it like rinsing soap from dishes; thorough rinsing ensures no residue remains. I ran two cycles, which resulted in clearer, crisper ice.
Check and Clean the Water Filter
Many ice makers have a water filter that traps impurities. Remove the filter and inspect it—replace if necessary. In my experience, a clogged filter reduces ice production; replacing it improved flow instantly. Consult your manual or visit this guide for filter replacement tips.
Reassemble Components and Test
Once cleaned, reassemble the parts carefully, ensuring all connections are secure. Plug your appliance back in, turn it on, and monitor ice production over the next few hours. I once left my ice maker for 24 hours after cleaning, and it produced perfect-sized ice cubes—no more tiny or sparse ice!
Prevent Future Buildup with Regular Maintenance
Set a schedule to clean your ice maker every 3–6 months. Regular maintenance prevents severe blockages, saving you time and money. If you encounter persistent issues despite cleaning, it might be time to consult experts from professional repair services, who can offer same-day solutions with warranty benefits.
Many homeowners assume that appliance installation, same-day repairs, warranties, and service are straightforward processes, but there’s more beneath the surface. Contrary to popular belief, the nuances and myths surrounding these topics can lead to costly mistakes if not understood properly. For example, many think that all repair services are equal, but in reality, unlicensed or hurried repairs often void warranties or result in subpar workmanship. Did you know that a quick fix might seem tempting, yet it could complicate warranty claims later?
Are There Hidden Conditions That Void Your Warranty?
In fact, most warranties come with fine print that many overlook, such as requirements for professional installation or specific maintenance routines. According to industry expert feedback, failure to follow proper procedures can invalidate your warranty, leaving you unprotected in emergencies. Therefore, understanding the intricacies can save you money and frustration down the line.
Another common misconception is that same-day service always guarantees quality. While rapid response is a benefit, it sometimes comes with compromises, like insufficient diagnostics or rushed repairs, which may lead to recurring problems. To avoid falling into this trap, check reviews and ensure the service provider follows a comprehensive troubleshooting protocol. Additionally, don’t be lured into the false sense of security that an affordable repair guarantees durability; sometimes, lower-cost options cut corners, risking further damage.
Advanced homeowners should also consider how installation errors affect appliance performance. Improper leveling, incorrect electrical connections, or neglecting manufacturer’s guidelines can cause inefficiencies or damage over time. Knowing these nuances encourages proactive questions during installation, like verifying proper power supply and ventilation to prevent future issues. For detailed tips, explore this expert guide on reliable appliance installation.
Furthermore, many believe that warranties are automatically activated when they buy an appliance. However, registration processes and documentation are often overlooked, which can invalidate a warranty claim. Keep track of purchase receipts, serial numbers, and registration confirmation to prevent hassles later. When facing a breakdown, consulting this resource on maximizing warranty benefits during repairs can provide clarity.
Let’s not forget the cultural myth that repairs are always DIY-friendly. While some minor issues can be tackled by skilled homeowners, complex repairs demand professional intervention to avoid risks like electrical hazards or voided warranties. It’s wise to verify if your repair service is licensed and experienced; otherwise, you might inadvertently do more harm than good. For a full explanation of what to look for, review this article on reputable repair services.
In conclusion, peeling back the layers reveals that understanding the nuanced details of installation, repair, and warranties empowers you to make informed decisions, avoiding expensive mistakes. Are you aware of the fine print that might affect your coverage? Have you ever fallen into this trap? Let me know in the comments.
Invest in Reliable Diagnostic Tools
One of my top recommendations for maintaining appliance longevity is using a digital multimeter with auto-ranging capabilities. Personally, I rely on the Fluke 115 True RMS multimeter because it provides precise voltage and continuity readings, which are essential when troubleshooting electrical issues. Additionally, a high-quality infrared thermometer helps me quickly spot hotspots or uneven cooling in refrigeration units, preventing potential failures. Regularly using these tools allows me to catch problems early before they escalate into costly repairs.
Leverage Smart Monitoring Applications
In recent years, I’ve integrated smart diagnostics apps connected to my appliances through manufacturer-specific platforms. These apps offer real-time data on usage patterns, error codes, and maintenance alerts, greatly reducing downtime. For instance, my refrigerator’s app notified me of a clogged defrost drain before it caused water leakage, enabling proactive cleaning. As the trend toward smart home integration accelerates, harnessing these tools will become standard practice for long-term appliance care.
Establish Routine Maintenance Protocols
Consistent upkeep is key to sustained appliance performance. I schedule bi-annual deep cleans for filters, condensers, and water lines, following manufacturer guidelines available on trusted sites like this comprehensive repair guide. Keeping spare parts, such as replacement filters and belts, on hand ensures quick replacements without delay. Implementing checklists and calendar reminders helps me stay disciplined, preventing issues from developing unnoticed.
Understand When to Call Professionals
While DIY maintenance can save money, knowing your limits is critical. For complex problems like compressor failures or gas leaks, I rely on certified technicians with specialized equipment. A good example is referencing this expert advice on selecting reputable repair services. They have the training and tools to accurately diagnose issues, often with same-day service, ensuring your appliance’s warranty remains valid and your system gets the proper care.
Future Directions in Maintenance Technology
As technology evolves, predictive analytics powered by machine learning is poised to revolutionize appliance care. Imagine devices that monitor their own health and alert you of impending failures weeks in advance—saving time and money. Staying updated with emerging tools and techniques, such as IoT integrated sensors and cloud-based diagnostic platforms, will be crucial for proactive maintenance in the future.
How do I keep my appliances performing over time?
Implementing a routine that combines reliable diagnostic tools, smart monitoring, scheduled maintenance, and professional check-ups is the best way to ensure longevity. I recommend trying out a digital multimeter and syncing your devices with manufacturer apps to get firsthand experience with proactive troubleshooting. With dedication and the right tools, you can avoid many common failures and keep your systems running smoothly for years. For more insights on reliable service options, visit this detailed article.

What I Wish I Knew Before Diving Headfirst into Repairs
- Always read the manual thoroughly—I once forced apart a component without guidance and ended up cracking it. Knowing the correct disassembly order saves money and frustration.
- Never underestimate the power of routine maintenance; small, regular checks prevent big headaches later, especially with things like water filters or condenser coils.
- Investing in the right diagnostic tools, like a digital multimeter, transformed the way I identify issues early, saving me time and expensive repairs.
- Understanding warranty fine print is crucial—many rely on repair services without checking if their coverage is valid, risking costly out-of-pocket expenses.
- Professional installation isn’t just a formality; it can prevent long-term damage caused by improper leveling or electrical connections, which often lead to avoidable repairs.
Tools and Resources That Keep Me Ahead
- Fluke 115 True RMS Multimeter: Trusted for its accuracy in troubleshooting electrical issues, it’s been a game-changer in diagnosing appliance faults myself.
- Smart Monitoring Apps: Apps linked to my appliances provide real-time alerts for potential problems, turning reactive repairs into proactive maintenance.
- Expert Guide to Appliance Repair and Installation: This comprehensive resource I found on [this page](https://discountappliancehub.com/expert-guide-to-appliance-repair-and-installation-today) offers step-by-step advice that complements my DIY efforts without risking warranties.
- Service Review Sites: They help me select reputable technicians for complex repairs, ensuring my warranties stay intact and repairs are guaranteed.
Keep Your Appliance Journey Exciting and Empowering
I’m passionate about sharing these insights because a little knowledge and the right tools can turn appliance maintenance from a daunting chore into an empowering endeavor. Don’t hesitate to take proactive steps—equip yourself with the right information, and you might just extend the life of your appliances far beyond expectations. What’s your biggest lesson learned from maintaining your appliances? Share below and inspire others to become more confident in their repair skills.