
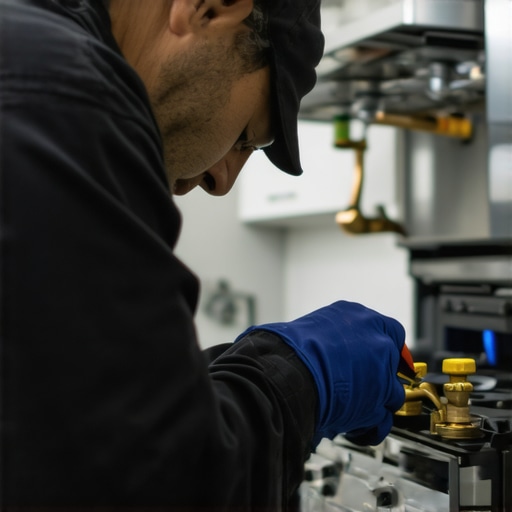
I remember the first time I installed a gas range in my kitchen. I was proud of my DIY spirit but quickly realized I overlooked a crucial detail: securing the gas connection properly. The moment I turned on the stove and caught a faint gas smell, my stomach sank. That lightbulb moment made me realize how vital a secure, leak-free connection is—not just for peace of mind but for safety and efficiency. If you’ve ever experienced a gas smell during or after installation, you know how nerve-wracking that can be. Today, I’m going to share everything I’ve learned about connecting a gas range the right way, so you don’t have to repeat my early mistake.
Why Proper Gas Range Connections Matter More Than You Think
Ensuring your gas range is connected without leaks isn’t just about avoiding unpleasant smells; it’s a critical safety step. Gas leaks can lead to dangerous situations, including fires and even explosions. According to the Consumer Product Safety Commission, gas leaks are responsible for thousands of incidents annually, many of which could be prevented with proper installation techniques. Moreover, leaks can cause your appliance to operate inefficiently, increasing energy bills and reducing lifespan. So, why do so many people struggle with correct connections? Often, it’s because they overlook key details during installation, assuming that tightening a few fittings will do the trick. That’s a costly mistake.
Common Mistakes That Could Leak Gas (And How to Avoid Them)
Early in my DIY journey, I made a simple yet common mistake: I didn’t apply thread sealant or Teflon tape correctly. That tiny oversight almost turned into a disaster. Proper sealing is essential; it prevents gas from escaping at the fittings. Another mistake is over-tightening, which can damage fittings and cause leaks. Conversely, under-tightening leaves gaps—another recipe for disaster. Using the right tools and understanding the connection process is key. If you’re unsure about how to connect your gas range properly, consider consulting a professional or thoroughly reviewing manufacturer instructions. Sometimes, a quick online tutorial from trusted sources can make all the difference.
Are you facing this issue now or planning a new installation? Before you fire up your range and risk a leak, let’s go through the precise steps to connect your gas line securely. Trust me, following a proven method is worth every minute, especially when safety is involved. Ready to ensure your kitchen is both safe and efficient? Let’s dive into the step-by-step process that will give you peace of mind. For more comprehensive solutions and expert tips, check out [this guide on appliance installation safety](https://discountappliancehub.com/how-to-ensure-reliable-appliance-installation-in-2025). Now, onto ensuring your gas connection stands the test of time.
Start by Turning Off the Gas Supply
Before you begin any installation, locate your home’s main gas shut-off valve and turn it off completely. This step is crucial to prevent gas leaks during the setup. When I installed my range, I made sure to double-check this valve was fully closed to avoid a sudden leak. Performing a quick inspection assures safety before proceeding.
Prepare the Gas Line and Fittings
Remove the old fittings if replacing an existing connection. Use thread sealant or Teflon tape on the male threads of the adapter. Think of sealant as the gasket that keeps water from leaking through a garden hose—it creates a barrier that prevents gas from escaping. I always wrap my tape clockwise—so it doesn’t unravel when tightening fittings—ensuring a tight, leak-proof seal.
Apply Proper Sealant Technique
Wrap the Teflon tape around the threads two to three times, ensuring it lies flat without overlaps. Avoid overdoing it, as excessive tape can prevent a proper seal. When I first did this, I learned that too much tape created gaps, leading to leaks. Practice this step carefully; it’s the basis for a secure connection.
Connect the Hose to the Gas Range
Attach the flexible gas hose to the range inlet. Use a wrench to tighten the connection snugly—think of it like tightening a bicycle’s bolt: firm but not over-tightened. Too tight can damage fittings; too loose risks leaks. During my first installation, I over-tightened and cracked the fitting, which led to a minor leak that needed professional repair.
Inspect for Leaks Using a Soap Solution
Mix a small amount of dish soap with water and apply it to the joints with a sponge or spray. Turn on the gas supply without igniting the range. Look for bubbles forming at the connections—those indicate leaks. I tested my connection this way, and a few bubbles appeared at a loose fitting, prompting me to tighten it further. If bubbles persist, immediately turn off the gas and re-tighten or replace fittings. This process is quick but vital for safety.
Perform a Final Safety Check Before Ignition
Once no leaks are detected, turn on the gas supply fully. Wait a few minutes and smell for gas. If there’s any scent, turn off the supply and recheck connections. If in doubt, contact a professional for inspection—don’t risk igniting a suspected leak. Remember, a small leak left unchecked can be dangerous.
If you’ve followed these steps meticulously, your gas range should be connected securely and safely. For detailed professional assistance or to schedule same-day service, visit this resource. Ensuring compliance with local codes and manufacturer instructions reduces risks and prolongs your appliance’s lifespan.
While many believe that following basic instructions ensures successful appliance installation or repair, the real nuances often lie beneath the surface. A common myth is that a tight connection guarantees no leaks or issues—that’s only part of the story. In my experience, overlooking subtle details like proper threading, sealant quality, or even environmental factors like ambient temperature can cause problems down the line. For instance, using inferior Teflon tape or applying it incorrectly may lead to gas leaks, despite seemingly secure fittings. Moreover, many assume that warranty coverage automatically applies post-repair; however, improper installation or neglecting regular maintenance can void warranties, making costly repairs inevitable. An advanced mistake professionals warn against is neglecting to perform pressure testing after installation—this step detects hidden leaks before they become hazards. According to the Appliance Repair Foundation, many emergency calls result from overlooked small leaks that escalate into major safety issues. Additionally, many underestimate the importance of choosing local, reputable technicians for same-day service—poorly trained or unscrupulous repairmen may skip crucial verification steps, risking safety and appliance longevity. Do you know the difference between genuine warranty-backed service and those offering only quick fixes? Visiting this link reveals how verifying the technician’s credentials can save you headaches later. Keep in mind, a proper installation or repair isn’t solely about making the appliance work now; it’s about ensuring it functions safely and efficiently over time. Have you ever fallen into this trap? Let me know in the comments.
Investing in the Right Tools for Reliable Appliance Maintenance
Keeping your appliances running smoothly over the years hinges on having the right equipment and understanding how to use it effectively. My personal toolkit includes a high-quality digital multimeter, which I use not just for troubleshooting electrical issues but also to verify the integrity of wiring connections during repairs. A digital multimeter offers quick readings and precise measurements, helping me identify voltage irregularities that could cause short-term glitches or long-term damage. Additionally, I rely on a dedicated ultrasonic leak detector when working with gas appliances. This device detects minuscule gas leaks that are otherwise invisible to the naked eye—critical for safety during installations and repairs (source). Using professional-grade tools minimizes mistakes, saves time, and enhances the longevity of your appliances.
Furthermore, I recommend investing in a set of precision screwdrivers and specialty wrenches designed for appliance fittings. These tools help avoid stripping screws or damaging delicate components, especially when working in tight spaces. For maintenance schedules, I document each service and repair with smart software, such as maintenance logs on my tablet. This record-keeping not only tracks when next service is due but also helps identify recurring issues, leading to more strategic preventative maintenance—saving money and preventing breakdowns before they happen.
Building a Routine to Maintain Performance and Safety
Consistent inspections and cleaning are vital. For example, regularly inspecting dishwasher spray arms, microwave filters, and refrigerator door seals prevents minor issues from escalating. I set monthly reminders to check for signs of wear or leaks, using my ultrasonic detector as part of the process for gas lines, ensuring safety isn’t compromised. Remember, small preventive steps can extend appliance life significantly. Implementing a maintenance routine with proper tools has proven to reduce emergency repairs and avoid the inconvenience of unexpected breakdowns.
How do I keep my appliances performing well over time?
Alongside manual checks, I utilize software solutions that prompt me when maintenance tasks are due, and I subscribe to professional service alerts. Modern appliances often integrate Wi-Fi connectivity, allowing remote diagnostics and software updates—enhancing long-term performance. As I look to the future, the trend in appliance maintenance points toward smarter diagnostics, with AI-powered tools predicting failures before they happen. Staying ahead with the right tools today prepares you for a smarter, more reliable maintenance approach tomorrow. If you’re ready, try integrating a digital multimeter into your routine; it’s an affordable investment that can save you hundreds by catching electrical issues early. For trusted same-day service or expert maintenance support, visit this page.
What I Didn’t Expect About Secure Connections
One of the biggest surprises I encountered was realizing that a simple oversight—like forgetting to apply Teflon tape correctly—could turn a safe installation into a potential hazard. It taught me that attention to detail isn’t just about getting the job done; it’s about safeguarding my home and loved ones from unseen dangers.
Why Cutting Corners Can Cost You More
I learned the hard way that rushing through the process to save time often leads to overlooked leaks that are hard to detect later. Investing patience and using proper tools from the start prevented costly repairs and gave me peace of mind. Trusting expert resources and tutorials can make a significant difference.
Understanding the Power of Routine Checks
Implementing regular leak inspections with soap solution isn’t just a step—it’s a safeguard that requires commitment. This habit has kept my kitchen safe and has become second nature, reminding me that consistent vigilance outperforms reactive fixes.
Turning Knowledge into Action
Applying what I’ve learned about gas connections transformed my approach from a cautious novice to a confident DIYer. This experience has shown me that mastering these skills not only enhances safety but empowers you to take control of your home’s maintenance.
Where My Best Resources Come From
The most reliable information I found came from manufacturer instructions and reputable online tutorials, which provided step-by-step guidance tailored to my specific range. Additionally, engaging with professional forums and local experts gave me insights that I couldn’t find in generic guides, reinforcing the importance of credible sources when ensuring safety.