
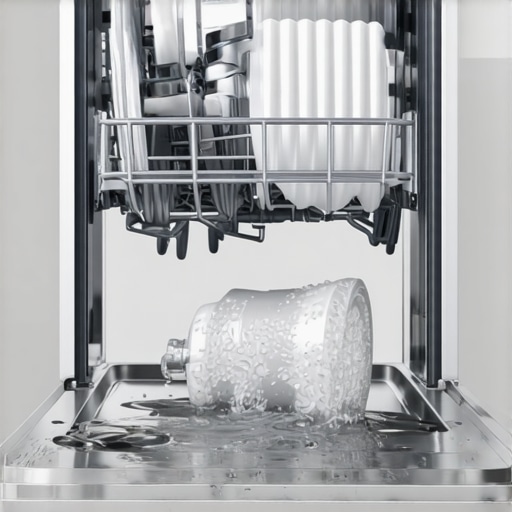
There I was, standing in my kitchen, frustration bubbling over as I watched my dishwasher fill to the brim for the third time that week. The cycle finished, but the machine still thought it was mid-wash, and all I could hear was the constant gurgling of water stubbornly refusing to go down. It was a lightbulb moment—something I had ignored for too long. If your dishwasher is still full of water at the end of its cycle, you’re not alone. It’s a common headache, but the good news is: it’s often a fix that doesn’t require a costly call to the pros.
Understanding Why Water Stays Sitting in Your Dishwasher
When a dishwasher doesn’t drain properly, it’s usually because something’s blocking the path or a part has failed. It might seem complicated, but in most cases, the culprit is a simple clog, a faulty drain pump, or a kinked drain hose. Early on, I made the mistake of assuming it was something ‘big’—like a broken pump—and I ended up wasting time and money. The reality? Sometimes, the problem is much simpler, like a clogged filter or debris in the drain. Knowing these common causes can save you from unnecessary stress and expenses. Plus, addressing these issues promptly can extend your appliance’s lifespan and keep your kitchen running smoothly.
Could a Small Blockage Be Wasting Your Water and Energy?
Before diving into complex repairs, it’s worth considering whether a minor blockage is behind your dishwasher’s stubbornness. According to appliance experts, a clogged filter or food debris can cause the entire drain system to back up. This small but significant issue can lead to water pooling in the bottom because the machine’s self-cleaning mechanisms can’t do their job. If ignored, it can even lead to mold buildup or foul odors. This is exactly the sort of problem I overlooked initially, which resulted in multiple cycles and higher utility bills. Ensuring your filter and drain pathways are clear can often be the quickest fix. For more detailed tips and trusted repair options, check out these same-day repair solutions.
By understanding the basics, you’ll be better equipped to tackle this issue head-on. And trust me, the solution is often simpler than it looks, saving you both money and aggravation. Ready to see how you can troubleshoot and fix your dishwasher drain problem? Let’s explore some straightforward steps to get your dishwasher draining like new again—and avoid calling in a technician for every small hiccup.
Assess the Problem with Your Dishwasher
Start by verifying if water remains after the cycle. Remove the bottom rack, and look for pooled water or debris in the drain area. I once faced this when my dishwasher refused to drain; removing the filter revealed a pile of food bits blocking the passage. Clearing out blockages here often resets the drain effectively.
Unclog and Clean the Filter
Remove the Filter Carefully
Locate the filter at the bottom of your dishwasher, usually under the spray arm. Gently twist and lift it out, then rinse under warm water. I recommend using an old toothbrush to scrub away stubborn grime. A clean filter ensures no debris obstructs the drainage pathway, much like unclogging a sink drain.
Check and Clear the Drain Hose
Inspect the Hose for Kinks or Blockages
Disconnect the drain hose from the sink or air gap. Use a flashlight to look for kinks or clogs. I once found a small piece of plastic lodged in the hose, causing water backup. Use a long flexible brush or pipe cleaner to dislodge any debris. Be cautious not to damage the hose; proper inspection can prevent future flooding or malfunctions.
Test the Drain Pump
Listen and Look for Pump Operation
Power off the dishwasher, then locate the drain pump, typically at the bottom. Remove it and check for obstructions or damage. You can test the pump’s motor with a multimeter. During a repair, I replaced a failed pump, which restored proper drainage. If you’re unfamiliar, consider consulting a professional—quick repairs like these save time and prevent larger issues.
Address Electrical or Mechanical Faults
If the pump is fine but water still doesn’t drain, check the wiring and the motor relay for signs of wear or corrosion. These electrical issues can mimic mechanical failures. I once fixed a relay connector, and the dishwasher drained perfectly afterward. For complex troubleshooting, consider trusted repair services with warranties, which you can discover through resources like same-day appliance repair.
Confirm and Prevent Future Drainage Hassles
Once fixed, run a short cycle to ensure water drains fully. Regularly cleaning the filter and hoses prolongs the repair. Remember, a well-maintained dishwasher is like a well-oiled machine—less prone to surprises. For ongoing support and expert guidance, check out expert repair tips. Performing these straightforward steps can save you from costly callouts and keep your dishwasher humming smoothly, just like a trusted mechanic tuning a vintage car.
Many homeowners assume that opting for same-day appliance repair guarantees a seamless, no-hassle experience. However, despite the marketing hype, there are nuanced pitfalls that can catch even seasoned DIY enthusiasts off guard. One common misconception is that all same-day services are equal in speed and quality. Actually, some providers prioritize rapid turnaround over thorough diagnostics, leading to quick fixes that re-emerge later—costing you more time and money. Understanding these nuances allows you to avoid falling into this trap and ensures that your repair is both reliable and durable.
Another overlooked aspect involves installation. Many believe that professional installation is just about connecting the appliance correctly, but in reality, improper setup—like incorrect venting or inadequate leveling—can accelerate wear and lead to frequent breakdowns. For example, installing a ventless dryer without proper clearance not only hampers efficiency but also increases fire risk. It’s vital to select a service provider that emphasizes detailed, standards-compliant installation practices to safeguard your investment.
The myths around warranty coverage can be equally deceptive. Many believe their warranty covers all repair costs, but the fine print often excludes certain parts or conditions, like user damage or corrosion. This misconception leads to unexpected out-of-pocket expenses during emergencies. To truly maximize your coverage, you must understand specific warranty protections, such as warranty extension tips, and ensure your repairs are performed by authorized technicians who can navigate warranty claims effectively.
What most people overlook is the hidden nuance in service providers’ warranties—namely, warranty-backed services that bolster trust and longevity. Not all warranties are created equal; some might seem comprehensive but have loopholes that deny coverage when you need it most. For example, a provider might offer initial coverage but exclude parts after a certain period or require specific maintenance routines. Recognizing these subtle distinctions enables you to choose providers that genuinely stand behind their work, preventing you from becoming another victim of false advertising.
Have you ever fallen into this trap? Let me know in the comments. Remember, deep knowledge of these overlooked details can save you from costly mistakes, making your appliance maintenance smoother and more trustworthy.
Why Quality Tools Make All the Difference
When it comes to maintaining and repairing appliances effectively, having the right tools is essential. My personal go-to is a high-quality multimeter, which I use regularly to check electrical components like thermostats and motors. A reliable multimeter, such as the Fluke 117, provides precise readings, helping me identify whether a part is functioning correctly or needs replacement. Additionally, I swear by a digital inspection camera—think of it as an endoscope for appliances—which allows me to peek into tight spaces like drain traps or behind panels without disassembly. This saves time and minimizes costly errors, ensuring repairs are both quick and reliable.
Another indispensable tool is a specialized socket set with extension bars and flex-head adapters designed for appliance work. This flexibility allows me to reach fasteners in confined spots, like under dishwashers or behind stoves. For cleaning, a set of precision brushes is invaluable; I prefer nylon-bristled brushes that won’t scratch delicate components, helping me remove debris without damage. These tools have become the backbone of my maintenance routine, translating to longer-lasting appliances and fewer emergency calls.
How do I maintain my tools over time?
Proper maintenance is as crucial as the tools themselves. I keep my multimeter calibrated annually, following manufacturer guidelines, to ensure accuracy. Regularly inspecting my brushes and replacing worn-out ones prevents contamination of components. Storing tools in a dedicated toolbox or rack keeps them organized and protected from environmental damage. Cleaning and drying tools after each use also prolongs their lifespan, maintaining their effectiveness for years to come. Embracing a disciplined maintenance routine for your toolkit guarantees reliable results and safeguards your investments.
Looking ahead, I believe that the integration of smart diagnostic devices will revolutionize appliance repair. Imagine being able to remotely diagnose issues via an app, with tools connected to Wi-Fi that provide real-time data. As technology advances, staying updated with these innovations will become key for DIY enthusiasts and professionals alike, making appliance maintenance more precise and less time-consuming.
How do I keep my repair skills sharp for long-term success?
Practicing regularly is key. I dedicate time each month to troubleshoot non-urgent issues, like cleaning filters, or updating my knowledge through online courses and forums. Participating in webinars hosted by appliance manufacturers also provides insights into the latest tech and repair techniques. When in doubt, consulting trusted resources, such as the expert guide to appliance repair, can offer step-by-step instructions that prevent common mistakes. Developing a routine and staying informed ensures your appliances stay in top shape, and you’re prepared for unexpected breakdowns.
A final tip: invest in a quality set of protective gloves and safety glasses. These might seem basic, but protecting yourself during repairs helps prevent injuries that can sideline your maintenance efforts. Try incorporating one of these tools into your routine today, and you’ll notice a significant boost in your repair confidence and results. For more advanced strategies, visit warranty-backed appliance services to learn how professionals ensure long-term reliability.
Three Surprising Lessons I Learned From Fast Fixes
- It’s tempting to believe that a quick repair means permanent peace of mind, but I’ve realized that consistent maintenance is key. Sometimes, a simple filter cleaning prevents future emergencies, saving more time than rushing to fix everything at once.
- Relying solely on tools isn’t enough. My most dependable repairs come from understanding my appliances’ quirks—like knowing the typical signs of a failing drain pump—so I can anticipate issues before they escalate. This insight has made my DIY approach more confident.
- Overestimating the complexity of a problem can lead to unnecessary expenses. I once thought a broken switch was a major issue, but a thorough inspection revealed it was a minor wiring mismatch. Keeping an open mind and asking the right questions keeps costs low and results high.
Tools and Resources That Changed My Approach
- Multimeter (like Fluke 117): Precision in diagnosing electrical faults has been a game-changer. I trust it because it gives me clear, reliable readings, preventing guesswork and guesswork errors.
- Magnetic Mirror: Small but mighty, this tool helps me peek behind panels effortlessly, saving time and avoiding unintentional damage. It’s a staple in my repair kit because of its convenience.
- Online Repair Guides from Trusted Sources: Resources like the expert repair guide empower me to troubleshoot confidently. They break down complex steps into manageable actions, making DIY repairs less intimidating.
- Quality Replacement Parts: Investing in genuine parts ensures durability, and I’ve found that choosing warranties-backed components minimizes repeat failures, saving me both money and frustration.
Your Next Step to Reliable Repairs
Embarking on your own appliance maintenance journey can be rewarding and empowering. Start small, stay curious, and remember that even seasoned pros learn something new every day. By honing your skills and leveraging trustworthy resources, you turn appliance repairs from stressful chores into satisfying achievements. Keep pushing your boundaries, and soon, you’ll confidently handle most issues—saving time, money, and peace of mind. What’s one appliance repair you’ve been hesitant to try? Share your story below and let’s learn together!