
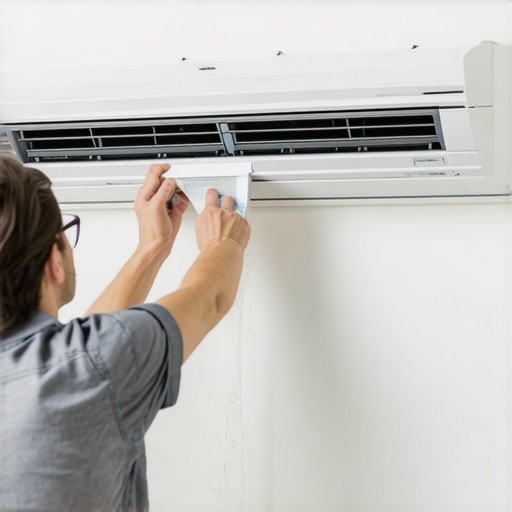
I remember the moment vividly. It was a scorching summer day, and my ductless mini-split just couldn’t keep up. The air felt stale, and my energy bills shot up unexpectedly. That’s when I finally peeked behind the panels and realized—my intake filters were so clogged that the system’s efficiency was choking. It was a lightbulb moment. If I had just maintained those filters earlier, I could have avoided the discomfort—and the costly repairs. Today, I want to share with you exactly how I learned to keep those filters clean, so your mini-split keeps running like new.
Why Regular Filter Maintenance Matters More Than You Think
Your mini-split system is a marvel of modern technology, quietly cooling your space and improving air quality. But its efficiency hinges on a simple component: the intake filter. When dust, pollen, and other debris build up, they restrict airflow, forcing your system to work harder—and wear out faster. According to the Department of Energy, a dirty filter can increase your energy consumption by up to 15%, costing you more monthly.
The good news? Regular cleaning is straightforward. Yet, many homeowners overlook this task until a system slowdown or breakdown prompts a costly repair. Avoiding that pitfall starts with understanding the common mistakes and how to sidestep them. I’ll walk you through my personal experience and the crucial steps to ensure your filters stay clean.
But first, let me address a question many of you might be pondering:
Is Cleaning the Filters Actually Worth the Hype?
Honestly, I used to brush off filter cleaning as a minor chore. My early mistake was assuming that a quick wipe once in a blue moon sufficed. That misconception nearly cost me big time, leading to reduced cooling and increased energy bills. Over time, I discovered that regular, thorough cleaning not only boosts efficiency but extends the system’s lifespan. For more comprehensive advice on maintaining your appliances, check out our [expert guide to appliance repair and installation today](https://discountappliancehub.com/expert-guide-to-appliance-repair-and-installation-today).
Now that we’ve established why filter maintenance is vital, let’s get into how you can easily do it yourself, saving money and headaches in the long run. Ready to learn my step-by-step method? Stay tuned for practical tips that will keep your mini-split humming smoothly.
Removing the Old Filter with Precision
Start by turning off your mini-split to prevent dust from dispersing. Locate the air intake panel—it’s usually at the front or side—and carefully remove it. Use a flashlight to spot the filter; it’s often held in place with clips or tabs. My first time, I hastily yanked the filter out, causing some minor damage. To avoid that, gently wiggle or slide the filter free, ensuring you don’t bend or break any clips.
Cleaning the Filter Effectively
Next, take the filter to your sink. Rinse it with lukewarm water, using a soft brush or cloth to dislodge stubborn debris. Avoid harsh soaps or chemicals—they can damage the filter material. I once used a strong detergent out of habit, which degraded the filter’s effectiveness, leading to more frequent replacements. After rinsing, shake off excess water and let the filter air dry completely—this prevents mold growth inside your system. Do not use a hairdryer or expose the filter to direct sunlight for prolonged periods, as heat can warp or damage it.
Replacing and Securing the Filter for Optimal Performance
Once dry, reinsert the filter with the correct orientation—often marked with arrows. Ensure it’s seated firmly in place; loose filters can cause air leaks or reduce efficiency. Replace the intake panel and turn your mini-split back on. I remember a time I left the panel slightly loose; I noticed poor cooling performance afterward. Tightening the panel fixed the issue immediately, demonstrating how important proper installation is.
Establishing a Regular Maintenance Routine
Schedule to clean the filters every 1 to 3 months, depending on your environment—more frequently if you have pets or allergies. Keeping a maintenance calendar helps, and setting reminders prevents neglect. My busy schedule once caused me to forget, and I paid the price with higher energy bills. Consistent cleaning not only saves money but also prolongs your system’s lifespan.
Knowing When to Call a Professional
If your filter appears damaged or you notice persistent cooling issues despite cleaning, it’s time for expert help. Professionals can inspect and replace filters that are difficult to access or assess internal components. For quick, reliable assistance, consider connecting with specialists who offer same-day repair services backed by warranties. Proper maintenance combined with professional checks ensures your mini-split stays efficient for years.
When it comes to appliance warranties and repair services, most homeowners operate under a set of misconceptions that can cost them time and money. Let’s dig deeper into some lesser-known truths that can make a significant difference in your experience. One common myth is that a warranty covers all repairs indefinitely. In reality, warranties often have strict exclusions and require proper maintenance to stay valid. According to industry experts, neglecting routine care can void your warranty, leaving you vulnerable during emergencies.
Are All Repair Services Created Equal?
Many assume that any technician with a certification can handle their appliance issues. But the difference between a genuinely qualified professional and an untrained technician can be night and day. Unqualified repairs may lead to further damage, rework, or even void your warranty. Always verify that your service provider is factory authorized or has proven credentials, which are often linked to high customer satisfaction ratings. You can find trustworthy options by reviewing [reliable appliance repair providers](https://discountappliancehub.com/what-to-expect-from-same-day-appliance-repair-experts). Moreover, the assumption that same-day service equals rushed repairs is flawed. Reputable providers prioritize both speed and quality, ensuring your appliance is fixed correctly on the first visit. This is critical because quick fixes that don’t address underlying issues can result in repeat failures, costing you more in the long run. Interestingly, some homeowners overlook the importance of understanding the warranty’s fine print, such as whether parts or labor are covered, or if there’s a deductible. Reading your warranty document thoroughly, or consulting a professional, can help you maximize coverage during emergencies. The idea that installation is a one-time event is another misconception. Faulty installation can cause ongoing issues, affect warranty validity, and reduce appliance lifespan. Proper, certified installation, such as following the guidelines at [professional installation standards](https://discountappliancehub.com/how-to-ensure-reliable-appliance-installation-in-2025), ensures safety and efficiency. Don’t fall into the trap of assuming all repair services are equal—research, verify credentials, and understand warranty specifics to avoid costly pitfalls. Have you ever fallen into this trap? Let me know in the comments.Maintaining your appliances and ensuring efficient repairs over the long term requires the right tools and a disciplined approach. Personally, I rely on a few key items that have proven invaluable in my experience. First, I always keep a high-quality digital multimeter on hand. It’s essential for diagnosing electrical issues accurately, especially when testing circuit continuity or voltage supply before attempting any repairs. I prefer a model like the Fluke 117 because of its reliability and precision, which saves me time and helps avoid unnecessary parts replacements.
Another indispensable tool is a cordless, rechargeable screwdrivers set. I use a versatile set, such as the DEWALT 20V Max, because it offers enough torque and maneuverability to disassemble various appliances quickly. Having a reliable screwdriver reduces the risk of damaging delicate components during repairs.
For cleaning and maintenance, I swear by a set of precision brushes and compressed air. These allow me to clean dust and debris from internal components without risking damage. Regularly cleaning fans, vents, and coils with these tools can significantly extend the lifespan of your appliances.
On the software side, I utilize diagnostic apps and manuals tailored for specific brands—these can often be found through manufacturer websites or reputable online forums. For example, the Samsung Smart Appliances app offers troubleshooting guides that help identify issues early, avoiding unnecessary service calls.
Thinking ahead, the trend in appliance maintenance is moving towards smart diagnostic tools integrated with IoT devices. Future developments may include predictive maintenance systems that alert you before a component fails, saving you from unexpected breakdowns. Experts like those from industry leader *Whirlpool’s Connected Care* predict these technologies will become standard within the next few years.
How do I keep my repair tools in top shape over time? Regular calibration and battery maintenance are critical. For instance, lithium-ion batteries from brands like DEWALT require occasional calibration cycles—fully charging, then discharging before recharging—to maintain capacity. Additionally, keeping your diagnostic tools calibrated ensures accuracy, which can be verified annually against known voltage standards.
I encourage you to try out a high-precision multimeter combined with a quality cordless screwdriver to streamline your repair projects. These tools have made a noticeable difference in how quickly and confidently I handle appliance issues. For more specific tips on maintaining your tools or troubleshooting health, check out our detailed guide on [maximizing your appliance warranty during emergency repairs](https://discountappliancehub.com/maximize-your-appliance-warranty-during-emergency-repairs). Remember, investing in the right tools is investing in peace of mind—so start with the essentials and build your kit over time. For trusted repairs and professional guidance, don’t forget to [contact us](https://discountappliancehub.com/contact-us).
Uncover My Biggest Wake-Up Call About System Lifespan
Learning the importance of routine filter checks was a game-changer for me—seeing how neglect directly led to costly repairs made me prioritize maintenance and extend my mini-split’s lifespan. That eye-opener taught me to never disregard those simple tasks, saving money and hassle.
The Hidden Value of Regular Small Steps in Appliance Care
Taking just a few minutes every month to clean filters and inspect components has consistently prevented major breakdowns. These small actions accumulate into significant savings, and understanding that kept me vigilant in caring for my appliances.
Resources That Turn Maintenance Into Confidence
I rely on industry-standard tools like the Fluke 117 multimeter for accurate diagnostics, and the DEWALT 20V Max screwdriver for quick disassembly. These trusted tools empower me to troubleshoot effectively, reducing dependency on costly professional visits and enhancing my DIY skills.
Empowering Yourself to Maintain Appliance Efficiency
Every homeowner has the capacity to reduce energy bills and prolong their appliances’ life through consistent filter cleaning and awareness. Embrace the routine, stay curious, and don’t hesitate to seek professional help when needed—your appliances will thank you. Remember, investing in proper maintenance is investing in peace of mind—start today and see the difference.
What has been your biggest lesson learned about appliance maintenance? Share your experience below—I love hearing stories that inspire others to keep their systems running smoothly.