
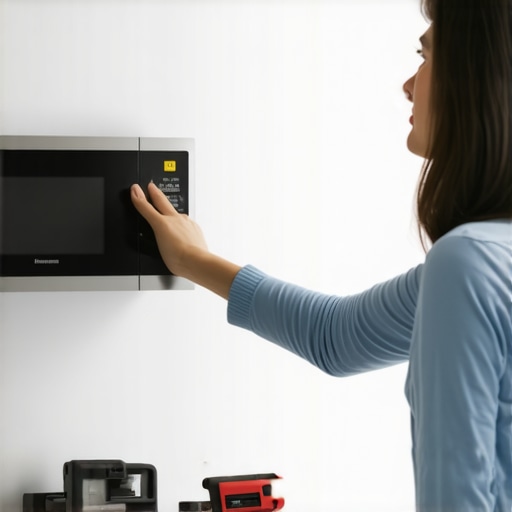
Ever had that moment where you’re about to enjoy a quick snack, only to realize your wall-mounted microwave is wobbling, crooked, or worse, unresponsive after installation? I remember my first attempt—thinking I could wing it without proper planning—and promptly ending up with a lopsided oven that just wouldn’t stay put. Talk about frustration! That lightbulb moment made me realize how crucial it is to understand the correct way to install a wall-mounted microwave for safety and longevity.
Why Proper Installation Matters More Than You Think
When I first tried installing mine, I underestimated how much weight and tension the wall could handle. A simple mistake like using the wrong mounting bracket or ignoring the manufacturer’s clear instructions could lead to costly repairs or even accidents. According to the Consumer Product Safety Commission, improper installation is a significant factor in many household appliance mishaps, including wall-mounted units falling and causing injuries. So, taking the time to do it right isn’t just about aesthetics—it’s about safety and peace of mind.
Is It Really Worth the Extra Effort?
I used to think that a quick, DIY installation was sufficient. Boy, was I wrong. My early mistake? Not double-checking the wall’s support structure, which led to a wobble that made every snack time nerve-wracking. That experience taught me the importance of understanding the nuances involved. If you’re wondering whether it’s worth investing time and effort, I say yes—because a properly installed microwave will serve you safely and efficiently for years. If you’re still skeptical, check out some expert tips on reliable appliance installation from this trusted resource.
So, what’s next? Let’s dive into how to ensure your wall-mounted microwave is installed correctly the first time, saving you from future headaches and ensuring your kitchen stays both safe and stylish.
Secure the Wall Before Mounting
First, identify the wall studs using a stud finder, and mark their locations precisely. In my own experience, skipping this step led to a wobbly microwave that felt unstable when I pressed slightly on it, risking damage or injury. Always confirm that the support structure can handle the unit’s weight, which is often specified in the manufacturer’s manual.
Choose the Right Mounting Kit
Use an installation kit designed specifically for your microwave model. Think of it as selecting the correct puzzle piece—using the wrong one can cause misalignment or detachment over time. I once tried a generic bracket, which resulted in a crooked microwave, so investing in the proper kit saved me headaches later. Verify compatibility by cross-checking model numbers.
Prep the Mounting Area
Clear the wall surface and drill holes according to the mounting template provided. Secure the mounting bracket to the wall studs with heavy-duty screws. I remember carefully measuring multiple times before drilling—precision prevents uneven mounting that could cause vibrations or tilting. If unsure about drilling into drywall alone, consider using anchors or consulting a professional.
Attach the Microwave to the Mounting Bracket
With help, lift the microwave and align it with the bracket. Once in position, lock it securely following the manufacturer’s instructions. During one accidental slip, I nearly dropped the unit, emphasizing the importance of teamwork and careful handling. Make sure all locks and screws are tight, but avoid overtightening to prevent damaging the appliance or the wall.
Verify Stability and Level
Use a spirit level to ensure the microwave is perfectly horizontal. A slight tilt can hamper door operation and compromise safety. When I didn’t level mine initially, the door wouldn’t close correctly, leading to potential food spoilage or moisture ingress. Adjust the mounting as needed before finalizing the setup.
Connect Power and Test
Finally, plug in the microwave and test all functions. Ensure the unit is stable, responsive, and not wobbling. In my case, the first trial was shaky because I forgot to engage the mounting lock properly. Once corrected, it sat snugly, providing peace of mind and safety during use. Consider checking nearby outlets, and if the outlet isn’t conveniently located, consult an electrician for safe wiring options.
Proper installation is critical for safety and appliance longevity. This methodical approach prevents future repairs and guarantees your kitchen remains stylish and secure. Whether you’re a seasoned DIYer or trying this for the first time, following these concrete steps will save you time and money while maximizing your warranty benefits if issues arise later here.
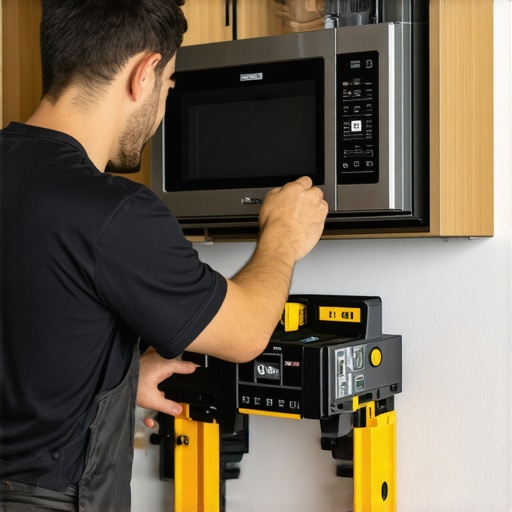
Many homeowners operate under common misconceptions about appliance warranties, same-day repair services, and installation processes. These myths can lead to costly mistakes or missed opportunities for better coverage. As an expert in appliance care, I’ve seen these pitfalls repeatedly—let’s explore some lesser-known nuances that can save you time and money.
The Myth of Total Warranty Coverage
Everyone assumes that a manufacturer’s warranty covers all repair costs, but the reality is often more complex. Many warranties exclude labor costs or require the use of authorized service providers. For example, a common mistake is believing that a simple repair will be fully covered, only to be hit with unexpected labor charges. To truly maximize your warranty, it’s essential to understand the specifics—something many overlook. For detailed insights, check out how to maximize your appliance warranty during emergencies here.
Misjudging the Role of Same-Day Service
A widespread misconception is that same-day repair guarantees a fix within 24 hours. However, in practice, availability depends on the service provider’s team, parts inventory, and the complexity of the issue. Relying solely on ‘same-day’ promises without verifying these conditions can leave you waiting longer than expected. An advanced mistake is assuming all technicians follow the same standards—many lack the expertise for complex repairs, leading to repeated trips and delays. Consulting expert guides on what to expect from same-day repair here can help set realistic expectations.
Why Your Installation Might Be Faulty Even If It Looks Fine
Installing an appliance might seem straightforward, but small errors can have significant impacts. For example, improper leveling or loose connections can cause premature failures or safety hazards. A trap many fall into is only checking functions after installation, neglecting thorough inspection of support stability and electrical connections. Advanced installers understand how nuances like proper grounding and secure mounting prevent future issues. To avoid these common pitfalls, review expert installation tips here and ensure everything is set correctly from the start.
Beware the Overconfidence in DIY Repairs
While DIY repairs can be cost-effective, overconfidence often leads to damage or voided warranties. A typical mistake is attempting complex repairs without verifying warranty coverage or manufacturer guidelines. For instance, opening up a sensitive control panel without proper knowledge might cause further damage, rendering the warranty invalid. Always remember, some repairs require certified technicians—skipping this step might save money upfront but cost more later if mishandled. Expert-certified repair and installation services not only guarantee safety but also preserve warranty benefits here.
Are Warranties Trapped by Fine Print?
Absolutely. Many warranties have detailed exclusions, especially regarding third-party repairs or non-standard parts. The trap lies in small print that disqualifies coverage if parts aren’t OEM or repairs aren’t done by authorized service providers. This nuance often surprises consumers after a claim gets rejected. To avoid this, always check the warranty terms and document all repairs meticulously. For expert advice on handling warranty claims effectively, visit this resource.
Understanding these nuanced, often overlooked aspects of appliance warranties and repair services can dramatically improve your experience, ensuring safety, cost-effectiveness, and peace of mind. Have you ever fallen into this trap? Let me know in the comments, and share your stories or questions!

Tools That Make Maintenance Easier
As someone who has repaired numerous household appliances, I can attest that having the right tools is crucial for effective and safe maintenance. One staple in my toolkit is a high-quality digital multimeter. I use it not only to check voltage and continuity but also to diagnose electrical issues that aren’t immediately obvious. Investing in a reliable multimeter like the Fluke 115 ensures accurate readings, preventing guesswork that can lead to further problems. Additionally, a set of precision screwdrivers with insulated handles is invaluable for opening up units without damaging screws or risking electrical shocks. For tightening or loosening specialty fasteners, a capacitor discharge tool can save you time and prevent accidental capacitor shocks in appliances like microwave ovens.
Software and Apps for Troubleshooting
Beyond physical tools, I rely on diagnostic apps that connect via Wi-Fi or Bluetooth to certain smart appliances. For example, smart fridge diagnostic platforms allow me to monitor temperature sensors and compressor status remotely. A popular app like Whirlpool’s Smart Diagnostics helps identify issues early, saving time and preventing breakdowns. As IoT (Internet of Things) devices become more prevalent, integrating these apps into your maintenance routine can provide predictive insights, helping you address issues before they escalate. In the future, I believe appliances will increasingly become interconnected, allowing for more proactive and efficient maintenance strategies.
How do I maintain appliance performance over time?
Consistent maintenance involves a mix of regular cleaning, timely repairs, and using the right tools. Scheduling quarterly inspections of seals, filters, and electrical connections can prevent minor issues from becoming major problems. For electrical components, using a multimeter to periodically test voltage drops helps ensure your appliance’s circuitry remains healthy. Additionally, subscribing to manufacturer’s firmware updates for smart appliances can improve efficiency and bug fixes—think of it as software maintenance for your devices. Remember, adhering to manufacturer guidelines and consulting expert resources like this guide can extend your appliance’s lifespan significantly. Start incorporating these practices today to keep your appliances running smoothly and maximize your warranty benefits.
Keep Your Repairs Under Warranty
When considering long-term maintenance, it’s wise to document all repairs and inspections meticulously. This record-keeping can be critical when leveraging warranties or service guarantees. For instance, many warranties require proof of regular maintenance to remain valid, especially for complex systems like HVAC or high-end refrigeration. To streamline this process, I recommend maintaining a digital log with photos, dates, and details of each service—many home management apps now facilitate this. If your appliance begins to show signs of trouble, quick response time is key. Explore options like same-day repair services that come with warranty support, ensuring your investment is protected while minimizing downtime.
Expert Advice for Longevity
One advanced tip is to periodically run diagnostic checks with manufacturer-approved tools. For example, some washing machines have diagnostic modes accessible via specific button combinations, letting you identify issues without calling a technician. For installations or repairs that are beyond DIY scope, professional services backed by warranty coverage not only ensure safety but also protect your investment. Remember, proper calibration and maintenance can prevent costly failures down the line. The trend is moving toward smarter, self-monitoring appliances, so staying updated on device diagnostics and maintenance techniques is more important than ever. Take the initiative today by exploring the diagnostic features of your smart appliances—it’s a proactive way to keep them working at peak performance.
What I Wish I Knew Before Hanging My Microwave
The toughest lesson was realizing that wall support types vary greatly, and assuming drywall could hold the weight was a rookie mistake. I learned the importance of always confirming the wall’s structure and using proper studs or anchors—skipping this step risks falls and injuries. My mistake was underestimating the power of a reliable stud finder and proper mounting techniques, which has saved me from several potential mishaps since.
My Easiest Shortcut for Safer Installations
Using a dedicated mounting kit designed specifically for your microwave might seem like an extra expense, but it assures compatibility and safety. I once tried to cut corners with a generic bracket, resulting in a crooked, unstable setup. Trusting the right tools and parts isn’t just about saving time—it significantly improves the safety and longevity of your installation.
How I Transformed My Approach to Appliance Maintenance
Regularly inspecting and testing electrical connections with a quality multimeter totally changed my maintenance game. This proactive step helps catch issues early, preventing costly repairs or hazards. I now schedule quarterly self-checks and stay ahead of potential failures, which keeps my appliances running smoother and preserves their warranties better.
The Most Surprising Misconception That Cost Me
I once believed that a warranty covered all repairs and parts, but I discovered some exclusions—like labor costs or non-OEM parts—that could catch me off guard. Reading the fine print and keeping detailed repair records has empowered me to navigate warranty claims more confidently and avoid unexpected expenses. The lesson? Never assume coverage extends to everything—know your policy.
Tools That Make My Maintenance Smarter
Investing in a quality digital multimeter and insulated screwdrivers has been a game changer. These tools save me time, reduce risks, and improve repair accuracy. Pairing them with diagnostic apps for smart appliances has so far prevented many breakdowns. Staying equipped with the right tools keeps my appliances performing at their best and helps me avoid unnecessary service calls.
Becoming Your Own Appliance Advocate
Understanding the nuances of installation, warranty terms, and routine checks has given me confidence. It’s about more than fixing things—it’s about proactively managing your appliances to prevent mishaps. My encouragement to you? Educate yourself, use trusted resources, and take ownership of your appliance care for safer, longer-lasting results.
Your Next Step Starts Now
Embrace these insider insights—your home appliances, safety, and peace of mind will thank you. Remember, smart maintenance and correct installation aren’t just chores—they’re investments in your home’s well-being. Ready to take the next step? Share your stories or questions below; we’re all learning together!