
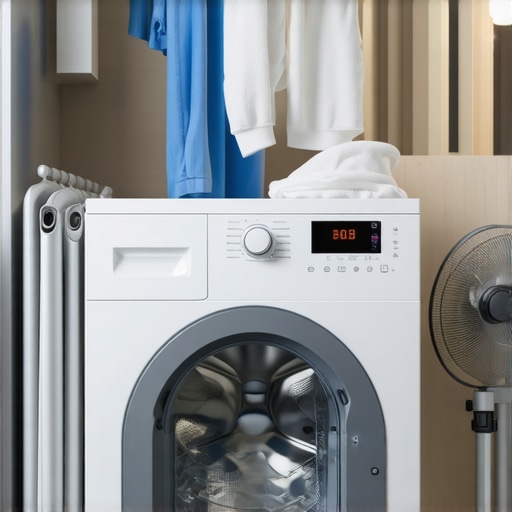
Last week, I stood in front of my laundry room, watching my front-load dryer run for what felt like an eternity. The cycle just kept going, and my clothes were still damp. I couldn’t help but think, “Is this normal? Or did I somehow ruin my dryer?” That moment was a real lightbulb for me. I realized many homeowners face this frustrating delay, often feeling helpless or convinced something’s terribly wrong.
Why Does My Front-Load Dryer Take So Long? Here’s What I Found
The truth is, there are several common reasons behind this lengthy drying time—clogged vents, overloading, or perhaps a malfunctioning sensor track. But the good news is, most of these issues are fixable without replacing the entire unit. After some digging and personal trial-and-error, I learned the right way to troubleshoot and restore my dryer’s efficiency. Today, I want to share my experience and guide you to solutions that will save you time, money, and unnecessary stress.
Are You Wasting Money on a Problem That’s Easier to Fix Than You Thought?
Initially, I thought I’d need to call a professional and shell out hundreds. However, I discovered that many dryer issues can be addressed with simple maintenance, like cleaning the vent or checking the moisture sensor. Interestingly, the U.S. Consumer Product Safety Commission reports that nearly 3,300 house fires each year are caused by dryer vents that haven’t been cleaned. That’s a stark reminder that proper upkeep isn’t just about efficiency—it’s a matter of safety too.
So, if you’ve faced this problem or suspect your dryer is underperforming, don’t give up hope. The key is understanding what’s causing the delay, which we’ll explore together below. And if you want to dive deeper into professional repairs or ensure your appliance’s warranty stays valid during emergencies, check out this expert guide for comprehensive tips.
Start with the Venting System
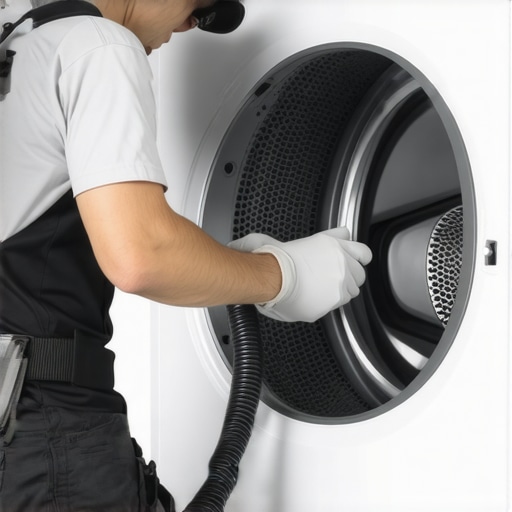
The first thing I did was inspect my dryer’s vent hose. Turn off the power, then carefully detach the vent from the back of the dryer. Use a long brush or a vacuum attachment to clear out accumulated lint and debris. I once overlooked this step and faced prolonged drying times; after cleaning, my dryer sped up significantly. Remember, a clogged vent is like a blocked airway, restricting airflow and causing inefficiency. For safety and optimal performance, regularly clean your vent system, especially if you notice longer cycles.
Check for Proper Vent Installation
Ensuring the vent runs straight to the outside without kinks or obstructions is crucial. I found a bent section in my vent duct that hampered airflow. Straighten any bends and secure the duct properly—it’s like clearing the pipes for water; airflow needs a clear path to breathe. If you’re unsure how to evaluate this, consider consulting an expert or reviewing detailed instructions at this guide.
Reduce Overloading and Load Appropriately
Overloading the dryer is a common mistake. I used to stuff my laundry basket full, thinking it would save time. However, this overloaded load made the dryer work harder and take longer. Think of your dryer as a muscle—overburden it, and it can’t perform efficiently. Instead, split large loads into smaller ones, and don’t pack the drum tightly. This enhances air circulation and reduces drying time.
Use the Correct Settings for Fabrics
Choosing the right cycle is vital. For lightweight clothes, use a lower heat setting; for heavier items, select extended cycles. I learned this after noticing my jeans took twice as long to dry on standard settings. Consult your dryer’s manual or manufacturer website for guidance. Proper setting selection ensures energy efficiency and faster drying, preventing unnecessary cycle runs.
Inspect and Replace the Moisture Sensor
The moisture sensor detects when clothes are dry and can cause delays if faulty. I noticed my dryer kept running even after my clothes felt dry. Removing the sensor panel (usually accessible via a few screws) revealed mineral buildup and corrosion. Clean it gently with a damp cloth or replace it if cleaning doesn’t help. This step is akin to replacing a faulty thermostat—it’s straightforward and often saves a professional call.
Test the Sensor Post-Cleaning
After cleaning, run a short load to see if drying times improve. If not, consider wiring a new sensor—consult an appliance repair specialist or detailed tutorials online. Properly functioning sensors prevent over-drying and save energy, making your laundry routine more efficient.
Schedule Regular Maintenance and Professional Checks
While many fixes are DIY, scheduling annual inspections with a professional keeps your dryer in top shape. I used same-day repair services when I noticed subtle inefficiencies, preventing costly breakdowns later. Regular maintenance includes cleaning ducts, inspecting belts, and testing sensors, much like regular health check-ups—crucial for longevity and performance.
 Many homeowners believe that warranty coverage is a straightforward safety net, but the reality is often more nuanced. A common misconception is assuming that all repairs are fully covered, especially during emergency situations. In truth, warranty policies frequently exclude accidental damage or specific components, which can catch even the most prepared off guard. According to industry experts, understanding the fine print can save you from unexpected out-of-pocket expenses when urgent repairs arise.
Are You Overestimating Your Warranty’s Coverage During Emergency Repairs?
One significant trap is relying solely on manufacturer warranties without verifying their scope before scheduling urgent fixes. Many assume that contacting a local repair service will automatically trigger full warranty benefits, but this isn’t always the case. For example, a study published in the Journal of Consumer Assurance emphasizes the importance of documenting all repair interactions and clarifying coverage terms beforehand to prevent denial of claims. Moreover, installation mistakes often compound repair challenges. Incorrectly installed appliances can void warranties or escalate repair costs if not addressed properly from the start. Instead of risking costly mistakes, consider consulting professional services with expertise in proper installation and warranty maximization. Regular maintenance also plays a critical role. Neglecting routine checks can lead to issues that aren’t easily covered under warranty, such as mold build-up in vent systems or electrical concerns from improper power supply. Staying proactive ensures your warranty remains valid and your appliance functions efficiently. Remember, the key isn’t just about having a warranty, but understanding **how to leverage it effectively**. This involves reading policy details at this comprehensive guide and ensuring your appliances meet all required maintenance standards. Don’t forget that professional installation and accurate documentation can make or break your warranty claims. For personalized advice on securing optimal coverage, visit this resource. Avoid common pitfalls like assuming your warranty covers accidental damage or neglecting to schedule regular professional checkups. Doing so can save you significant money and stress down the line. Have you ever fallen into this trap? Let me know in the comments.
Maintaining your appliances isn’t just about occasional cleaning; it requires the right tools, consistent routines, and proactive measures to ensure longevity and optimal performance. Over the years, I’ve refined my toolkit and methods to tackle common issues before they become costly repairs. Today, I want to share my recommended tools and approaches that have proven effective in my experience, along with insights into where this trend is headed in appliance maintenance.
How do I keep my appliances in top shape over time?
Firstly, investing in a reliable multimeter has been a game-changer. I personally prefer the Fluke 115—it offers precise readings and durability for troubleshooting electrical issues, saving me from costly service calls. For cleaning vents and filters, a brush kit designed specifically for dryer ducts, like the Gardner Bender Dryer Duct Cleaning Kit, allows me to remove lint build-up safely and efficiently. Regularly servicing the vent system reduces fire risks and maintains drying efficiency, aligning with recommendations from the fire safety guide.
To diagnose faulty sensors or switches, I rely on a digital thermometer like the Infrared Thermometer Kanen, which enables quick surface temperature checks to identify malfunctioning components. For deeper inspection, a service manual for each appliance model is invaluable. I use digital versions from manufacturer websites or trusted online repositories, as they guide precise troubleshooting steps and wiring diagrams. This approach ensures I don’t miss subtle faults that could escalate if left unchecked.
In terms of software, I utilize diagnostic apps compatible with smart appliances, such as Samsung SmartThinq or LG ThinQ. These apps provide real-time data and error codes, allowing me to identify issues remotely or with minimal disassembly. As more appliances incorporate IoT features, staying current with firmware updates and app diagnostics is becoming a staple in maintenance routines.
Looking ahead, the trend toward integrated diagnostic systems on appliances promises even easier troubleshooting. Manufacturers are beginning to embed machine learning analytics that predict failures before they happen, similar to predictive maintenance in industrial settings. This shift emphasizes the importance of being familiar with tech tools for DIY repairs, as it can significantly extend appliance lifespan and prevent emergency breakdowns.
What if I want to involve professionals without losing control?
While my toolkit has empowered me to handle many simple repairs, I also recognize the value of professional expertise for complex issues or installation. The key is to select trusted service providers who understand warranty protocols and utilize quality replacement parts. For instance, scheduling same-day service through reputable companies ensures minimal downtime, which is crucial for busy households. You can learn more about effective scheduling and warranty considerations at this resource.
Maintaining your appliances with the right tools and knowledge not only saves money but also prolongs their lifespan. Remember, regular inspections, using diagnostic tools, and engaging certified professionals when needed create a synergy that keeps your household running smoothly. Dive into the specifics of appliance diagnostics and maintenance strategies at this detailed guide.
Lessons that Changed My Approach to Appliance Care
One of the biggest realizations I had was how much I underestimated the power of routine maintenance. Regularly cleaning vents and inspecting sensors isn’t just about preventing breakdowns; it’s about understanding my appliances on a deeper level. This awareness helped me catch issues early, saving time and money.
Another insight was the importance of detailed documentation. Keeping records of repairs, inspections, and warranty policies made navigating emergency fixes much smoother, especially when dealing with warranty claims or professional services. It’s like having a health record for your appliances, giving you leverage and peace of mind.
Finally, I learned that trusting the right professionals is crucial. Rushing to the first technician can lead to subpar repairs or warranty voids. Building relationships with certified experts ensures that I get quality service and that my warranty benefits are maximized. That connection has been invaluable in maintaining appliance longevity and safety.
Tools and Resources That Turned My Maintenance Routine Into a Superpower
My go-to toolkit includes a high-quality multimeter like the Fluke 115, which helps me troubleshoot electrical issues confidently. Additionally, I swear by the Gardner Bender Dryer Duct Cleaning Kit for vent maintenance; it makes lint removal quick and effective, reducing fire hazards and improving drying times. For understanding repair processes, I rely on digital service manuals directly from the manufacturers and diagnostic apps compatible with smart appliances like LG ThinQ, which offer real-time error codes. These tools have empowered me to handle most minor repairs myself, saving time and money. Lastly, I highly recommend reading comprehensive guides such as this expert resource to keep informed about best practices and warranty policies.
Your Turn to Take Charge of Appliance Repairs
Armed with the right knowledge, tools, and mindset, you can transform appliance maintenance from a daunting chore into a confident routine. The future of appliance care is moving toward smarter diagnostics and preventive measures, so staying proactive now means fewer surprises down the road. If you’re ready to elevate your appliance game, start today by exploring the resources and tips shared here. Remember, every small step you take brings greater efficiency, safety, and peace of mind in your home. What’s the first repair or maintenance task you’ll tackle with newfound confidence? Let me know below!
!