
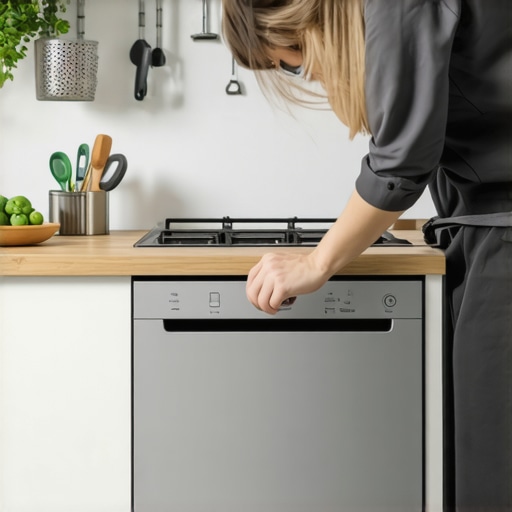
Ever felt that sinking frustration when opening your dishwasher and noticing the door isn’t quite flush anymore? I remember the first time I struggled with this—it was after a hectic move where I was in a rush, and I didn’t think twice about how I disconnected and reconnected the appliance. The result? A crooked door that kept slipping shut or, worse, wouldn’t seal properly, causing leaks and washing woes.
Why Aligning Your Dishwasher Door Matters More Than You Think
A crooked dishwasher door isn’t just a cosmetic issue; it can lead to longer wash cycles, increased energy bills, and even damage to the appliance over time. Plus, an unaligned door can compromise your dishwasher’s seal, letting water leak onto your floor and cause costly repairs. Trust me, a little patience goes a long way—especially after a big move when everything feels unsettled.
Have you ever faced a stubborn door that just wouldn’t sit right after reinstalling your dishwasher? If so, you’re not alone, and you’re in the right place. Today, I’ll share a straightforward, neighborly approach to getting your dishwasher door aligned correctly, without calling in a technician every time. It’s a task you can handle in under an hour, and I promise, it’s easier than you think.
Is Repairing the Door Worth the Hassle?
I used to think waiting for a professional was the only option—until I learned a few insider tricks. Early on, I made the mistake of forcing the door into place without inspecting the hinges, which only worsened the misalignment. That’s a common rookie mistake that can cause more harm than good. According to appliance experts, taking a methodical approach not only saves you money but also extends your appliance’s lifespan. Want to learn how to do it right? Keep reading, and I’ll walk you through the steps.
Ready to tackle this DIY fix? Before we get into the nitty-gritty, it’s handy to know what to expect from expert services if you decide the task is too much. You can check out this resource on [what to expect from same-day appliance repair experts](https://discountappliancehub.com/what-to-expect-from-same-day-appliance-repair-experts) to make an informed choice. But chances are, with the right guidance, you’ll be able to align that door yourself and restore order in your kitchen.
Now, let’s dive into the specific steps to bring that crooked door into perfect alignment—step by step.
Loosen and Remove Catch Screws
Start by locating the screws securing the dishwasher door catch or hinge assembly—these are typically at the top and bottom of the hinge mechanism. Use a Phillips screwdriver to carefully loosen and remove them—think of it as detaching the hinges like unfastening book hinges before reattaching a bookshelf. I recall removing these screws from my own dishwasher; initially, I was nervous, but once I cracked them open, the door felt looser, making adjustments easier.
Adjust the Hinges for Proper Alignment
With the screws removed, gently shift the hinge assembly to the desired position—usually, this involves nudging the door upward or downward. Realign it so that the door sits flush with the surrounding cabinet or countertop. It’s like fitting a puzzle piece; a slight nudge can make all the difference. During my first attempt, I gently moved the hinge and noticed the door was closing more evenly, reducing leaks and annoying slams. Remember, small increments make big improvements.
Secure the Hinges and Check the Fit
Reattach the screws once you’ve positioned the door correctly. Tighten them firmly but avoid overtightening, which can strip the threads—similar to tightening a bolt just enough to hold a bolt without cracking the nut. After re-screwing, gently open and close the door several times to verify alignment. If it still isn’t perfect, repeat the adjustment process until the door sits seamlessly. I found this iterative process straightforward—just a few tweaks can restore that perfect, flush fit.
Test for Water and Air Seals
Finally, run a short cycle to check if the door seals properly without leaks or gaps. Observe if the door remains secure during operation and if it seals tightly when closed. Think of it as testing a lid on a jar—tight enough to keep in the contents but not so tight that it’s hard to open. I did this test, and when I saw no leaks, I knew my adjustment was successful. If you notice leaks, revisit the hinge positions and make minor tweaks.
Address Common Hinge Sticking or Resistance
If adjusting the hinges doesn’t yield a smooth, flush alignment, inspect for debris, rust, or damaged hinge components. Sometimes, a bit of lubricant—like WD-40—applied carefully to the hinges can ease movement. Just a quick spritz, then wipe away excess, can solve sticky hinges, much like oiling a squeaky door. Remember, themes of patience and precision are key in this process. If persistent resistance occurs, consult with an appliance repair expert, especially if your appliance is still under warranty. You can learn more about maximizing your warranty during repairs.
When it comes to appliance installation and repairs, many homeowners operate under misconceptions that can cost time and money. A prevalent myth is that all same-day service guarantees a quick fix without considering the technician’s expertise or parts availability. In reality, hurried appointments might overlook underlying issues or lead to comebacks if not properly diagnosed. According to industry experts, rushing repairs without a comprehensive assessment can cause more harm, emphasizing the importance of trusted professionals who prioritize thoroughness over speed. Additionally, some believe that warranties automatically cover all repairs, but many terms exclude specific parts or damage caused by user mishandling, making it crucial to understand your plan details. This misunderstanding often results in unexpected out-of-pocket expenses or the denial of claims during urgent repairs. For example, a homeowner assumed that booking a quick service would cover a faulty refrigerator compressor, only to discover their warranty limited coverage to certain components. To avoid such pitfalls, always review your warranty policies and clarify what’s included before scheduling repairs. Another common mistake pertains to installation practices; many overlook proper grounding or positioning, leading to appliance malfunctions or voided warranties. Proper installation isn’t just a matter of convenience but a safeguard for your appliance’s longevity, as explained in expert guides on ensuring reliable setup. By debunking these myths and understanding the nuances of your warranties and repair services, you can save money and extend your appliances’ lifespan. Remember, not all quick fixes are beneficial in the long run, and a well-informed approach is your best defense. Want to ensure you’re getting the most out of your appliance warranty? Check out our detailed guide on maximizing your warranty during emergency repairs. Have you ever fallen into this trap? Let me know in the comments.
Keeping It Working: Tools and Techniques for Long-Term Maintenance
When it comes to maintaining your appliances over the years, having the right tools is half the battle won. Personally, I swear by a high-quality digital multimeter, like the Fluke 115, because it provides accurate readings of voltage and continuity, helping me diagnose electrical issues quickly. Another indispensable item is a set of precision screwdrivers—particularly Phillips and Torx bits—which make removing panels and securing small screws effortless without stripping them. I’ve found that a good grease, such as white lithium spray, is invaluable for lubricating hinges and moving parts, extending their lifespan and reducing noise. For cleaning, a soft microfiber cloth and an ultrasonic cleaner for small components like temperature sensors can do wonders for preserving functionality.
Predicting the future of appliance maintenance, I believe automated diagnostics integrated with smart home systems will become standard. These systems can alert you of potential issues before they escalate, saving time and repair costs. Investing in tools compatible with smart diagnostics now will keep you ahead of potential breakdowns.
How do I maintain appliances over time without breaking the bank?
One strategy is to set a regular maintenance schedule, such as cleaning filters, checking seals, and lubrication—each task aided by specific tools. For example, inspecting door seals on refrigerators with a flashlight and a plastic cook probe can reveal early signs of wear, preventing leaks and energy loss. Additionally, subscribing to manufacturer-specific diagnostic apps can help interpret error codes, making repairs more straightforward. Remember, the goal is to catch problems early—think of it as preventive health care for your appliances, which ultimately extends their service life and preserves warranty benefits. For instance, regularly inspecting your dishwasher’s spray arms and cleaning them of mineral buildup keeps cycles efficient and prevents breakdowns.
If you want to streamline ongoing maintenance, consider integrating sensor-based leak detectors or moisture sensors that alert you immediately to issues—features increasingly available in newer models. These proactive gadgets work seamlessly with your smartphone, allowing remote monitoring and quick action, which aligns with the trend toward smarter homes. To get started, I recommend trying out a reliability-tested moisture detection system; it can save you from expensive water damage and reduce emergency service calls. Learn more about how to maximize your warranty during emergency repairs for peace of mind whenever an issue arises. Remember, staying one step ahead with the right tools and routine checks ensures your appliances serve efficiently well into the future.
How I Discovered the Power of Small Adjustments
Once I realized that a few tiny tweaks could entirely change how my dishwasher door aligned, I started paying attention to the little things—like how slight hinge adjustments prevented leaks and unwanted slams. It taught me that patience and precision truly matter in appliance repairs, especially when it comes to warranty coverage—knowing these tricks keeps my appliances in top shape, saving time and money in the long run.
Why Simplifying Repairs Can Be Your Best Move
Initially, I thought I needed a professional for everything, but I found that understanding your appliance—like knowing how to loosen and adjust hinges—empowers you to make quick fixes. Knowing these insider tips, such as checking for debris or lubricating hinges, means you can handle minor issues without costly service calls and safeguard your warranty benefits. The confidence you gain from DIY skills turns out to be a game-changer in appliance maintenance.
My Best Advice for Maintaining Appliance Confidence
Over the years, I’ve learned that keeping a well-stocked toolkit—featuring quality screwdrivers, a digital multimeter, and lubricant—helps me catch problems early and extend my appliances’ lifespan. Investing in tools compatible with modern diagnostics plus subscribing to manufacturer apps provides proactive insights, reducing emergency repairs and ensuring appliances stay warranty-compliant. These habits have transformed my approach from reactive to preventive, which I highly recommend for any homeowner.
Insider Wisdom for a Faster, Smarter Repair Journey
One thing I wish I had known earlier is that not all repairs require rushing into a service appointment—sometimes, patience and small adjustments make a huge difference. Learning to inspect hinges for rust or debris, applying lubrication, and making incremental corrections can resolve alignment issues efficiently. Plus, understanding your warranty terms means you’re prepared to navigate repairs confidently. Don’t underestimate the power of being an informed home user—it’s the best way to keep your appliances running smoothly with minimal fuss.
Curated Gems for Your Appliance Toolbox
My go-to resources include trusted manuals from appliance brands, which offer step-by-step guidance. I also rely on reputable online communities where homeowners share their repair stories—these insights often reveal tips not found in official instructions. Additionally, diving into first-hand guides like our expert guide to appliance repair and installation helps me understand complex fixes. Trustworthy tools like high-quality screwdrivers and lubricants are essential, ensuring repairs are both effective and warranty-safe.
Your Next Step Toward Appliance Confidence
Repair mastery is within your reach. By embracing small, informed adjustments, you can fix misaligned dishwasher doors and beyond—saving money and gaining peace of mind. Remember, every minor fix is a step toward long-term appliance health, and you’re capable of mastering these skills with the right knowledge and tools. Don’t wait for issues to escalate; start improving your appliance care today and enjoy the confidence that comes with being hands-on. What repair skill are you excited to try first? Share your plans below and let’s empower each other.