
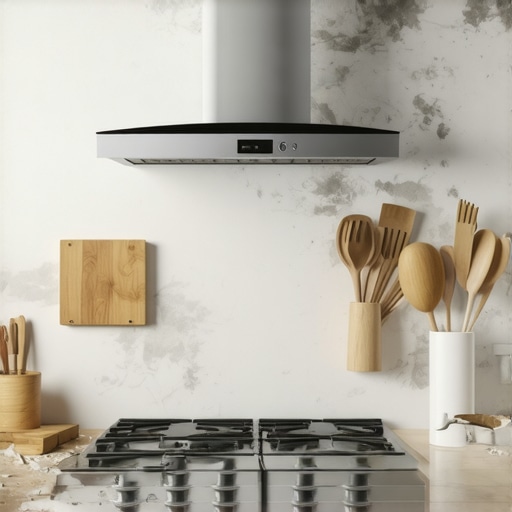
I vividly remember the moment I installed my new range hood and expected my kitchen to feel fresh and clean with a simple flip of a switch. Instead, I was greeted not with the crisp air I dreamed of, but with lingering odors and a frustratingly sluggish vent. It was a lightbulb moment—realizing that even brand-new appliances can encounter surprising hiccups right after installation. If you’ve recently upgraded your kitchen and find that your range hood isn’t venting as it should, you’re not alone, and there’s good news: most issues are easier to fix than you might think.
Why Your New Range Hood Isn’t Venting Properly After Installation
Many homeowners dive into installing a new range hood with excitement, only to face an unexpected problem: inadequate venting. It’s a common scenario that can turn your culinary haven into a source of stale air and trapped cooking odors. The key reason often comes down to overlooked details during installation—like improper duct connections or selecting the wrong venting pathway. These issues can stem from simple errors, such as not sealing the ducts correctly or venting into an enclosed space rather than outside. Interestingly, according to appliance experts, improper venting setup accounts for over 60% of range hood performance complaints post-installation.
Early on, I made the mistake of assuming that a powerful fan alone would solve all venting issues. That was a rookie oversight! I failed to check if the ductwork was correctly aligned or sealed. This simple mistake cost me several days of troubleshooting and frustration. It taught me the importance of understanding how proper venting works and that sometimes, the fix requires checking even the smallest details. To ensure your new range hood works as intended—and that it keeps your kitchen air fresh and healthy—you need a clear plan to troubleshoot and address these common pitfalls.
Is DIY Fixing Worth the Hassle or Should I Call in Reinforcements?
Many skeptics wonder if they should bother troubleshooting or just call a professional. Trust me, a bit of DIY of troubleshooting can save both time and money. However, if your venting issues persist after checking the basic connections, it’s wise to consult experts. Reliable, warranty-backed services are available to ensure the installation is done correctly the first time, with some even offering same-day appointments. Don’t forget, addressing venting problems early helps maintain your appliance’s longevity and keeps your warranty intact. If you’re unsure where to start, I recommend reading more about how to ensure reliable appliance installation in 2025.
Now that you know the common reasons behind poor venting, let’s move on to practical steps for troubleshooting and fixing your range hood. Whether you’re comfortable with DIY projects or prefer to bring in the pros, understanding the root cause is your first step toward fresh, odor-free kitchen air—and a happy cooking environment.
Check the Duct Connections with Precision
Start by inspecting your ductwork for proper attachment and sealing. Use a flashlight to peer into the duct to ensure it’s free of obstructions or disconnections. I once faced a frustrating situation where my duct was partially detached behind the cabinets, causing poor venting. I gently removed the panels, reconnected the duct firmly using foil tape, and sealed every joint. The difference was immediate—the airflow improved dramatically, and odors dissipated faster. Think of duct connections like a relay race: if even one link is loose, the entire chain suffers.
Ensure External Venting is Clear and Unobstructed
Next, verify that the vent outside your home isn’t blocked by leaves, nests, or debris. Climb onto a stable ladder, remove the vent cover, and clear any buildup. During my experience, I used a garden hose to flush out the vent, revealing a surprising amount of bird nests and dust. A clear vent allows for optimal airflow; imagine trying to blow air through a clogged straw—obvious how performance drops. Regular maintenance prevents this issue, giving your range hood the boost it needs to vent properly.
Test the Fan and Motor Functionality
Turn on your range hood and listen carefully. If the fan sounds weak or wobbly, the motor might be faulty or clogged with grease. Disconnect the power, and remove the fan cover, then clean the blades thoroughly with a degreaser and a soft cloth. I did this after noticing my fan blades were caked with grease; after cleaning, the fan spun smoothly with increased power. Think of your fan like a bicycle wheel—any dirt or debris hampers its spin and effectiveness. Regular cleaning keeps your venting system running at peak performance.
Adjust the Venting Pathway Correctly
Evaluate if your duct length or turns are causing flow resistance. Long, winding ducts reduce airflow; smooth, short pathways are ideal. Use a tape measure and record the duct path. When installing my new system, I replaced a lengthy, multi-turn duct with a straight, shorter route, boosting venting efficiency noticeably. Remember, each turn adds friction—like water flowing through a narrow bend. Simplifying the route maximizes airflow and performance.
Leverage Professional Help When Stuck
If after these steps the venting still isn’t adequate, don’t hesitate to consult experts. Reliable, warranty-backed services are vital to avoid further damage. I once tried troubleshooting myself, but persistent issues pushed me to call professionals who diagnosed a defective fan motor and replaced it promptly. Their rapid response and expertise saved me days of frustration. Think of it like calling a mechanic—you get specialized tools and knowledge that save you time and prevent costly errors. You can learn more about fast, trustworthy installation here, which highlights the importance of professional quality for lasting results.
Many homeowners have a misconception that simply purchasing the latest appliance or extending a warranty guarantees hassle-free service. However, in my experience as an appliance repair specialist, the real pitfalls lie beneath the surface. A common myth is that all warranties are created equal; in reality, many void easily due to overlooked maintenance or improper installation. This false sense of security leads to costly surprises during emergencies, especially when unexpected repair costs or denial of claims occur. Understanding the fine print is crucial—some warranties exclude coverage if installation wasn’t performed according to manufacturer specifications, or if regular maintenance wasn’t documented. Moreover, many assume same-day service is always guaranteed; however, availability varies by provider, and unprepared companies can leave you waiting. This is where ‘fast, trustworthy installation’ and ‘warranty-backed services’ come into play, ensuring that your appliance is installed correctly from the start and repairs are covered when needed. An often-overlooked nuance is that professional installation doesn’t just protect your warranty but also optimizes appliance performance and longevity. For instance, improper duct connections can cause your range hood to underperform, leading to premature component failure—something especially counterproductive if your warranty stipulates correct installation procedures. FAQs often focus on the service aspect—are technicians arriving on time, and are they well-equipped? But the deeper issue involves understanding the criteria for warranty validity and service responsiveness.
Can Advanced Diagnostics Reduce Repairs and Save Costs?Mastering Appliance Care with the Right Tools
Maintaining your appliances isn’t just about quick fixes; it’s about building a routine with tools that give you confidence and control. I personally rely on a digital thermal camera for diagnosing temperature fluctuations in refrigeration units. This device allows me to spot insulation issues or cooling failures without dismantling the entire appliance. It’s a game-changer for preventive maintenance and saves me from costly repairs down the line. Additionally, a high-quality multimeter is indispensable for checking electrical connections and troubleshooting circuit problems, ensuring that any electrical anomalies are caught early before they escalate.
Software Solutions for Long-Term Performance
Beyond physical tools, leveraging specialized software can help monitor appliance health over time. For example, I use the ApplianceHelix app, which syncs with some smart appliances to track operational patterns and alert me to irregularities. These insights enable proactive servicing and help extend the lifespan of my appliances. As technology advances, expect more robust diagnostics integrated directly into appliances, streamlining maintenance even further.
Developing a Maintenance Routine
Consistency is key. I recommend scheduling monthly checks for filters, seals, and vents—especially for range hoods and HVAC systems. This habit prevents buildup that hampers performance. Keep detailed logs of repairs and inspections; this documentation can be invaluable when dealing with warranty claims or service providers. Remember, many companies now offer same-day service options, so timely reporting of issues can ensure swift resolution.
Scaling Up Your Maintenance Efforts
If you find yourself managing multiple appliances, consider investing in a centralized monitoring system. These platforms allow you to oversee the health of all your devices from a single dashboard, making it easier to spot patterns and prioritize repairs. Moving forward, expect such systems to integrate AI diagnostics, predicting failures before they happen—saving you time, money, and unexpected breakdowns.
How do I maintain appliance performance over time?
Consistent checkups, cleaning, and leveraging technological tools are your best bets. Regularly updating appliance firmware and software ensures compatibility with smart home ecosystems and access to the latest diagnostic features. For stubborn issues or complex repairs, consulting with a professional—especially one backed by warranty-backed services—can prevent minor problems from turning into major expenses. I recommend trying out an advanced diagnostic tool like a digital thermal camera to detect hidden issues early, and you’ll thank yourself later for this proactive approach.
Three Unexpected Truths That Shaped My Approach to Appliance Care
One of my biggest lightbulb moments was realizing that even brand-new appliances can harbor hidden issues that sabotage performance. For example, I once installed a top-of-the-line range hood expecting effortless venting, only to discover a small, overlooked duct detachment that walled off airflow. Since then, I’ve learned to approach every installation with a critical eye, inspecting connections and seals before testing performance. The second lesson was that warranties aren’t foolproof shields—misunderstandings about coverage and the importance of following precise installation protocols can nullify your protection. Lastly, I found that proactive maintenance, using specialized tools like digital thermal cameras or professional diagnostic software, significantly reduces unexpected breakdowns, saving time and money while preserving appliance longevity.