
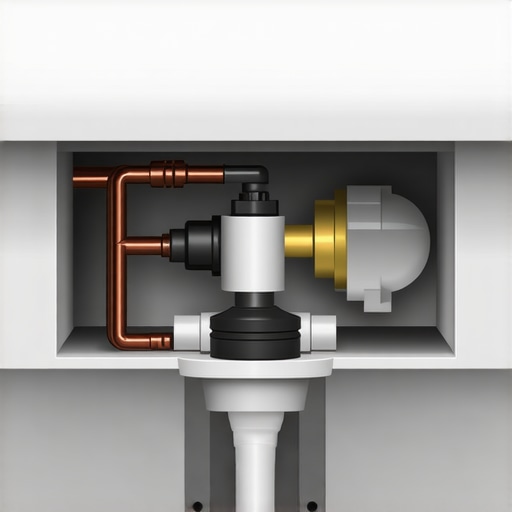
Ever been in the middle of a quiet evening when suddenly, the relentless sound of your toilet running echoes through your home? It’s frustration at its finest. I remember the first time I ignored that persistent hissing and thought, “It’s probably just a minor leak.” But days later, my water bill skyrocketed, and that ticking noise was still there. That was my lightbulb moment—realizing there’s a specific valve setting that might be the culprit behind that ongoing drain on your water and wallet.
Why Your Toilet Keeps Running Isn’t Just Annoying—It’s Costly
Many homeowners overlook how small adjustments can save big on utility bills and prevent potential water damage. The common mistake? Not knowing which part of the flush valve to tweak or even that a tiny misalignment could be the root cause. Early on, I made the mistake of replacing the entire assembly without examining that critical valve setting. Interestingly, studies show that residents can save up to 10% on water bills annually simply by maintaining their toilet’s internal mechanisms properly (source: Energy.gov). This kind of savings isn’t just about money; it’s about understanding how these little components affect your home’s efficiency.
Is It Really Worth the Hassle to Tackle This Issue?
If you’re like me, you might think, “It’s just a minor inconvenience; I’ll deal with it someday.” But the reality is, ignoring a constantly running toilet can lead to serious problems—such as increased water bills, plumbing issues, or even damage to your home’s foundation if leaks escalate. A key lesson I learned early on was to avoid the mistake of rushing into full replacements when a simple valve adjustment could do the trick. I also wish I had known about the importance of proper maintenance and the impact of the water-pressure settings, which can be checked and adjusted easily.
For those ready to finally resolve this nagging issue, I’ll walk you through the specific valve settings and adjustments that can silence your toilet and save you money. And if you’re concerned about whether you’re doing it right, don’t worry—I’ll provide tips on how to verify your fixes, so you’re not left guessing. Ready to take control of that stubborn leak? Let’s dive into the practical steps.
Identify the Specific Valve That Controls the Flushing Mechanism
To begin, locate the toilet tank and find the flush valve, which is usually at the center of the tank’s opening. The float ball or the cup attached to the float arm regulates water level and can cause the running issue. I once had a stubborn toilet that kept running because the float needed a minor adjustment rather than a full replacement. To verify this, listen carefully as the water circulates; if the water keeps flowing after flushing, the float might be set too high or too low.
Adjust the Float Level Precisely
Next, turn off the water supply to the toilet by shutting the valve behind or beside it. Drain the tank by flushing, then locate the float assembly. If you have a ball float, carefully bend the arm downward to lower the water level. For newer models with a fill valve, look for a screw on top of the fill valve or a clip on the float that can be slid to adjust height. During my own repair, I gently turned the screw clockwise to lower the float, which stopped the continuous running. Remember, small adjustments can have big effects—so make incremental changes and test after each.
Check and Maintain the Flapper Seal
After adjusting the float, test the flush and observe if the toilet continues to run. If it does, inspect the flapper at the bottom of the tank for wear or misalignment. A faulty or mis-seated flapper allows water to leak into the bowl, causing the fill valve to stay open. To fix this, turn off the water, remove the flapper, and clean or replace it if necessary. Ensure it seals tightly over the drain opening. This simple step saved me from spending money on unnecessary parts during a previous repair.
Verify and Fine-Tune Your Adjustments
Once all adjustments are made, turn the water supply back on and observe the filling process. Listen for continuous hissing sounds or water trickling into the bowl, indicating leaks or misadjustments. If the toilet stops running prematurely, it might be because the water level is too low. Adjust the float again until you see a steady, quiet fill cycle. During my first attempt, I had to tweak the float twice before achieving a perfect stop—patience is key.
Confirm Your Fix with Multiple Flushing Cycles
Finally, flush the toilet several times to ensure the problem is resolved. Watch for any signs of running water or leaks. If issues persist, consider inspecting the fill valve for debris or damage, or consult an expert by reviewing trusted guides such as this expert guide. Sometimes, a minor adjustment is all you need to regain control and save on water bills, avoiding costly repairs down the road.When it comes to appliance repair and installation, most homeowners think they fully understand the process—think again. A common misconception is that opting for free or cheap same-day service guarantees quality, but in reality, hasty choices can lead to subpar repairs or overlooked warranty details. The real nuance lies in recognizing that not all same-day services are equal—some providers promise quick turnaround but cut corners on parts or warranty coverage, leaving you vulnerable to future issues. For example, many believe that warranties cover every repair, but some plans exclude certain parts or type of damage, which could cost you more in the long run. An advanced misconception is assuming that installation standards are consistent; in fact, improper installation can void warranties, cause appliance malfunctions, or even damage your home’s infrastructure. It’s vital to verify that technicians follow established guidelines, such as those outlined in trusted industry guides, to ensure compliance and protection.
How can you distinguish between trustworthy and rushed service providers for high-stakes appliance repairs?
One critical trap to avoid is choosing a service solely based on price or immediate availability, without investigating their reputation or warranty policies. For example, a provider might advertise same-day service with a promising warranty, but if their technicians don’t adhere to manufacturer standards—like those detailed in this expert guide—your appliance could be at risk. Furthermore, many assume that warranties automatically cover accidental damage or wear and tear, but these are often excluded, so reading the fine print is essential. Additionally, be cautious of providers who delay parts ordering or send inexperienced technicians; these oversights can turn a quick fix into a costly future repair. Remember, the key is to demand transparency about parts, technician qualifications, and warranty scope. A comprehensive service not only repairs efficiently but also ensures your appliance’s longevity and your peace of mind. Want to make smarter decisions? Check out how to verify reliable installation and maximize warranty benefits for peace of mind. Have you ever fallen into this trap? Let me know in the comments.
Investing in Reliable Tools for Long-Term Performance
Having the right tools dramatically enhances the efficiency and effectiveness of appliance maintenance. Personally, I swear by a high-quality digital multimeter to diagnose electrical issues quickly—it’s a game-changer when troubleshooting glitches in refrigerators or ovens. A digital multimeter allows me to verify voltage, continuity, and resistance, ensuring repairs are precise and safe. Another essential is a compact socket set with various sizes, enabling me to tackle fasteners in tight spaces, especially when replacing door seals or heating elements. For plumbing-related tasks, I rely on a versatile plunger and a flexible drain snake, which help clear stubborn clogs without damaging pipes. I also recommend a motherboard cleaner spray, like isopropyl alcohol with a fine brush, for cleaning circuit boards during repairs, preventing short circuits and ensuring optimal operation. Over the years, I’ve realized investing in professional-grade tools not only prolongs their lifespan but also improves repair quality, saving money and time in the long run.
Streamlining Repairs with Specialized Software and Resources
For ambitious DIYers, utilizing manufacturer-specific diagnostic apps can be invaluable. These tools enable you to access detailed wiring diagrams and firmware information—saves me countless trips to the repair shop. Additionally, credible online forums like ApplianceJunk.com are filled with experienced technicians sharing troubleshooting tips and step-by-step guides, including detailed wiring schematics. Subscribing to industry updates ensures you’re aware of the latest appliance upgrades, recalls, or known issues, helping you preempt potential failures. I also use Wi-Fi-enabled diagnostic tools that connect to your smartphone, providing real-time data and alerts, which help track appliance health over time. Such proactive monitoring is shaping the future of appliance maintenance, moving toward predictive diagnostics rather than reactive fixes.
How do I maintain appliance performance over time?
Consistent upkeep involves more than quick fixes; routine checks and using appropriate cleaning products make a difference. I recommend scheduling regular inspections of door seals, hoses, and filters—simple steps that prevent costly breakdowns. Think about adopting a maintenance calendar aligned with manufacturer recommendations, which can be found in your appliance’s manual or trusted guides like this expert guide. For example, cleaning refrigerator coils every six months improves efficiency and prolongs lifespan. Also, using approved replacement parts from reputable suppliers ensures compatibility and warranty retention. I personally always keep a stock of genuine filters and belts, making quick replacements easy and reliable. Additionally, staying current with software updates for Wi-Fi-enabled appliances ensures optimal functionality and security. In the coming years, predictive maintenance powered by IoT devices will revolutionize appliance longevity by alerting you to potential issues before they escalate. To stay ahead, try integrating one smart diagnostic tool into your routine and observe its insights over a month—you might uncover hidden efficiency gains! Remember, consistent maintenance and investing in quality tools lay the groundwork for trouble-free appliance operation, saving you from unexpected and costly repairs later on.Throughout my journey in mastering same-day appliance repair, I’ve uncovered subtle truths that many overlook. One of the most vital lessons is the danger of rushing repairs; taking the time for precise diagnosis prevents future headaches and costs. I once hurried through another quick fix, only to have the same problem reappear later because I missed a hidden component—reminding me that patience truly pays off. Additionally, I learned that trusting reputable resources and manufacturer guides saves time and ensures compliance, avoiding voided warranties or subpar fixes. Recognizing the importance of investing in quality tools and software turned simple repairs into satisfying successes, boosting my confidence and efficiency. My biggest insight? That the smallest adjustments, when combined with a strategic approach, can extend appliance lifespan and optimize performance—saving both money and stress in the long run.