The first time I unboxed my brand-new washer, I was eager to get it set up and running. But in my excitement, I overlooked a critical step—removing the shipping bolts. That mistake cost me a whole day of mess, noise, and, frankly, frustration. It hit me then: those shipping bolts aren’t just for transit—they’re a warning sign that ignoring them can lead to serious problems.
Don’t Let a Simple Step Turn into a Big Hassle
Think about it. Your new appliance arrives, shiny and promising to make life easier. The last thing you want is to find out later that neglecting a tiny bolt caused your washer to shake violently or leak. That’s the kind of problem that feels like a minor oversight—until it isn’t. Shipping bolts are designed to lock the drum in place during transportation, preventing internal damage. Forcing your washer into service without removing them is like skipping a crucial step in assembling furniture—you might get it to work, but sooner or later, you’ll face issues.
Is Overlooking Shipping Bolts Actually a Big Deal?
I learned the hard way early in my DIY repairs that leaving shipping bolts in place can lead to damaging the washer’s internal components or voiding your warranty. When I first installed mine, I thought I could save time by skipping that step. Within the first few loads, I noticed abnormal vibrations, and ultimately, I had to call in a professional. I bet many homeowners have faced similar pitfalls, and that’s why I want to share this vital lesson.
For more on how to focus on reliable and timely appliance setup, check out our guide on [fast, trustworthy installation services](https://discountappliancehub.com/fast-trustworthy-appliance-installation-near-you). Understanding these small but essential details can save you a lot of headaches and money. Ready to dive into why this step is so critical and how to do it right? Let’s get started!
Remove the Shipping Bolts Before Powering Up
During my first installation, I rushed through the instructions and left the shipping bolts in place, thinking they were just a transit safety feature. When I powered on the washer, it shook violently, causing noise and potential internal damage. To correct this, I had to stop the cycle, unplug the machine, and carefully remove each bolt. This experience was a harsh reminder that skipping this step can lead to costly repairs or voided warranties.
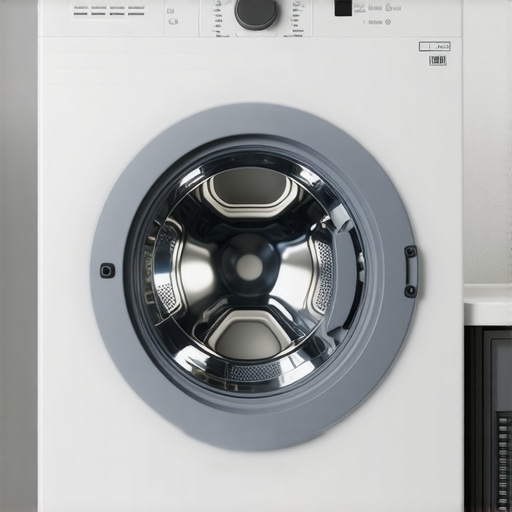
Identify the Shipping Bolts and Locate Their Position
First, consult your washer’s manual. The shipping bolts are usually located at the rear, protruding through a small access panel. They are typically colored plastic or metal rods secured with nuts. If you’re unsure, look for thick bolts at the back, aligned along the drum’s axis. Remember, every model is different, so referencing your manual is critical.
Gather the Proper Tools and Prepare for Removal
Most washers require just a wrench or socket set. Before unscrewing, place a towel or cloth behind the machine to catch any dropped nuts. If you don’t have tools handy, you can often find a basic wrench in your toolbox. Be sure to turn off and unplug the washer for safety, preventing accidental activation or electrical shock during the process.
Remove the Bolts in a Controlled Sequence
Unscrew each bolt carefully, keeping the nuts in a safe place—like a small container—so they don’t get lost. Gently pull out the bolts, avoiding excessive force that might damage surrounding parts. For a specific example, I once struggled with a stubborn bolt but slow, steady turning avoided stripping the nut. Keep in mind that some models have additional shipping accessories like foam inserts or spacers, so double-check your manual before reassembling.
Secure the Access Panel and Recycle the Bolts
After removing all bolts, replace the access panel and tighten the nuts by hand to ensure nothing is loose. Store the bolts safely; you might need them if you move or transport the appliance later. This small step can prevent damage during future relocations and ensures you don’t accidentally leave any components inside the drum, which could cause imbalance or noise.
Test Your Washer Without the Shipping Bolts
Plug in the machine, and do a short trial run without any laundry inside. Observe the vibrations; a properly installed washer should operate smoothly. If you notice excessive shaking, double-check the bolts and leveling. Using professional [same-day installation services](https://discountappliancehub.com/fast-trustworthy-appliance-installation-near-you) can save you from these hassles and ensure everything is set correctly the first time.
Skipping this step might seem minor, but it’s crucial for your washer’s health and longevity. Remember, preparing your appliance properly isn’t just about avoiding noise—it preserves the internal components and helps keep your warranty valid. When in doubt, consult your manual, and if complications arise, professional repair experts can guide you through the process seamlessly.
Many homeowners assume that scheduling same-day appliance repairs guarantees instant fixes and foolproof warranties, but the reality is far more nuanced. A popular misconception is that all same-day services are created equal; in truth, the quality, warranty coverage, and expertise can vary dramatically. Relying solely on quick turnaround times without scrutinizing the provider’s credentials can lead to subpar repairs or even voided warranties. According to industry experts, the key isn’t just speed but the technician’s experience and adherence to manufacturer standards, which can significantly impact your appliance’s longevity. Additionally, many overlook the fine print in warranty agreements—some warranties exclude certain repairs or parts unless performed by authorized technicians, making it vital to verify coverage beforehand. An often-ignored aspect is the importance of proper installation procedures, especially when replacing complex appliances like dishwashers or induction cooktops, where improper setup can cause performance issues or safety hazards later on. For example, improperly leveled refrigerators may cycle excessively, increasing energy bills and reducing lifespan.
Why Do So Many People Fail to Test Their Repair During the Initial Visit?
The advanced nuance here is that a quick repair isn’t enough; thorough testing ensures the issue is fully resolved. Many homeowners end the service call prematurely, unaware that residual problems or minor adjustments might remain. Technicians trained in diagnostics will check all related functions, ensuring wiring, sensors, and system controls operate correctly, preventing future callbacks. Experts advise asking technicians to demonstrate the repair’s effectiveness before they leave, a step often skipped by less experienced service providers. This oversight can lead to costly repeat repairs and warranty disputes. To avoid such pitfalls, consider choosing a provider that not only offers same-day service but also guarantees comprehensive follow-up, like those listed on [our trusted repair partners](https://discountappliancehub.com/fast-trustworthy-appliance-installation-near-you). Remember, a reputable service should prioritize long-term reliability over quick fixes. Have you ever fallen into this trap? Let me know in the comments.
Invest in Quality Maintenance Tools for Long-Term Performance
Maintaining appliances effectively requires reliable, specialized tools. I personally swear by a high-precision digital multimeter, such as the Fluke 117, because it allows me to quickly diagnose electrical issues without guessing. Having a cordless ratchet set simplifies removing and tightening bolts during repairs, especially when accessing hard-to-reach areas. Furthermore, a detailed service manual for your specific appliance model acts as your blueprint, preventing costly mistakes and guiding you through complex procedures. These tools not only save time but ensure safety, accuracy, and peace of mind, forming the backbone of a proactive maintenance routine.
Incorporate Software for Organized Troubleshooting
Beyond physical tools, modern diagnostic software like appliance-specific apps can streamline troubleshooting. For example, some refrigerators feature Bluetooth modules that connect to maker-approved apps, offering real-time diagnostics and error code explanations. I utilize these apps to monitor appliance health proactively, catching minor issues before they escalate into costly repairs. Leveraging remote diagnostics reduces unnecessary service calls, saving money and time, and extends the lifespan of your appliances. As technology advances, integrating these digital tools into your maintenance schedule will become increasingly essential.
Develop a Routine for Long-Term Appliance Care
Regular inspections, cleaning, and part replacements are key to sustainability. I recommend setting a quarterly schedule for deep cleaning filters, seals, and vents. For filters, I use a set of small, precision screwdrivers to disassemble panels easily; this minimizes the risk of damage and simplifies reassembly. Additionally, keeping a log of maintenance activities helps identify recurring problems early and plan repairs before issues compromise performance. This disciplined approach not only prolongs appliance functionality but also maintains optimal efficiency, saving on energy costs and preventing emergency breakdowns.
Scaling Up Maintenance and Repairs Safely
As your home’s appliance inventory grows, so does the complexity of upkeep. I suggest investing in a versatile set of electronic leak detectors and vibration analyzers. These tools help pinpoint leaks or vibration issues in large appliances like central HVAC units, supporting timely interventions. For more advanced repairs, consider training with online courses from recognized technical institutes—these can expand your skillset and confidence. Remember, quality parts are crucial; I always opt for OEM components to guard warranties and ensure compatibility. Implementing preventive maintenance at scale involves planning and the right tools, but it pays off in seamless operation and minimized downtime.
How do I maintain appliance performance over time?
To keep appliances in top shape, establish a routine that includes regular inspections, timely part replacements, and keeping your tools organized. Checking manufacturer recommendations and adhering to scheduled maintenance can prevent minor issues from turning into major repairs. Additionally, using diagnostic apps or professional-grade tools allows you to identify potential problems early. For ongoing support, consider partnering with trusted, warranty-backed service providers— they can offer expert advice and rapid assistance when needed. If you want to optimize your maintenance process, start by investing in a quality multimeter and setting a maintenance calendar today. For guidance on finding reliable service, check out top tips for same-day service warranty coverage.
The Hidden Pitfalls of Overlooking Small Steps During Repairs
My most valuable lesson came from realizing that neglecting seemingly minor details, like removing shipping bolts, can lead to costly repairs and delays. Overconfidence in skipped procedures often masks the long-term consequences, reminding me to pay close attention to every step.
Trustworthy Tools and Resources That Make a Difference
Having quality tools like a reliable multimeter and detailed manuals transformed my approach to appliance repair. Resources like expert tutorials and reputable service websites became my allies, helping me troubleshoot with confidence and reduce dependency on guesswork.
The Emotions Behind Facing Unexpected Challenges
Realizing I damaged my washer because of a simple oversight was frustrating but ultimately empowering. It taught me patience and the importance of thoroughness, fueling my desire to learn and share experiences that could save others from similar frustrations.