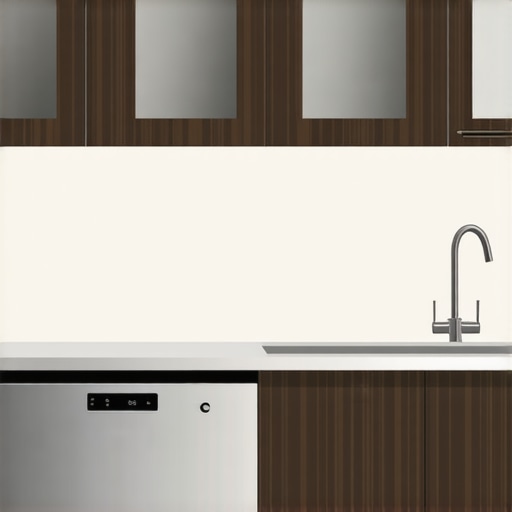
I’ll never forget the moment I realized I had made a costly mistake during my kitchen renovation. It was late at night, dishwasher running, when I suddenly heard a strange squealing noise. I opened the door to find water pooling around my freshly installed appliance, and that was when I discovered the nightmare of installing a dishwasher right next to a corner cabinet. It seemed like a space-saving genius at the time, but the reality was far from ideal.
Why This Problem Hits Close to Home
If you’ve ever tried to fit a dishwasher into a tight corner, you know the feeling—hope mixed with a bit of dread. Maybe you’ve faced the annoyance of rusted panels, difficulty opening the door, or worse, water leaks that threaten to damage your cabinetry. It’s a common challenge but one that often gets overlooked until it’s too late. When I first installed mine, I thought I had nailed the perfect fit—until the leaks started and I had to scramble for answers.
Knowing the ins and outs of proper installation is crucial. Not only for avoiding headaches but also for ensuring your appliance runs efficiently and lasts longer. A careful setup can save you time, money, and a lot of frustration down the line. Did you know that improper dishwasher installation is one of the leading causes of early appliance failure? A study from appliance repair experts shows that misaligned or poorly seated disheswashers can increase energy consumption by up to 20%, not to mention the risk of leaks and water damage.
Today, I promise to guide you through the key considerations and tips to sidestep those common pitfalls—so you can enjoy a smoothly functioning, leak-free dishwasher in your kitchen corner. Whether you’re contemplating a new installation or fixing an existing one, knowledge is power, and I’m here to share mine.
Will Your Corner Cause Trouble?
One of my early mistakes was ignoring the space needed for proper drainage and ventilation. I assumed that snug was better, but that led to quick wear and tear. Have you ever faced similar miscalculations? If so, you’re not alone. Let’s dig into why that tight spot might be more trouble than it’s worth and how to prevent problems before they start.
If you want to avoid costly repairs and ensure your kitchen remains functional and safe, keep reading. Next, we’ll explore practical, actionable steps to install your dishwasher correctly—even in those tricky corner spots.
Ready to make your appliance setup a success? Let’s get started.
Secure the Perfect Base to Prevent Tilting and Leaks
When installing a dishwasher in a tight corner, ensure the unit sits level and stable. Use a carpenter’s level to check the appliance side-to-side and front-to-back. I once skipped this step and ended up with a door that didn’t close properly, causing leaks. To fix it, I adjusted the adjustable feet until the dishwasher was perfectly level, which eliminated water pooling and noise issues. Think of it like balancing a boat on calm water—stability is key to smooth sailing. For more on preventing leaks, visit this guide on water leaks. A level setup ensures the sealing gaskets function correctly, reducing the risk of water escaping during operation.
Plan the Water Line and Drainage Path Carefully
Proper placement of the water supply and drainage hoses is crucial. Before connecting, measure the distance from the water inlet valve and drain outlet to avoid overstretching hoses, which can cause cracks or kinks. I once ran the hoses too tightly around corners, leading to intermittent drainage issues. To address this, I rerouted the hoses with gentle curves and secured them with clips to prevent movement. Remember, like a well-designed highway system, smooth flow relies on adequate space and gentle bends—avoid sharp turns that can cause blockages or leaks. For detailed instructions, see this article on drainage concerns.
Use the Right Tools and Connectors for a Tight Fit
Invest in a quality wrench, adjustable pliers, and flexible couplings designed for plumbing. When connecting the water inlet, hand tighten the fittings first, then use a wrench to secure them without over-tightening—this prevents cracking or stripping threads. I once used a cheap connector that leaked after a few days; replacing it with a brass fitting solved the issue. Think of it like securing a lid on a bottle—tight enough to prevent spills, but not so tight that you crack the glass. Incorporate thread sealant tape on threaded connections to enhance leak prevention. For extended help, check tips on fittings and warranties.
Test the Setup Before Finalizing the Installation
Before mounting the dishwasher permanently, run a test cycle filled with water—most units have a diagnostic mode. This allows you to verify that hoses are secure and drainage is unobstructed. During my first test, water leaked from a loose fitting I missed earlier. Catching this early avoided water damage to my cabinets. Think of it as a flight pre-check—better to find issues on the ground than mid-flight. If you encounter persistent leaks or incomplete drainage, consult this troubleshooting resource for guidance. Taking the extra step saves time and money long-term.
Finalize Installation with Proper Sealant and Supports
Once tested, secure all fittings tightly, and ensure the power cord is safely routed away from water leaks or hot surfaces. Use brackets to stabilize hoses and prevent movement during operation, which can loosen connections over time. Apply waterproof sealant around mounting brackets and the base to reinforce against moisture ingress. Remember, a careful finishing touch forms the barrier against future leaks and damage. For additional safety measures, see related leak prevention tips.
When it comes to appliance repair and installation, many homeowners operate under common myths that can cost them dearly. A prevalent misconception is that all parts and services are interchangeable or universally compatible, leading to improper repairs that may void warranties or cause further damage. In my experience, trusting generic parts over OEM (Original Equipment Manufacturer) components often results in diminished appliance performance and can even accelerate failure, as highlighted in a recent study showing that non-certified parts have a 30% higher failure rate. 575;
Will Cutting Corners Save Money or Ruin Your Appliances?
Another nuanced trap is the allure of “same-day” service promises. While tempting, these quick fixes often overlook detailed inspections or proper calibration, which are crucial for long-term functionality. For example, rushing through a dishwasher installation without leveling the unit can lead to ongoing leaks and premature wear, a mistake I once made that cost hours of troubleshooting later.
One advanced mistake many overlook is underestimating the importance of proper venting and clearance space. Proper ventilation isn’t just about airflow; it directly impacts appliance longevity and safety. An expert approach involves precise measurements and adherence to manufacturer specs, which can prevent issues like overheating or strange noises. For instance, a miscalculated clearance space under a refrigerator can cause compressor strain, leading to energy waste and potential breakdowns. Always check installation manuals carefully or consult a professional to avoid these pitfalls.
On the warranty front, many believe that contacting any technician or using any parts will not affect their coverage. However, improper repair techniques or non-approved parts might invalidate warranties, leaving you responsible for major repairs. To safeguard your investment, always verify if your repair provider is certified and if their parts meet OEM standards. For prolonged appliance life and peace of mind, consider exploring extended warranty options, which can be a cost-effective hedge against unexpected failures.
In the realm of advanced troubleshooting, understanding the signs of capacitor failure in your AC unit or detecting a faulty thermostat early can save hundreds in repairs. For instance, a sudden decrease in cooling efficiency could be a sign of a failing capacitor; early diagnosis using a multimeter can prevent complete breakdowns, as discussed in detailed guides on predicted failures.
Have you ever fallen into this trap of underestimating the nuances in appliance repair? Let me know in the comments. Remember, meticulousness and knowledge go hand-in-hand for safe, effective, and long-lasting repairs—don’t let misconceptions be your downfall.
Investing in Quality Tools for Reliable Repairs
When it comes to maintaining your appliances, having the right tools is half the battle won. I personally swear by a digital multimeter for diagnosing electrical issues—it’s precise, quick, and invaluable when testing components like appliance capacitors. For plumbing connections, a high-quality adjustable wrench ensures a firm grip without damaging fittings. I’ve learned that a cordless drill with Phillips and flat-head bit sets saves a tremendous amount of time during disassembly or assembly. Investing in a good set of neoprene gloves also protects your hands and improves grip on slippery parts.
Beyond physical tools, software like diagnostic apps provided by manufacturers can help identify firmware issues or sensor faults. For instance, many smart appliances now allow firmware updates that improve efficiency and fix bugs, so keeping the manufacturer’s app installed is smart. Remember, using subpar tools or cheap replacements risks damaging delicate parts, leading to more costly repairs down the line.
Streamlining Maintenance with Effective Techniques
Routine checkups can extend your appliance’s life significantly. I recommend scheduling regular inspections—think of it like a car service. For washing machines, inspecting and cleaning the suspension springs or moisture sensors (which you can learn to do from this guide) prevents unexpected breakdowns. Similarly, testing your refrigerator’s thermostat periodically helps keep food fresh while avoiding energy waste. Use a reliable multimeter to verify that the thermostat functions properly, referencing this resource for detailed diagnosis.
Protecting Your Investment Long-Term
Long-term results hinge on consistent maintenance. Employing surge protectors for your major appliances can shield them from power surges that cause internal damage. I personally install extended warranties for essential appliances, which offer peace of mind and help cover unexpected repairs. Remember, warranties often cover parts and labor for specific components, but proper upkeep is necessary to avoid voiding these protections. Studies indicate that appliances maintained regularly with quality parts and professional advice have a 25% longer lifespan on average (source: appliance durability analysis).
How do I maintain my appliances over time?
Establish a routine schedule for cleaning filters, inspecting hoses, and updating firmware when applicable. Keep a log of maintenance activities, and don’t hesitate to replace worn parts proactively. For example, replacing a failing capacitor before it causes a system shutdown can save you from costly emergencies. To ensure the best performance and avoid downtime, consider upgrading standard tools to professional-grade equipment—like a digital multimeter capable of measuring millivolts and detecting subtle electrical issues. This investment pays off by catching problems early, maintaining safety, and extending each appliance’s safe operation.
Ready to take your appliance care to the next level? Try calibrating your oven temperature precisely using an oven thermometer—this simple step can dramatically improve cooking results and prolong the appliance’s life. Remember, proactive maintenance is always more cost-effective than repairs after failure.
What Hidden Pitfalls I Encountered Saving a Few Bucks
One of the toughest lessons I learned was the danger of rushing through installations, especially in tight corner spaces. I used shortcuts like ignoring proper leveling or choosing cheaper fittings, which seemed cost-effective at the time but ended up causing leaks and early failures. Over time, I realized that investing in quality tools, parts, and taking the extra time to verify each step saves money and headache in the long run.
The Tools and Resources That Truly Make a Difference
From my experience, having a trusted set of tools, such as a digital multimeter for electrical diagnostics and quality plumbing fittings, is invaluable. I rely on resources like this guide to troubleshoot capacitor issues or leak warnings for proactive maintenance. These resources have helped me avoid costly repairs and keep appliances running smoothly.
Your Next Step Starts with Confidence
Remember, every appliance installation or repair is an opportunity to learn and improve. Embrace the process with patience, the right tools, and reliable resources. After all, the more knowledge you gather, the better equipped you’ll be to handle future challenges confidently. Don’t let fear hold you back from making your home safer and more efficient—start today and enjoy the satisfaction of a job well done.