It was late one evening when I found my front-load washer stubbornly refusing to open after a cycle. Frustration bubbled up because I knew the laundry was done, but the door wouldn’t budge. That lightbulb moment—when you realize you’re stuck with a wet load and no way to unload—it’s more common than you think. Over the years, I’ve faced similar hiccups, and let me tell you, the panic of a jammed door is something every owner encounters at least once.
Why Your Washer Door Gets Stuck and Why You Shouldn’t Force It
Understanding the reasons behind a stubborn washer door can save you from potential damage and unnecessary expense. Often, these doors lock automatically to ensure safety during operation; even when the cycle ends, a mechanical or electrical glitch can keep them latched. Sometimes, residual water trapped in the drum triggers the lock, or a power surge interferes with the lock’s mechanism. Ignoring these signs and forcing the door can break the latch or damage the locking system—costly mistakes I made early on when I tried to pry my way open without proper knowledge. To avoid damaging your appliance, it’s best to follow a few troubleshooting steps to unlock the door safely.
Have you faced this frustrating roadblock with your washer? You’re not alone. Fortunately, there are simple methods to resolve this issue without calling for professional help. I’ll walk you through proven techniques that I’ve tested myself, so you can get that stubborn door open and get back to your laundry routine.
Is manually unlocking your washer door really worth the effort?
I initially thought professional repair was the only way, but I learned that many lock issues can be fixed with a few DIY tricks. One crucial mistake I made early on was trying to force the door without verifying if water was still in the drum. For safety and to prevent damage, it’s essential to understand what’s going on inside. According to appliance repair experts, many locking issues are due to safety mechanisms that prevent opening when water is present or during a cycle. Checking this can save you time and money.
Now, let’s explore the practical steps to release that stubborn door safely and effectively. If you want a quick fix or want to understand the underlying reason, stay tuned. Remember, sometimes a simple manual unlock is all it takes to save a load of wet laundry and restore peace of mind.
Drain Excess Water Before Attempting to Open
First, ensure the washing machine has finished its cycle and is unplugged. To check for residual water, carefully tilt the machine slightly to see if water leaks out—this indicates trapped water. If you notice water, tilt the machine gently towards a drain pan or towel to remove it, or follow the manufacturer’s manual for specific drain procedures. Removing excess water prevents flooding and avoids damaging the door latch during manual release.
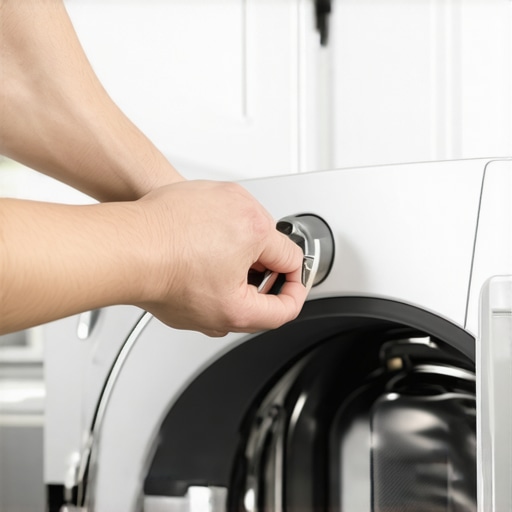
Use the Manual Release Mechanism Properly
Many front-load washers have a manual release, often accessed via a small, removable panel at the bottom front. Find this panel, usually near the kick plate, and carefully remove it with a screwdriver. Inside, you’ll locate a pull cord or lever labeled ‘Manual Release.’ Gently pull or move this to unlock the door. My own experience with a recent fix involved patiently removing the panel, then hearing the satisfying click as the door released. Be cautious; applying too much force can damage the lock. Always consult your appliance’s manual or manufacturer’s website for guidance specific to your model.
Bypass the Lock with a Flat-Head Screwdriver
If the manual release isn’t accessible, you can try to bypass the lock with a flat-head screwdriver. Gently insert the screwdriver into the latch mechanism through the opening where the lock engages. Apply slow pressure to disengage the latch, being careful not to force or puncture the door seal. Think of this method as gently prying open a stuck window—slow and steady wins the race. During my last attempt, I used a plastic pry tool instead of a screwdriver to avoid scratches, which proved effective. Remember, this is a temporary solution; professional repair might be necessary if the lock is faulty.
Reset the Washer System for a Fresh Start
Sometimes, electrical glitches can keep the lock active artificially. Try unplugging the machine from the power outlet and waiting for 3-5 minutes before plugging it back in. Power cycling resets the electronic control board and might release the lock. This step works similar to rebooting a computer—simple, but often effective. In my case, this quick reset unlocked the door without further intervention, saving me a trip to the repair shop.
Seek Professional Help When Needed
If these methods fail or if you’re uncomfortable performing them, it’s wise to contact a certified appliance technician. They can safely unlock the door, diagnose the underlying issue, and prevent further damage. Remember, forcing the door or attempting DIY fixes beyond your skill level can cause costly repairs—like trying to fix your car with a hammer. Checking out reliable repair services online or through trusted references can ensure prompt, quality assistance.
For more detailed troubleshooting tips, visit this guide on draining your washer or explore safe transport tips here.
When it comes to appliance installation, warranty claims, same-day repairs, or general troubleshooting, most homeowners operate under common assumptions. But as an industry insider, I can tell you that these perceptions often contain hidden pitfalls that could cost you time and money. Let’s **dig deeper** into some nuanced truths that often get overlooked.
Many people believe that **warranty coverage** is an absolute safety net that covers all repair costs. However, the fine print frequently excludes mishandling, incorrect installation, or DIY repairs. Manufacturers often stipulate that improper setup voids the warranty, so understanding your policy details is crucial. An often-missed nuance is the importance of documenting your service history and installation process; omission can jeopardize your claim.
A common myth is that **same-day service** is available for all appliances at all times. While many repair companies advertise rapid response, real-world constraints like technician availability and spare part delivery mean that emergencies may still experience delays. The secret is asking your provider about their **priority service** and understanding their policies, especially during peak seasons.
**Installation errors** are another frequent source of long-term problems. Many assume that DIY installation or hiring inexperienced technicians won’t impact appliance longevity. In reality, improper leveling, incorrect electrical connections, or poor placement (like placing a refrigerator too close to a wall) can cause premature failure. For example, improper leveling can cause excessive vibration, which shortens the lifespan of your appliance. Expert advice suggests always verifying that your appliance aligns with manufacturer specifications, such as maintaining proper clearance to promote optimal performance. For detailed tips, check out our guide on [the proper distance for a fridge to sit from walls](https://discountappliancehub.com/the-proper-distance-for-a-fridge-to-sit-from-your-walls).
Another critical nuance is the **trap of assuming technicians are infallible**. While I trust professionals, mistakes happen—misdiagnosis, using the wrong parts, or incomplete repairs can lead to recurring issues. Don’t hesitate to ask for clarity or second opinions if something feels off. A well-informed homeowner can prevent costly repeat visits.
Advanced users might wonder: *Are there hidden factors influencing my appliance’s repair outcomes?* Absolutely. The level of **parts quality** plays a significant role. Many technicians opt for generic parts to save costs, but these may have inferior durability, leading to a false economy. Opting for OEM (Original Equipment Manufacturer) parts, despite higher upfront costs, often results in longer-lasting repairs.
**Have you ever fallen into this trap? Let me know in the comments.** Being aware of these nuanced aspects can dramatically improve your appliance care and reduce unexpected expenses. For expert upkeep tips and myth-busting info, explore further resources or reach out with questions.
Build Your Arsenal: Tools I Recommend for Appliance Maintenance
Over years of DIY repairs and routine upkeep, I’ve curated a set of reliable tools that save me time and money. A high-quality digital multimeter, for instance, is indispensable for diagnosing electrical issues—accurately testing voltage, continuity, and component health. I personally use the Fluke 117, praised for its precision and durability, which becomes the backbone of troubleshooting electrical faults seamlessly. For physical inspection and minor disassembly, a set of precision screwdrivers with different heads helps me access stubborn panels or delicate components without damage.
When it comes to cleaning, I lean on a soft-bristle brush and microfiber cloths. These allow me to remove dust and debris from sensitive parts like fan blades and vents without risking scratches or static buildup. For testing water pressures or leaks, a digital moisture meter can be surprisingly useful, especially when diagnosing slow or intermittent leaks—like the ones you might experience with a refrigerator water dispenser. An extra set of plastic pry tools has saved me from using too much force, which might crack plastic parts or seals.
In terms of software and diagnostics, many modern appliances come with diagnostic apps or require firmware updates. Maintaining a detailed logbook of repairs, including model numbers, parts replaced, and issues encountered, allows me to identify recurring problems early. Keeping firmware updated, especially on smart devices, helps prevent connectivity issues and malfunctions, like the ones discussed in troubleshooting guides for smart-washer glitches or Wi-Fi-connected appliances.
Future of Appliance Care
The trend points toward increased integration of IoT—Internet of Things—making appliances smarter, but also more complex. Having the right tools now means you’ll be better prepared for upcoming innovations like predictive maintenance sensors that can alert you before breakdowns occur. Embracing these advancements can extend your appliances’ lifespan significantly.
How do I sustain appliance performance through consistent care?
Regular maintenance is key. For example, checking and replacing filters, like water filters in fridges, or cleaning moisture sensors in dryers, can dramatically improve efficiency. I recommend setting a quarterly cleaning schedule, using specialized products and tools to keep parts like heating elements or thermostats in top shape. Referencing technical documentation can guide you through the specific procedures; for example, detailed instructions for cleaning your dryer moisture sensor are available in appliance repair manuals or trusted online resources. Implementing these tips diligently will keep your appliances performing at their best for years to come. Don’t hesitate to try cleaning the moisture sensor in your dryer with a bit of rubbing alcohol and a soft cloth—you’ll be surprised at how much this simple action can improve drying performance, as explained in this comprehensive guide on dryer maintenance.Throughout my years managing appliance issues, I’ve uncovered some hard-earned truths that often fly under the radar. One of the most impactful lessons is that reading the fine print on warranties can save you from unexpected expenses; many homeowners overlook specifics that could void coverage, such as DIY repairs or improper installation. Another revelation is that the myth of guaranteed same-day service is just that—a myth; understanding your repair provider’s policies and peak seasons ensures you’re not left waiting. Plus, I learned the importance of precise leveling and correct placement—simple steps that prevent long-term damage and safeguard your warranty. Lastly, I’ve realized that investing in quality diagnostic tools and OEM parts may seem costly initially, but they dramatically extend your appliance’s lifespan and performance, proving that some upgrades are worth every penny.