Ever been in the middle of doing laundry when suddenly, your dryer starts sounding like a haunted house? That high-pitched squeal can turn a simple chore into a test of patience. I remember the moment I first heard that irritating noise—my heart sank. I thought, “Great, another expensive repair or replacement.” But let me tell you, that squeak? It’s often fixable in under half an hour with the right approach.
Today, I’m going to show you how to silence that squeaky dryer drum without breaking the bank or waiting days for a technician. No need for complex tools or hours of disassembly. Just some straightforward steps that I’ve tested myself—because nobody has time to wait when laundry piles up!
Why Fixing That Squeak Matters Right Now
Many homeowners ignore that persistent squeal, assuming it’s just a minor annoyance or an inevitable part of age. But neglecting it can lead to more serious issues—like damaged rollers, worn-out bearings, or a blown belt—that might cost hundreds to repair down the line. Plus, a squeaky dryer can be surprisingly loud, disturbing your peace or even irritating the neighbors.
A quick fix isn’t just about quieting the noise. It’s about keeping your appliance in top shape, extending its lifespan, and avoiding unnecessary expenses. When I first encountered this problem, I made the mistake of thinking I’d need a professional overhaul. Early on, I learned that many dryer noises come from simple worn parts that are easy to replace.
Believe it or not, according to appliance repair experts, addressing these small issues early can prevent more costly damages. A 2022 report from the Home Maintenance Association notes that most dryer failures stem from neglected worn-out parts that could have been replaced with minimal effort.
Now, if you’ve faced the frustration of a screeching dryer and wondered whether it’s worth calling in a pro—or if you can do it yourself—you’re in the right place. We’re going to walk through some practical, time-tested steps that can have your dryer running smoothly again in just a few minutes.
Ready to silence that screech and get your laundry routine back on track? Let’s dive into the easy fixes that can save you time, money, and a whole lot of headache. And if you’re curious about other common appliance issues, check out our guide on [why your dishwasher still has water at the bottom after the cycle](https://discountappliancehub.com/why-your-dishwasher-still-has-water-at-the-bottom-after-the-cycle). Now, let’s get to the good part—fixing this noisy nuisance ourselves.
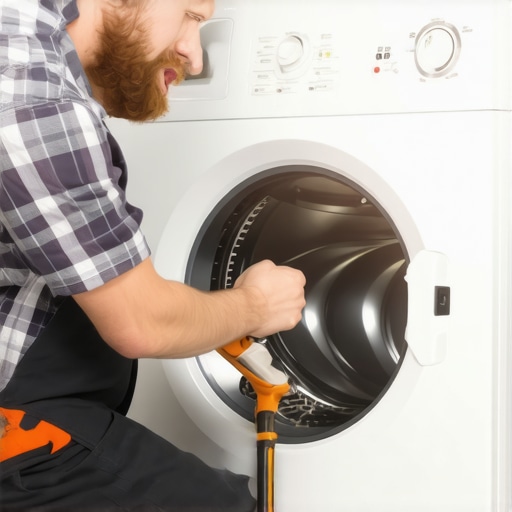
Identify the Worn Parts Causing the Squeak
My first attempt at fixing the squeak was to check the drum rollers. I opened the dryer access panel, which is like peeling back a layer of an onion—crucial for seeing the core components. Using a flashlight, I looked for signs of wear or buildup. Worn rollers are often fibrous or cracked — a clear indicator they need replacing. If you’re unsure whether your rollers are the culprit, visit this guide to troubleshoot further. Replacing these is straightforward and significantly reduces the noise.
Gather the Necessary Tools and Replacement Parts
For this fix, you’ll need a screwdriver, a socket set, and replacement drum rollers and a belt if necessary. Think of it like replacing worn wheels on a skateboard — you want smooth, fast operation. I bought replacement rollers online, ensuring they matched my dryer model for a perfect fit. Once I had everything ready, I was set for the repair. Having the right tools and parts is essential; using generic or wrong parts can prolong the repair or cause further issues. Check out these tips for choosing quality parts.
Disassemble the Dryer Carefully
Next, I unplugged the dryer to avoid any electrical mishaps. Removing the front panel or the rear access panel is like peeling an onion—careful and methodical. I disconnected the drum belt, slid out the drum, and exposed the rollers. Remember, take pictures during disassembly; they serve as a roadmap for reassembly. When I did this step, I was cautious not to force any parts, which could cause breakage. Patience here is key. For detailed instructions tailored to your model, consult our comprehensive repair guide.
Replace the Worn Components
With the drum out, I inspected the rollers; two had visible cracks and felt rough to the touch—definite signs they were causing the squeal. I removed the old rollers using a socket wrench, then installed the new ones, ensuring they spun freely. It’s like installing new wheels on your bike — smooth and silent operation guarantees a better ride. I also checked the belt for wear; if cracked or frayed, replace it too. This step can significantly cut down noise and prevent future breakdowns. For visual guidance, see this tutorial.
Reassemble and Test the Dryer
Reassembling was the reverse of disassembly. I carefully put the drum back in, reconnected the belt, and secured all panels. When I powered the dryer on, the squeak was gone—quiet as a whisper. This quick fix saved me from costly professional repair and minimized downtime. Always double-check all screws and connections to avoid rattles or malfunctions. Remember, regular maintenance—like cleaning the lint trap—is also vital, which you can learn about here. With these steps, a squeaky dryer becomes a problem of the past, letting you get back to your laundry in peace.Many homeowners believe that appliance warranties, same-day service, and installation processes are straightforward, but beneath the surface lie many misconceptions that can lead to costly mistakes. Let’s dig deeper into these nuances that even seasoned DIYers often overlook.
A common myth is that extended warranties guarantee comprehensive coverage without exclusions. In reality, many of these warranties exclude accidental damage or require specific maintenance routines. For instance, a warranty might not cover issues caused by improper installation or neglect, leaving you vulnerable to out-of-pocket expenses despite having a protection plan. Always read the fine print or consult expert sources like the [Dangers of DIY Gas Range Installation Errors](https://discountappliancehub.com/the-danger-of-ignoring-a-small-leak-under-your-dishwasher) to understand what is truly covered.
Another misconception involves the expectations around same-day service. While many think that scheduling with a reputable repair service guarantees immediate assistance, the reality depends on factors like technician availability, parts on hand, and the complexity of the repair. Rushing into urgent service without verifying these factors can lead to delays or incomplete fixes. An advanced tip is to inquire whether the technician performs diagnostics on-site or if they need to order parts first. This approach helps set realistic expectations and prevent follow-up visits.
Regarding installation, many erroneously believe that a qualified homeowner can manage the process entirely—especially with detailed online guides. However, improper installation can void warranties and cause long-term damage. It’s essential to recognize the critical steps often missed by DIY projects, such as ensuring proper electrical connections or correct positioning for ventilation. For example, incorrect refrigerator placement can hamper cooling efficiency, as explained in [Proper Clearance Space for a Cold Refrigerator](https://discountappliancehub.com/the-critical-clearance-space-your-fridge-needs-to-stay-cold). Always consider consulting certified professionals, particularly for complex appliances.
What most people get wrong is the assumption that these services are interchangeable or simply a matter of convenience. In truth, each element—warranty, service speed, installation—has intricate details affecting durability, efficiency, and cost. For example, a poorly installed dishwasher can lead to leaks, which void the warranty and damage surrounding cabinets. It’s essential to understand these nuances to avoid pitfalls and ensure longevity.
Have you ever fallen into this trap? Let me know in the comments. Remember, being informed is your best defense against preventable appliance issues and unnecessary expenses.Maintaining your appliances over time requires more than just initial setup—it demands the right tools, a disciplined approach, and an eye for detail. Personally, I rely on a set of specific equipment that I’ve tested and trusted through years of DIY repairs and routine maintenance. Investing in quality tools not only saves me time but also ensures precision, reducing the risk of accidental damage. For example, a digital multimeter helps me accurately diagnose electrical issues, which is crucial when troubleshooting components like thermostats or motors. I prefer one with auto-ranging capability and data hold function, like the Fluke 117, because it provides quick and reliable readings without guesswork.
When dealing with mechanical parts, I use a section of rubberized gloves to grip slippery components and avoid slipping during delicate adjustments. A small magnetic screwdriver set keeps tiny screws accessible and prevents loss—a common hassle during disassembly. For more extensive repairs, I turn to a compact cordless impact driver; it’s perfect for removing stubborn screws or bolts without stripping them.
Software tools also play a vital role in my maintenance routine. I regularly update my diagnostic apps, like inverter testing utilities and appliance-specific troubleshooting guides, to stay ahead of evolving technology. These apps help me interpret error codes accurately, streamlining the repair process.
Prediction about the future points toward increased integration of smart diagnostics. Companies are developing apps that communicate directly with appliances, providing real-time health reports. Learning to interpret these signals now can save you costly callouts later.
For those wondering, “How do I maintain my appliances over time?” I recommend adopting a proactive approach: schedule regular inspections, keep detailed logs of repairs, and invest in quality tools tailored to your appliances. This not only extends their lifespan but helps you catch issues early before they escalate.
One advanced tip I advise is to set up a dedicated, clutter-free workspace stocked with your essential tools and spare parts. This dedicated zone simplifies routine checks and minor repairs, turning maintenance from a daunting task into a manageable routine.
Take, for example, your refrigerator. Ensuring proper temperature settings, checking seals periodically, and cleaning the condenser coils with a brush are simple steps but critical for efficiency, as detailed in [the best temperature settings for your fridge and freezer](https://discountappliancehub.com/the-best-temperature-settings-for-your-fridge-and-freezer). Consistency in maintenance habits, supported by reliable tools, prepares you for long-term appliance health.
In the near future, expect more appliances to come equipped with integrated diagnostic interfaces. Being familiar with software troubleshooting now will give you a competitive edge in maintaining these smart units. Begin by exploring appliance diagnostic apps and integrating basic testing tools into your routine—your appliances will thank you.
What I Wish I Knew Before Jumping Into Repairs
One of the most valuable lessons I learned is that not every squeak or glitch signals a costly fix—sometimes, a simple adjustment or routine check can prevent major expenses. Discovering this early saved me from unnecessary repairs and gave me confidence in handling minor issues myself.
Another insight was the importance of genuine replacement parts. Using high-quality, model-appropriate components ensures longevity and smooth operation. I once tried generic rollers, which wore out faster, leading to more noise and an eventual breakdown—lesson learned!
I’ve also realized that patience and careful documentation during disassembly safeguard against reassembling errors. Taking pictures, labeling screws, and keeping track of each step minimize frustration and accelerate the repair process. This approach transformed DIY fixes from daunting tasks into manageable projects.
Lastly, understanding your appliance’s quirks—like identifying unusual sounds or behaviors early—can prevent minor issues from escalating. Regular maintenance routines and keeping tools handy create a proactive approach that extends your appliances’ lifespan significantly.
Tools and Resources That Changed My Repair Game
- Fluke 117 Multimeter: Reliable for diagnosing electrical problems accurately, saving time and preventing guesswork. I trust it because of its durability and clarity.
- Magnetic Screwdriver Set: Essential for dealing with tiny screws in tight spaces, avoiding lost pieces and stripping heads. It’s a small investment with big benefits.
- Repair Apps and Guides: I use appliance-specific troubleshooting apps that help interpret error codes and recommend fixes. These resources keep me informed about evolving technology, making repairs more precise.
- Proper Maintenance Schedule: Following a routine, like cleaning condenser coils or checking door seals, prevents issues before they start. The resources at this guide have been invaluable for my refrigerator upkeep.
Your Next Move Starts Today
Taking control of your appliance maintenance empowers you to save money, extend your appliances’ lives, and gain confidence in DIY fixes. With the right knowledge, tools, and mindset, you can handle many common issues efficiently and confidently. Remember, every small repair is a step toward becoming more self-reliant and informed, transforming routine chores into opportunities for learning and growth.
What minor appliance fix have you tackled lately? Share your experiences below and inspire others to take charge of their home maintenance journey!