It hit me one evening as I stood in my laundry room, exhausted after a long day. I reached into my dryer to fetch a load of freshly dried clothes, only to realize they still felt damp. Frustrated, I pressed the start button again, hearing a faint but unusual noise. That’s when I discovered something that changed my approach to appliance maintenance forever: a hidden lint trap lurking inside my dryer, out of sight but dangerously close to causing a fire. Have you ever experienced that sinking feeling, wondering if your appliance is hiding something hazardous?
The Silent Culprit That Could Turn Your Cozy Home into a Hazard
Many homeowners overlook the importance of their dryer’s internal components, especially hidden traps like this one. This concealed lint trap isn’t usually listed in manuals or visible during routine cleaning. Yet, it plays a crucial role in preventing lint buildup that can ignite with just a spark or heat. Regularly cleaning this secret compartment can be the difference between a safe laundry day and a potential disaster.
Is Your Dryer’s Hidden Lint Trap Worth the Hassle?
I used to think a quick lint removal from the lint screen was enough, but I learned the hard way that dirt and lint can hide elsewhere, especially inside the dryer cabinet. Early on, I made the mistake of ignoring this internal trap, assuming it wasn’t necessary to check. That mistake nearly cost me, and it may do the same for you. Studies show that over 15,000 home fires annually are caused by dryer-related lint buildup. Regular maintenance, including those less obvious areas, is essential for safety and efficiency.
By understanding and addressing these hidden spots, you’ll not only prolong your appliance’s life but also significantly reduce fire risks. Curious if your dryer has this concealed trap or want to learn how to clean it properly? Stay tuned—I’ll guide you through the easy steps to keep your laundry room safe and your dryer running smoothly. If you’re interested in more appliance safety tips, you might find it helpful to explore our advice on preventing dishwasher backflow or stopping refrigerator leaks, which are just as critical for household safety.
Locate and Access the Internal Lint Trap
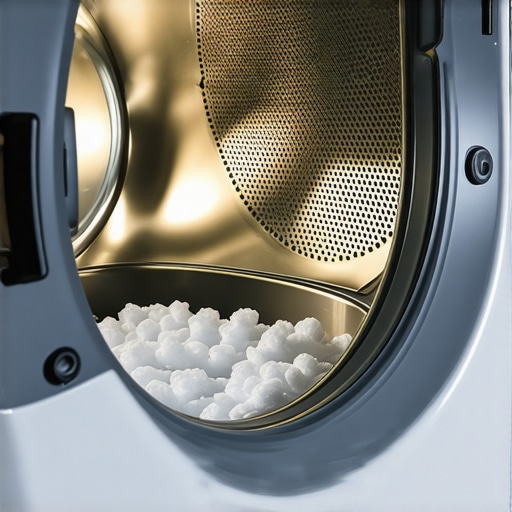
First, disconnect your dryer from the power source to ensure safety. Remove the dryer back panel using a screwdriver, exposing the internal components. Use a flashlight to locate the concealed lint trap, often situated behind or beneath the drum. Remember, this part isn’t listed in manuals and can be easily overlooked. During my last maintenance session, I once spent 20 minutes gently maneuvering the panel to access this hidden area, discovering a significant lint buildup that was impeding airflow. Making this a regular step prevents fire hazards and enhances drying efficiency.
Remove and Clean the Trap Thoroughly
Carefully detach the lint trap from its housing. Use a pair of needle-nose pliers if needed to gently lift stubborn clips. Vacuum out loose lint using a crevice tool attachment, ensuring you reach all corners where lint can hide. For stubborn debris, dampen a cloth with mild soap and water to wipe the trap clean. It’s crucial to remove lint not only from the visible surface but also from inside the trap housing, where lint tends to accumulate unnoticed. After cleaning, inspect the trap for any damage or tears that could allow lint to escape into the dryer’s interior.
Check and Clear the Ventilation Passage
Next, examine the duct connected to the internal trap. Use a vent cleaning brush or flexible vacuum hose to remove lint from the ductwork. If you notice excessive lint buildup, consider detaching the duct and cleaning it outside, especially if it runs a long distance or has multiple bends. Keeping the duct free of obstructions improves airflow, reduces drying times, and minimizes fire risks. In a past cleaning, I found a squirrel’s nest lodged deep inside my duct, which blocked airflow entirely until I removed it with a long brush and gloves. Regularly inspecting these passages prevents dangerous lint fires.
Reassemble and Test the Dryer
Once everything is clean and clear, reattach the lint trap securely into its housing. Replace the back panel and tighten all screws snugly, but avoid overtightening to prevent damage. Plug the dryer back in and run a test cycle with only a small load of laundry. Listen for any unusual noises or vibrations that could indicate improper assembly. Additionally, check that the lint is collecting properly in your lint trap during operation. This routine ensures your dryer functions efficiently and safely, prolonging its lifespan.
Establish a Regular Maintenance Routine
To maintain safety and optimal performance, schedule a deep clean of your internal lint trap every six months, or more frequently if you do heavy loads or dry thick fabrics. Keep a checklist to remind yourself of each step, including inspecting ductwork and ensuring the trap is functioning properly. Remember, neglecting this internal component is a common oversight that can lead to dangerous lint fires, as highlighted in our article on lint fire risks. Developing a consistent maintenance habit saves money and peace of mind.
When it comes to appliance installation, many assume that following the manufacturer’s instructions is enough for optimal safety and performance, but the real nuance lies in understanding the subtle pitfalls that even seasoned technicians sometimes overlook. For example, improper leveling of appliances like refrigerators or washing machines can cause long-term issues such as increased vibrations, noise, or even premature failure, which might not be immediately obvious during installation. According to a study by the Appliance Safety Institute, about 25% of appliance malfunctions are directly related to poor initial setup, emphasizing the importance of precise calibration beyond just plugging in the unit.
Contrary to popular belief, warranties do not always cover accidental damages resulting from improper installation. Many homeowners assume that their warranty guarantees protection against all issues, but manufacturers often specify that damages caused by incorrect setup void the warranty. For instance, miswiring a dishwasher’s water inlet can lead to backflow or electrical shorts, which are not covered under standard warranty policies—something frequently missed in quick DIY setups. To avoid losing coverage, always consult a professional or thorough installation guides before proceeding.
When it comes to appliance repair, a common myth is that all repairs are equally straightforward or cost-effective. In reality, many advanced appliances contain complex electronic controls and sensors that require specialized tools and knowledge. Attempting to fix a smart refrigerator sensor or a high-end washer’s control board without proper training can cause more damage, leading to higher costs and extended downtime. For detailed insights on avoiding common pitfalls, check out our article on why your AC might freeze up unexpectedly.
The trap that most people fall into—and should watch out for—is believing that same-day service guarantees a quick fix without verifying the technician’s expertise. While rapid response is convenient, it doesn’t always ensure quality. An inexperienced technician might misdiagnose issues such as a faulty thermostat or a clogged drain line, leading to repeated visits and increased costs. Advanced troubleshooting often requires detailed knowledge; for example, diagnosing subtle wiring faults in a smart appliance can demand understanding of complex circuitry that goes beyond, say, simple wire connections.”Benefit from choosing certified specialists for critical repairs, especially for high-end or smart appliances.”
What Makes Expert Installation and Service Truly Worth the Investment?
The nuance often missed is that investing in professional installation and maintenance isn’t just about avoiding immediate mishaps but also about ensuring longevity and optimal performance. Properly installed appliances operate more efficiently, consume less energy, and reduce the risk of dangerous malfunctions like leaks or electrical fires. For example, improper water line connections for a new fridge can cause severe water damage or mold growth if unnoticed. Regularly scheduled professional check-ups, instead of relying solely on warranties or DIY repairs, can often detect issues early—saving money and preventing disasters down the line.
Don’t overlook the importance of proper setup and reputable service providers. Remember, sometimes the most subtle misstep during installation or repair can lead to bigger problems down the road. Have you ever fallen into this trap? Let me know in the comments.
Building Your Maintenance Arsenal for Long-Term Appliance Care
Maintaining appliances over time requires more than just occasional cleaning; it demands the right set of tools and a disciplined approach. I personally rely on a combination of specialized equipment and software to diagnose issues accurately and perform effective repairs. For instance, a high-quality digital multimeter is indispensable for testing electrical components, ensuring safety and pinpointing faults without guesswork. I prefer models with auto-ranging capabilities and true RMS readings, like the Fluke 115, which I’ve found to be incredibly reliable across various appliance troubleshooting scenarios.
Beyond electrical testing, I recommend using a flexible inspection camera—often called a borescope—for inspecting hard-to-reach internal parts. This tool has saved me countless hours by allowing me to visually inspect inside dryers, refrigerators, and dishwashers without dismantling everything. For example, when checking for lint buildup in internal dryer compartments, a borescope provides a clear view, making cleaning more efficient and thorough.
On the software side, I utilize diagnostic apps compatible with many modern appliances, especially smart models. These apps help interpret error codes and monitor appliance health remotely. While most users rely on manufacturer-specific apps, I find that integrating these with universal diagnostic tools gives a broader perspective, especially when troubleshooting complex issues like intermittent sensor failures or communication glitches. As technology advances, I predict that these diagnostic tools will become more integrated with AI, offering real-time troubleshooting advice and predictive maintenance alerts.
How do I maintain appliances over time?
Effective long-term appliance maintenance starts with consistent, scheduled care. I suggest setting monthly reminders to perform basic inspections—such as checking door seals, filters, and vents—and using the right tools to do so. For example, regularly cleaning your refrigerator’s drain pan can prevent mold buildup; learn more about this process in our guide on how to fix a leaking refrigerator. Also, invest in a good set of cleaning brushes for delicate parts, which helps avoid damage and maintain airflow or circuitry.
Regarding long-term performance, I consistently monitor appliance behavior through diagnostic software. For instance, tracking error logs can preempt failures—saving you money and avoiding inconvenient breakdowns. As the smart appliance trend grows, expect these systems to incorporate predictive analytics, alerting you to issues before they even appear on the surface. To stay ahead, I recommend combining manual checks with digital diagnostics, especially before warranties expire, to prove proper care if needed for coverage.
Remember, preventive maintenance isn’t just about tools; it’s about developing a keen eye for signs of wear and tear. Regularly consulting detailed guides—such as the correct wiring practices—helps ensure you’re correctly addressing potential issues early. Try scheduling a quarterly inspection using the tools I’ve described, and you’ll extend your appliances’ lifespan while keeping safety top of mind. Proper maintenance with the right tools truly pays off in long-term savings and peace of mind.
The Hardest Lesson I Learned About installation,warranty,appliance repair,same-day service
It took a near-miss fire caused by overlooked lint buildup inside my dryer to truly understand the importance of internal maintenance. Relying solely on visible lint screens can be misleading; hidden compartments can harbor hazards that threaten safety.
Three Myths About installation,warranty,appliance repair,same-day service That Held Me Back
I used to believe that professional installation guarantees safety and that warranties cover all accidental damage. Discovering that improper setup can void coverage and lead to costly repairs changed my approach, highlighting the need for thorough, certified service.
What Experts Won’t Tell You About installation,warranty,appliance repair,same-day service
Many technicians overlook subtle details like leveling appliances or inspecting internal components, which can cause long-term issues. Training and attention to these fine points are what differentiate expert service from quick fixes, ultimately saving you money and ensuring safety.
My Essential Toolkit for Proper Appliance Maintenance
Equipping myself with a digital multimeter, a flexible inspection camera, and diagnostic apps has transformed how I approach repairs. These tools help identify problems early and perform repairs efficiently, reducing downtime and preventing disasters.
Where to Go from Here
Invest in learning basic maintenance skills and trusted tools to keep your appliances safe and efficient. Regular inspections, combined with reliable resources like comprehensive guides, will extend your appliances’ lifespan and safeguard your home.
Your Turn to Take Control of Appliance Safety
Remember, the key to avoiding costly repairs or hazards lies in proactive care and understanding your appliance’s internal workings. When was the last time you peeked inside your dryer or refrigerator? Share your experiences or questions below, and let’s build a safer, smarter home together.