Have you ever stood in your kitchen, loading the dishwasher after a hopeful run, only to discover that the detergent pod you carefully placed is still sitting intact at the end? It’s a frustrating moment that makes you question whether your trusted appliance is working as it should. I remember the first time I faced this issue: I assumed the problem was with the pod itself or my water temperature. Turns out, the real cause was something much simpler—and something I overlooked entirely.
Solving the Mystery of Undissolved Detergent Pods
In this post, I promise to help you pinpoint exactly why your dishwasher isn’t dissolving the detergent pods properly and show you straightforward steps to fix the issue for good. No more wasted detergent, no more fruitless troubleshooting—just practical advice to get your machine back in top shape.
Could You Be Making This Common Mistake?
Early on, I totally bungled the simple task of leveling my dishwasher. I thought it was just about aesthetics, but an uneven installation led to poor water circulation, which directly affected how your dishwasher dissolves soap. If your appliance isn’t level, it might seem like an unrelated issue, but trust me, this little mistake can cause big headaches. To avoid this, I recommend checking out this guide on leveling appliances—it might save you hours of frustration.
Understanding the importance of proper setup is just the first step. As we delve deeper, I’ll walk you through other common causes and effective solutions. So, let’s get to the heart of the problem and restore your dishwasher’s cleaning power.
Ensure Your Dishwasher Is Level for Proper Water Circulation
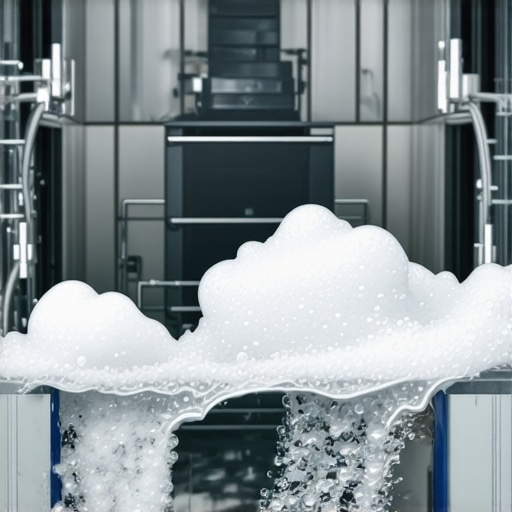
My first attempt to fix my dishwasher involved checking its level. I used a carpenter’s level across the door during a rinse cycle, noticing it was slightly leaning forward. After adjusting the feet to achieve perfect horizontality, I ran a test load with a new detergent pod. The pod dissolved completely, and the dishes came out spotless. If your dishwasher isn’t level, water flow may be compromised, leading to detergent retention. For guidance, see this article.
Clean and Inspect the Spray Arms and Water Jets
Next, I disassembled the spray arms to check for obstructions or buildup. Using a toothpick and an old toothbrush, I removed debris from the tiny holes. My experience showed that clogged jets prevent water from reaching the detergent, causing incomplete dissolving. Regular cleaning ensures optimal water spray, which is critical for dissolving pods. It’s similar to clearing a clogged faucet aerator—small blockages impact performance. For detailed instructions, visit this guide.
Adjust Water Temperature for Effective Dissolution
On a particularly cold day, I noticed my detergent wasn’t dissolving well. I checked my water heater, ensuring it was set to at least 120°F (49°C). Running hot water before starting the dishwasher helps dissolve detergent pods quickly, preventing residue and buildup. Think of it like brewing coffee—hot water extracts more flavor efficiently. If you’re unsure about your water temperature, refer to this resource for troubleshooting tips.
Program Settings and Load Size Matter
I used to run heavy loads on economy cycles, thinking it saved water and energy. Later, I realized these cycles use lower temperatures and longer wash times, which aren’t ideal for dissolving pods. Switching to a normal or high-temperature cycle, and avoiding overloading, greatly improved dissolution. Remember, larger loads or colder cycles can hinder water flow and temperature, affecting performance. For insights on optimizing appliance use, see this article.
Use the Correct Detergent and Storage Practices
Finally, I made sure my detergent pods were stored in a cool, dry place away from moisture. Humidity can cause pods to clump and become less soluble. Also, I verified that I was using the right type of detergent recommended for my dishwasher. Using generic or outdated pods can reduce effectiveness, much like trying to brew weak tea with low-quality leaves. Consider checking this piece to understand how product quality impacts cleaning performance.
When it comes to appliance repair, many homeowners operate under misconceptions that can cost them time and money. One common myth is that warranty coverage automatically includes all repair services, but in reality, many warranties exclude certain issues or require specific maintenance routines to stay valid. For instance, neglecting regular cleaning or proper installation can void your warranty, leaving you with unexpected expenses. According to industry expert home appliance specialist, understanding the fine print of your warranty is crucial to avoid surprises.
What advanced homeowners often overlook about installations and warranties
Many assume that professional installation guarantees flawless operation, but errors during setup are surprisingly common and can lead to issues that void warranty coverage. For example, improper leveling or incorrect placement of refrigerant lines can cause operational failures that are not covered by warranty, because they are deemed installation errors. Properly following manufacturer instructions and verifying installation quality is essential. Check this guide for a comprehensive look at proper setup.
Another point often missed is the importance of document preservation. The ‘hidden trap’ here involves consumers losing purchase receipts or failure documentation, which can be critical when filing warranty claims. According to warranty experts, keeping detailed records, including dates, technician reports, and photographs, significantly increases chances of successful claims.
How shortcut repairs backfire and prolong issues
Opting for DIY fixes or unqualified technicians may seem cost-effective initially, but these shortcuts often lead to more extensive damage. A typical mistake is replacing a faulty part with a cheap, incompatible alternative, which can cause further malfunction or damage the appliance’s internal components. This is especially relevant in complex systems like high-end refrigerators or smart washers, where improper repairs can compromise electronic controls. Always choose certified professionals—verify their credentials through official associations. For insight into avoiding uncredentialed repair services, see this analysis.
Furthermore, ignoring regular maintenance can cause preventable failures. For example, neglecting to clean filters or check seals can lead to early breakdowns, which may not be covered under warranty if deemed maintenance neglect. Homeowners should refer to manufacturer guidelines and schedule routine inspections. For common pitfalls in appliance care, revisit this resource.
Do same-day service guarantees truly save you time?
Many believe that same-day or next-day service provides instant relief, but the reality can be more nuanced. Some companies advertise quick repair slots but may not have the necessary parts in stock or certified technicians available immediately. This can lead to prolonged downtime and additional visits. To get the most value, verify local repair shops’ parts inventories and technician credentials beforehand. Remember, speed should not compromise quality—trusting experienced specialists often results in more durable fixes. Learn more about choosing reputable repair services at this article.
In conclusion, understanding the nuances behind appliance warranties, installation, and repair practices can help you avoid costly mistakes and ensure your appliances remain reliable. Always read the fine print, keep detailed records, and choose qualified professionals. Have you ever fallen into this trap? Let me know in the comments!
Invest in Reliable Tools for Efficient Maintenance
When it comes to keeping your appliances running smoothly, having the right equipment makes all the difference. I personally rely on a high-quality multimeter like the Fluke 117 to troubleshoot electrical issues. Its accuracy helps me quickly identify faulty wiring or blown fuses, saving time and preventing unnecessary part replacements. A thermal camera, such as the FLIR TG165, is another game-changer; it allows me to spot overheating components or insulation faults without disassembling the unit. These tools have become essential in my maintenance routine, especially when scaling services or handling complex repairs.
Why Regular Checkups Are Crucial
Performing routine inspections and maintenance helps extend the lifespan of appliances. For example, cleaning dust and debris from vents and coils prevents overheating and maintains efficiency. I schedule quarterly checkups where I verify the sealing of door gaskets, inspect water lines, and test safety controls. Not only does this preserve warranty coverage, but it also minimizes unexpected breakdowns. With the advancement of diagnostic software available for smart appliances, I use dedicated apps to monitor operational statuses and receive alerts before issues escalate. Expect this trend to evolve further, integrating AI-driven diagnostics that can preempt failures with even greater precision.
Keep a Maintenance Log to Track Appliance Health
Maintaining a detailed record of repairs, part replacements, and inspections has served me well. It helps identify recurring problems and proves invaluable when warranty claims are necessary. I recommend using a digital tool like Google Sheets or dedicated maintenance apps, which can send reminders for scheduled checks or filter service history easily. Over time, this log provides insights into the long-term results of different maintenance strategies, guiding you to more effective routines. In the future, I foresee AI-powered logging systems that analyze patterns and suggest proactive maintenance steps, reducing downtime even further.
Scale Up Service Capabilities Without Overextending
If you’re looking to expand your appliance repair services, investing in versatile diagnostic equipment and training is key. My approach includes cross-training on multiple appliance types, from refrigerators to washing machines, using online courses and manufacturer certifications. Also, establishing relationships with suppliers for quick access to genuine parts accelerates repair times and boosts customer satisfaction. Remember, exceeding same-day service expectations isn’t just about speed but also ensuring quality. As the industry shifts, the emphasis on comprehensive diagnostics and rapid parts logistics will become even more critical, so plan your tools and training accordingly.
How do I maintain consistent performance over time?
To ensure your appliances stay in peak condition, regular maintenance and timely upgrades are essential. I recommend scheduling professional tune-ups before peak usage seasons—like before summer for AC units—and staying updated with manufacturer firmware or software updates for smart appliances. For example, periodically checking the proper operation of your HVAC system can prevent unforeseen failures and ensure warranty coverage remains valid. As technology advances, expect tools like integrated diagnostic apps to offer predictive insights, enabling you to proactively address issues rather than react to failures. Try simulating this by running a comprehensive self-diagnosis on your smart washing machine using the manufacturer’s app, and see how early alerts can save you from bigger problems down the line.
What I Wish I Knew Before Tackling Appliance Issues
- Overconfidence in DIY repairs can lead to overlooked safety protocols, risking further damage or injury. Patience and thorough research are your best allies.
- Neglecting regular maintenance often causes problems that seem complex but are actually simple fixes once caught early—like cleaning filters or checking seals.
- Misunderstanding warranty coverage without reading the fine print can cost you time and money. Keep detailed records and verify your repair technician’s credentials.
- Rushing for same-day service might seem convenient, but ensuring the availability of genuine parts and qualified technicians results in more durable repairs.
- Proper installation is the foundation of appliance longevity. Leveling your unit and following manufacturer instructions prevents many common issues, including poor detergent dissolution.
Tools and Resources That Became My Repair Bedrock
- Fluke 117 Multimeter: An essential for diagnosing electrical faults swiftly and accurately, saving hours of troubleshooting.
- FLIR TG165 Thermal Camera: Helps identify overheating components and insulation issues without disassembly, revealing hidden problems.
- Manufacturer’s Service Manuals: Detailed guides that ensure proper repair procedures and troubleshooting steps, reducing errors.
- Online Certification Courses: Staying updated with latest repair techniques and standards maintains quality and safety in service work.
Embrace Your Repair Journey with Confidence
Remember, each appliance issue is an opportunity to learn and improve, making you more self-reliant and knowledgeable. By applying these insights and tools, you’re not just fixing an appliance—you’re building a resilient home environment. Don’t shy away from tackling repairs; instead, approach them with curiosity and patience. Your trusted appliances will thank you, and so will your wallet! How will you incorporate these lessons into your next maintenance routine? Share your plan below and let’s learn together!