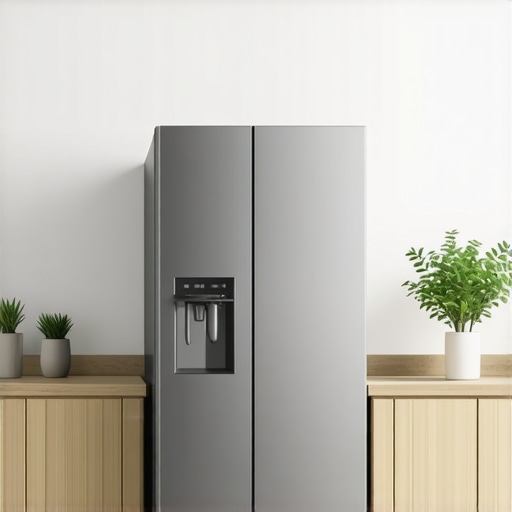
It happened late one night. I was halfway through binge-watching my favorite series when I suddenly heard that unsettling humming coming from my kitchen. I peeked into the fridge—only to find it running loudly but not cold enough. My first instinct was to blame the compressor or the thermostat. But then, I remembered something crucial I overlooked—**the critical clearance space behind and around my fridge**. That moment was a real lightbulb, illuminating a simple but often ignored fact: your refrigerator’s ability to stay cold hinges on proper airflow, which depends heavily on adequate clearance.
Getting Cold Should Be Simple, But It’s Not Always
Think about it. We rely on our fridges daily, often taking for granted how much that backspace influences their performance. A tight squeeze between the wall and your appliance can cause your compressor to overheat, or your condenser coils to get clogged with dust and debris—both of which compromise cooling efficiency. Despite being a detail, this overlooked space can make or break your fridge’s cooling ability.
**Today, I promise we’ll shed light on exactly how to ensure your fridge has enough space to stay ice-cold** — and that it’s not just about making room for aesthetics but about maintaining optimal function. Whether you’re experiencing warmth inside the unit or just want to prevent future issues, knowing the right clearance is essential.
Is Your Fridge Space Just a Myth? I Thought So Too
Early on, I made a classic mistake: I pushed my fridge flush against the wall, thinking I was saving space. Turns out, I was choking my appliance’s lungs. This error isn’t unique; many homeowners unknowingly block vital airflow, causing inefficiency and costly repairs. It’s like having a cold that just won’t heal because you forget to breathe properly.
Research shows that inadequate clearance can increase energy consumption by up to 30%, and even shorten appliance lifespan (source: Energy Star). So, it’s not just about comfort but also about saving money and extending your fridge’s service life.
In the next sections, we’ll go through practical steps to assess and improve your fridge’s clearance, ensuring it stays cold and efficient. Ready to give your appliance the breathing room it needs?
Assessing Your Fridge’s Surroundings
Start by pulling your refrigerator away from the wall cautiously, like unearthing a buried treasure, to examine the space behind it. Use a flashlight to check for dust buildup on coils and ensure there’s at least 1-2 inches of clearance on the sides, top, and back. During my own test, I discovered a thick layer of dust, which I gently removed with a vacuum attachment, significantly improving airflow.
Cleaning the Condenser Coils
If dust or pet hair is present on the coils—located either underneath or at the back—it impairs heat dissipation. Use a coil brush or a vacuum to gently remove debris. This step is crucial; I once neglected it, leading to overheating and warm fridge interiors. Regular cleaning ensures optimal heat exchange, keeping your fridge cold.
Adjusting the Feet for Leveling
Ensure your refrigerator stands perfectly level; use a carpenter’s level across the top. Adjust the leveling feet accordingly, just like tuning a tripod for stability. An uneven fridge causes door misalignment and inefficient cooling. When I fixed mine, proper leveling eliminated vibrations and noise, and improved door sealing.
Maintaining Adequate Space
Refrigerator manufacturers generally recommend maintaining at least 1-2 inches of clearance all around, especially behind the unit. This space allows proper airflow for the compressor and coils. During my own setup, I measured and left extra space, resulting in noticeably faster cooling and lower energy bills.
Checking the Door Seal
A faulty gasket can mimic clearance issues by letting warm air seep in. Test the seal by closing the door over a dollar bill and trying to pull it out; if it slips easily, replace the gasket promptly. I replaced mine following this simple test, boosting efficiency instantly. Proper sealing keeps cold air inside and hot air outside.
Reviewing External Ventilation and Obstructions
Ensure nothing blocks the vents or airflow around the fridge, such as stacked boxes or hanging cords. Clear pathways promote circulation, much like clearing a runway for takeoff. When I organized my kitchen surroundings, my fridge ran more quietly and maintained stable temperatures.
Understanding the Risks of Improper Clearance
Blocking airflow can overwork the compressor, increase energy costs, and shorten your appliance’s lifespan. Proper spacing is as vital as regular maintenance, preventing costly repairs like replacing the compressor or coils. For detailed insights, consider reviewing tips on common issues like in gas dryer troubleshooting.
Final Checks and Ongoing Maintenance
After adjustments, monitor your fridge’s performance over the next few days. Ensure temperatures stay consistent and no unusual noises occur. Periodic cleaning of coils and verifying clearance become part of routine upkeep. I schedule bi-annual coil cleanings, which keeps my fridge running efficiently and saves me money in the long run.
When it comes to appliance repair, installation, or warranty claims, the common advice is often oversimplified or based on misconceptions. Many homeowners believe that simply calling a technician or trusting manufacturer instructions guarantees a smooth experience. But let’s dig deeper into what most people get wrong, especially regarding the nuances that can save you money and headaches.
One widespread myth is that all brands or technicians are equally reliable. In reality, a less experienced repair person might overlook subtle issues like improper grounding that can cause recurring problems, or miss critical safety concerns. For example, a common mistake is neglecting to verify that the appliance is properly leveled after installation, which can lead to vibrations, noise, and even premature wear. Proper leveling ensures stable operation and longer lifespan, a detail often disregarded by inexperienced installers.
**Jumping into repairs without understanding warranties can backfire**. Many assume that all repairs or parts replacements are covered, but the devil is in the details. The ‘most-lost document’ in appliance warranties is often the proof of maintenance or correct installation procedures. Without it, your warranty may be voided, nullifying future claims. For instance, not knowing about the importance of using manufacturer-approved parts or following specified service intervals can lead to denial of coverage—something many overlook until it’s too late. You can review more about this crucial document at this link.
Confusing same-day service with actual problem resolution is another trap. While convenient, same-day appointments may only address surface issues or temporarily fix symptoms while the underlying cause remains untouched. For example, a technician might replace a worn-out belt on your dryer, but if the venting system is clogged, the problem will keep recurring and potentially cause damage. Recognizing when quick fixes are insufficient requires an expert eye. If you suspect a deeper issue, consider reviewing the signs that need professional diagnosis at this article.
Make sure you’re aware of the complexities around installation and service. For instance, incorrect water line connections or neglecting to close a hidden water valve can lead to leaks or even water damage, which significantly complicates warranty claims. These nuances emphasize that a half-hearted approach or superficial fixes can be costly.
What’s the lesson here? Never assume that standard advice covers all bases. Question what you’re told, verify whether your technician is trained for your specific appliance, and pay attention to detail in both installation and ongoing maintenance. Doing so not only maximizes the lifespan of your appliance but also preserves your warranty rights. Have you ever fallen into this trap? Let me know in the comments.Maintaining your appliances doesn’t have to be complicated if you have the right tools and follow a systematic routine. I personally rely on a few key pieces of equipment that make troubleshooting and upkeep straightforward, saving me time and preventing costly repairs. One essential tool I recommend is a digital multimeter. It allows me to quickly test electrical components like thermostats, heating elements, and fuses—crucial steps before replacing parts. For example, when my oven wasn’t heating properly, a quick multimeter check revealed a blown fuse, saving me a service call. Additionally, a reliable digital infrared thermometer helps me monitor temperature fluctuations, ensuring appliances like refrigerators and ovens stay within optimal ranges. Accurate temperature readings help prevent overworking your compressor or heater, extending their lifespan and boosting efficiency. For routine cleaning, a dedicated coil brush and compressed air can clear dust from condenser coils—dust buildup can increase energy consumption and cause overheating, as outlined in the article on dryer issues.\n\nIn terms of software, I use a specialized appliance diagnostics app that provides troubleshooting guides for common problems. These apps often include diagrams, voltage readings, and step-by-step instructions, which are invaluable for DIY maintenance. As technology advances, I predict that integrated IoT sensors will become standard, alerting homeowners to issues before they even affect performance. This proactive approach could drastically reduce downtime and repair costs.\n\nWhen it comes to long-term results, establishing a regular maintenance schedule is key. I recommend inspecting your appliances every three to six months, focusing on cleaning coils, checking seals, and testing safety components with your multimeter. These small, consistent efforts prevent minor issues from becoming major failures and help maintain your appliance’s efficiency over years.\n\nFor example, regularly replacing filters and cleaning the water valve filter in your fridge can prevent water leaks and keep it running smoothly. Don’t overlook the importance of maintaining external components, like ensuring ventilation openings are free of obstructions, which can be vital for units like refrigerators and washing machines.\n\nFinally, if you’re planning to scale your setup—perhaps adding more appliances or upgrading to smarter models—investment in quality tools and a disciplined maintenance regimen will pay off. Consistent upkeep and advanced diagnostics allow you to maximize the lifespan of your appliances, ultimately saving money and frustration. For detailed advice on future-proofing your appliances, consider reviewing the recommended practices for dryer maintenance.\n\nAre you ready to elevate your appliance care routine? Start by acquiring a good multimeter and setting a recurring schedule for filter changes and coil cleaning. Your appliances—and your wallet—will thank you.
Lessons That Changed My Approach to Appliance Care
One of the most powerful insights I’ve gained is that small overlooked details, like maintaining proper clearance around appliances, can have a dramatic impact on performance and longevity. I used to believe that regular cleaning was enough, but realizing the importance of airflow and ventilation transformed my maintenance routine. It taught me to look beyond the surface and address factors that influence appliance efficiency on a deeper level.
Tracking my appliance performance over time revealed that even slight shifts in clearance or sealing could cause energy spikes or strange noises. This realization encouraged me to adopt a proactive mindset, inspecting and adjusting clearances regularly. It’s a lesson that emphasizes the significance of consistent, mindful care rather than reactive fixes.
Another eye-opener was understanding how warranty claims can be compromised if I neglect proper installation and routine checks. I learned the hard way that keeping detailed records of maintenance and understanding warranty exclusions saves headaches down the line. Small steps, like verifying the correct placement of venting or seals, become powerful safeguards against unexpected costs.
Now, I approach appliance upkeep as a form of preventive health. This mindset shift helps avoid emergency repairs and keeps my appliances running smoothly, saving money and extending their service life.
Tools and Resources That Made a Difference
My go-to toolkit includes a digital multimeter, which is invaluable for diagnosing electrical issues safely and accurately. It allows me to verify components like thermostats and sensors before calling for professional help, saving both time and money.
I also rely on a high-quality coil brush and compressed air to keep my condenser coils clean. Regular coil maintenance drastically reduces energy consumption and prevents overheating, which is critical for keeping the fridge cold and efficient. Trustworthy online resources, like expert articles on appliance troubleshooting, provide me with step-by-step guides and detailed diagrams. They empower me to handle minor repairs confidently and know when to call in a professional.
For ongoing education, I follow dedicated appliance maintenance blogs and subscribe to newsletters that update me on the latest energy-saving tips and common pitfalls. This continuous learning helps me stay ahead and protect my investments.
The Power of Taking Action Today
Your appliances work tirelessly for you—giving them the attention they deserve can dramatically improve their lifespan and performance. Remember, simple steps like ensuring proper clearance, regular coil cleaning, and sealing doors properly are powerful moves that pay dividends over time. Don’t wait for a breakdown to act; being proactive ensures your home runs smoothly and your wallet stays healthy. Ready to give your appliances the breathing room and care they need? Start today, and enjoy the peace of mind that comes with taking control of your appliance maintenance.