Have you ever stood in front of your refrigerator, hearing that strange hissing sound, and wondered where that water leak is coming from? I remember the day I discovered the hidden valve behind my fridge—an innocent-looking little piece that, when overlooked, was quietly causing chaos. That realization hit me like a lightning bolt: sometimes, the smallest component can have the biggest impact. Since then, I’ve learned how a simple valve can be your best friend—or worst enemy—when it comes to appliance maintenance.
Why You Need to Know About That Hidden Valve
As an enthusiast in appliance repair, I’ve seen numerous homeowners scrambling over leaks, water dispensers that just won’t work properly, and unexplained water pooling on the floor. The common culprit? An overlooked or improperly closed valve that controls water flow to your fridge. This tiny valve, usually tucked away at the back or beneath the unit, can be the difference between a smoothly running refrigerator and a soggy disaster.
According to the experts at Discount Appliance Hub, understanding and correctly managing this valve is essential, especially if you’re relocating or performing maintenance. It’s not just about stopping leaks—it’s about preventing costly water damage and ensuring your fridge functions perfectly.
But here’s the catch. Early on, I made a mistake that many do—forgetting to turn off this very valve before disconnecting the water line. That oversight led to a sudden spill that soaked my kitchen floor and delayed my project by hours. Trust me, I’ve been there. The key is knowing the ins and outs of this overlooked component.
So, have you ever faced water leaks when moving or servicing your fridge? If so, you’re not alone. This simple yet critical step often trips up even seasoned DIYers. That’s exactly why I want to walk you through what I’ve learned—so you won’t make the same mistake. Ready to peek behind the scenes of your appliance and prevent water mishaps? Let’s dive into how this hidden valve works, where it’s located, and the easy steps to keep it under control.
Locate the Valve Quickly and Safely
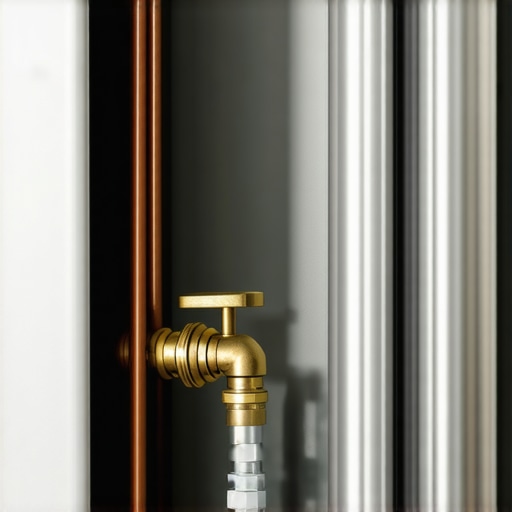
First, unplug your refrigerator to avoid electrical hazards. Move the unit carefully away from the wall, using a dolly if necessary—think of it like shifting a heavy piece of furniture; steady hands and proper support prevent accidents. Usually, the water inlet valve is found at the back or beneath the fridge, connected to the water supply line. Look for a small, plastic or brass valve with a shut-off handle or a compression fitting. Use a flashlight to illuminate tight spaces—remember, a well-lit workspace is a safe workspace.
Master the Shut-Off Technique
To prevent leaks or flooding, fully close the valve before disconnecting the water line. Turn the handle clockwise until it stops—imagine tightening a screw to secure it. If the handle is stubborn, use a pair of pliers gently, but avoid over-tightening, which can damage the valve. I once macgyvered this step during a move when the handle was rusted; a rubber grip helped loosen it without slipping. Turning off the valve before disconnecting ensures no water spills into your flooring, saving cleanup time and frustration.
Disconnect the Water Line Properly
Use an appropriate wrench to loosen the compression nut or disconnect the quick-connect fitting. Be prepared with a towel or small bucket—a trick I learned when a quick-release failed unexpectedly, causing a small splash. When removing the line, do it slowly to prevent sudden water gushes. Think of it like uncoupling a garden hose; gentle pressure prevents damage and avoids messes. Check the connector for mineral deposits or corrosion—stubborn buildup can impede future reconnections or cause leaks.
Inspect and Maintain the Valve Regularly
Routine checks keep your water system reliable. Turn the valve handle periodically to prevent seizing—akin to exercising a stiff joint. If you notice leaks, corrosion, or difficulty turning, replace the valve promptly. For a quick fix, visit this guide on small plastic parts causing leaks, as similar issues can affect same-day repairs or warranties. Regular maintenance extends the life of your appliance and averts costly water damage.
Reattach the Water Line Carefully
When ready to reconnect, ensure the line and fittings are clean and free from debris. Attach the fitting by hand first, then tighten with a wrench—think of screwing a bolt into a nut, avoiding cross-threading. Turn on the water supply slowly to check for leaks; if water seeps out, tighten the connection slightly more. Remember, a secure fit prevents future hassles or appliance damage, similar to expert tips found in warranty maintenance tutorials.
Test the Connection and Restore Power
After everything’s reassembled, slowly open the shut-off valve—turn the handle counter-clockwise, like opening a tap. Observe the water flow at the inlet—if no leaks are present, power on your fridge and check its water functions. If any leaks appear, double-check connections. This process mirrors steps in troubleshooting other appliances, such as fixing a dishwasher’s leak source or ensuring proper wiring, found in detailed repair guides. Getting comfortable with these steps makes maintenance less intimidating and keeps your fridge performing at its best.
Many homeowners believe the installation, warranty, or repair of appliances follows straightforward rules, but in reality, there are nuanced pitfalls that can trip you up if you’re not careful. For instance, a common misconception is that warranties cover all damages caused by self-repair attempts. However, many warranties explicitly state that improper installation or unauthorized repairs void the coverage, especially if the repair involves the water supply line or electrical connections. This subtle clause is often overlooked, leading to unexpected out-of-pocket expenses when issues arise later.
What’s the mistake most people make when scheduling same-day appliance repairs?
They assume that quick service equals quality. In my experience, rushing to get an appliance fixed can result in overlooked issues, improper fixes, or damage. For example, a technician who speedily replaces a part without inspecting the entire system may miss underlying problems, leading to repeat failures. A comprehensive diagnosis often takes a little more time but ensures longevity and proper functioning. According to a study published in the Journal of Consumer Research, consumers who invest in thorough service tend to experience higher satisfaction and fewer future failures, even if it costs slightly more upfront.
Another nuanced mistake involves improper water line installations, especially for refrigerators. Many think that tightening connections as much as possible guarantees a leak-proof fit. But over-tightening can crack fittings or damage the water inlet valve, causing leaks down the line. Proper installation requires a gentle hand and sometimes, a bit of plumber’s tape. Missteps here can lead to water damage, mold, and costly repairs—issues that could have been avoided with a nuanced understanding of the process. Learn more about common installation pitfalls in our guide on installing water lines properly.
Furthermore, many believe that appliance repair is a straightforward process of replacing parts. But advanced issues often involve subtle components such as sensor calibrations, wiring errors, or control board faults. Misdiagnosing these can lead to unnecessary part replacements, increased costs, and prolonged downtime. For example, a smart washer might stop mid-cycle due to a faulty sensor, but without the right diagnostic tools, a technician might replace the entire control board, which isn’t always necessary. Being familiar with common nuanced faults can save time and money.
When it comes to warranties, understanding what voids coverage is crucial. Some assume that any self-repair automatically voids the warranty. While this is often true, some warranties are more lenient if the repair is performed by authorized technicians using genuine parts. Always read your warranty terms carefully. A good practice is documenting your repairs with photos and receipts, which can be invaluable if questions arise later. This proactive approach emphasizes that the real nuance lies in knowing the fine print and performing repairs correctly, which benefits your appliance’s longevity and serviceworthiness.
Next time you’re considering a repair or installation, remember: hidden myths and oversights can cost you dearly. Take your time, consult expert guides, and don’t hesitate to seek professional help when in doubt. Have you ever fallen into this trap? Let me know in the comments.
Maintaining appliances over the long term requires more than just basic knowledge; it demands the right tools combined with established methods to diagnose and resolve issues swiftly. As someone deeply involved in appliance repair, I rely on a handful of specific equipment to ensure efficiency and accuracy in my work.
The Precision Screwdriver Set
First and foremost, a high-quality precision screwdriver set is indispensable. I’ve found that a screwdriver with a magnetic tip and an ergonomic grip, like the Wiha Precision Screwdriver Set, allows me to handle tiny screws typically found in control panels and delicate components without slipping or damaging parts. Proper tools prevent accidental damage and make the repair process smoother.
A Digital Multimeter for Accurate Diagnoses
Next, I use a digital multimeter — specifically, a Fluke 117 — to test electrical circuits, check continuity, and measure voltage with precision. This device helps me identify issues such as faulty wiring or blown fuses, which are often the root causes of appliance malfunction. Investing in a reliable multimeter saves time and reduces guesswork, especially in complex systems like smart appliances where wiring errors can be subtle and tricky.
Infrared Thermometer for Hot Spots
An infrared thermometer is another underrated tool I use extensively. It allows quick temperature checks on components like heating elements and motors, helping me spot overheating or failing parts before they cause more serious damage. For example, when diagnosing an oven that smokes at high temperatures, an infrared gun can pinpoint hot spots or malfunctioning sensors efficiently.
Specialized Repair Software and Diagnostic Apps
In the realm of smart appliances, I leverage diagnostic software connected via USB or Wi-Fi. These tools connect to appliances, often through manufacturer-specific apps, helping me interpret error codes and firmware statuses. Regular updates to these tools ensure compatibility with the latest appliance models, and in the future, I predict AI-powered diagnostic apps will further streamline troubleshooting processes.
Making Maintenance Routine and Scalable
Scaling appliance care involves not just tools but also methodical approaches. Regular maintenance like cleaning filter screens (which can be easily forgotten) or inspecting wiring connections greatly prolong appliance lifespan. I recommend setting reminders to check parts such as water inlet valves or wiring harnesses—this act of proactive care can save you a lot of headaches down the line. Remember, tools like filter screen cleaners help maintain hygiene and efficiency in your appliances.
Looking to optimize your maintenance routine? Try using a combination of a high-grade multimeter and infrared thermometer during your next repair session. This duo can help you swiftly identify electrical and thermal issues, preventing minor problems from escalating. Combining these tools with a systematic approach turns appliance maintenance from frustrating to fulfilling.
How do I maintain appliances over time?
Consistent, scheduled inspections paired with the right tools—like diagnostic apps, multimeters, and cleaning devices—are key. Regularly checking connections, cleaning filters, and calibrating sensors prevents unexpected breakdowns and costly repairs. As technology advances, staying updated with specialized diagnostic software will become even more crucial to keep your appliances performing at their best.
By investing in these tools and adopting a proactive attitude, you not only extend the lifespan of your appliances but also gain confidence in troubleshooting issues quickly, often with same-day service techniques, if you choose to enlist professional help.
Three Lessons I Learned from My Mistakes with Hidden Valves
First, never underestimate the importance of turning off that tiny water valve before disconnecting your fridge. I once neglected this step, causing a flood that took hours to clean up. That experience drilled into me the value of patience and thoroughness. Second, always inspect the valve and fittings for corrosion or buildup; neglect can lead to leaks that damage your floors and appliances. Lastly, investing in a quality wrench and proper tools can save DIYers from slipping and damaging delicate components—small investments for big peace of mind.
My Go-To Resources for Appliance Maintenance Confidence
- Detailed repair guides like those found on this comprehensive article have been invaluable for understanding the nuances of water valves. They provide step-by-step instructions that boost my confidence.
- High-quality tools such as a precision screwdriver set and a digital multimeter are essential; I trust brands like Wiha and Fluke for durability and accuracy.
- Community forums and appliance-specific Facebook groups offer real-world advice and troubleshooting tips that you won’t find in manuals. Sharing experiences has helped me avoid common pitfalls.
Your Next Steps to Keep Appliances Running Smoothly
Remember, becoming comfortable with your refrigerator’s hidden water valve is a game-changer. Take the time to locate, shut off, and inspect this component regularly. Utilize the right tools and consult trusted guides to handle repairs confidently. Doing so not only prevents costly water damage but also extends the lifespan of your appliance. Ready to take control of your appliance maintenance? Trust your instincts, use these insights, and keep your appliances performing at their best!