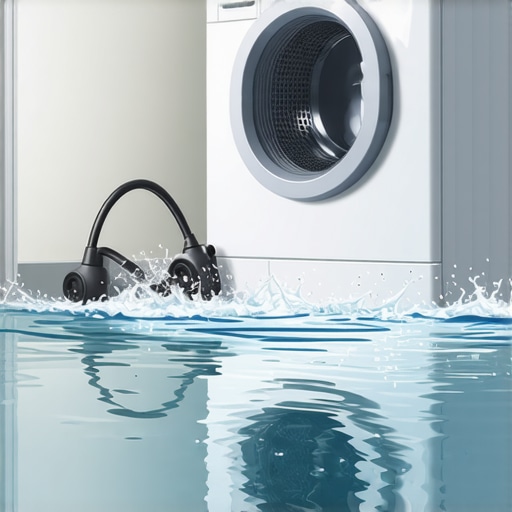
Picture this: I was laundry room deep in my weekend chores when I noticed water pooling on the floor. Panic set in. Turns out, a mistake I made during the drain pump installation had caused a flood that soaked not just my laundry essentials but also a hefty chunk of my basement. That lightbulb moment made me realize – a small oversight in appliance setup can turn into a big disaster fast.
Why One Simple Mistake Can Turn Your Laundry Area Into a Mini Waterpark
Over the years, I’ve learned that the devil is in the details when it comes to appliance repairs and installations. For many homeowners, the drain pump feels like just another part to replace or fix. But trust me, a tiny misstep here can lead to catastrophic flooding. The good news? Once I pinpointed what went wrong, I was able to prevent future chaos—and I want to share that insight with you.
Is It Really Worth Worrying About a Drain Pump Mistake?
Good question. Early on, I thought errors were minor and repair was straightforward. I learned the hard way that neglecting proper installation or maintenance can cause leaks, water damage, and even mold growth. In fact, according to experts, improper drain pump setup is one of the leading causes of laundry room flooding incidents (https://discountappliancehub.com/why-your-washing-machine-wont-drain-the-penny-in-the-pump). Now I double-check every step—because a small mistake can cost a lot more than a simple repair.
Have you ever faced a similar mishap? That sinking feeling of water where it shouldn’t be? If so, stick around. In the upcoming sections, I’ll walk you through the common pitfalls, how to avoid them, and what practical steps you can take to keep your laundry room dry and safe. It’s all about turning knowledge into protection for your home—and peace of mind.
,
Ensure Proper Connection of the Drain Hose
When I replaced my washer’s drain pump, I made the rookie mistake of not securing the drain hose tightly. The next day, water started leaking from the connection, causing a minor flood. To prevent this, always double-check that the drain hose is firmly clamped and correctly positioned. Use high-quality hose clamps and ensure they’re tight enough to prevent leaks but not so tight as to damage the hose. This step is critical because a loose connection can cause water to escape during operation, leading to potential flooding.
Verify Correct Pump Alignment and Orientation
During my repair, I discovered that installing the pump upside down caused the impeller to malfunction, resulting in poor drainage and leaks. Always follow the manufacturer’s instructions precisely, paying attention to the pump’s orientation. Especially for models where the pump’s position affects seal integrity, proper alignment ensures no gaps for water to escape. Think of it like aligning gears in a machine — if they’re out of sync, the whole system suffers. Take a moment to align components carefully before tightening mountings.
Test the Pump for Leaks Before Final Assembly
After installing the pump, I turned on the washer to test for leaks. This step is vital; don’t skip it. Run an empty cycle and observe connections closely. If you spot any drips, turn off the power immediately, and reseat fittings. This practice helps catch issues early, saving you a mess and costly water damage down the line. Use a flashlight and a towel to assist in spotting even minor leaks during the test.
Use the Right Replacement Parts and Sealants
In my case, using generic replacement pumps led to early seal failure. Always opt for OEM (original equipment manufacturer) parts compatible with your appliance. If sealing is required, apply high-quality waterproof sealant recommended by the manufacturer. This resembles using the right glue for woodworking; subpar materials compromise the entire repair. Proper parts and sealants guarantee a watertight assembly that can withstand multiple wash cycles.
Maintain Regular Inspection and Preventive Checks
Post-installation, I set a schedule to inspect the drain hose and pump area every few months. Look for signs of wear, cracks, or loosened clamps. Regular maintenance is like veterinary checkups for your appliance — it prevents small issues from becoming catastrophes. Also, keep the drainage area free of lint and debris, which can clog the system and cause backups or leaks.
Know When to Call a Specialist
Despite following all steps, sometimes issues arise that require professional help. If you notice persistent leaks, strange noises, or the pump fails to operate correctly even after a proper installation, don’t hesitate to contact a qualified technician. Early intervention can save your home from water damage and avoid voiding manufacturer warranties, especially since many warranties don’t cover damage caused by improper installation or neglect. For peace of mind, always review warranty terms and consider scheduled maintenance, like regular appliance checks.
 Many homeowners believe that appliance installation is a straightforward task requiring minimal expertise. However, this misconception can lead to significant issues down the line. One common myth is that same-day service or quick repairs always guarantee quality work. In reality, rushing repairs often results in overlooked details, such as improper sealant application or incorrect component alignment, which can cause leaks or malfunctions later. For example, applying sealants improperly may seem negligible initially but can lead to water leaks that damage your property over time. Additionally, many assume that warranties cover all repair-related damages, but often they exclude issues caused by user-installed errors or non-approved parts. To truly protect your investment, it’s vital to understand the nuances of warranty coverage, including the importance of professional installation and maintenance consistency. Have you ever fallen into this trap? Let me know in the comments.
Keep It Running: Tools I Recommend for DIY Appliance Care
Maintaining appliances over time requires more than just luck; it demands the right tools and methods. I personally swear by a few specific items that have saved me from costly repairs and extended the lifespan of my appliances. First, a reliable multimeter is a must. I use the Fluke 115 because of its precision and durability—it helps me diagnose electrical issues quickly, especially in complex systems like smart refrigerators or ovens. Next, a high-quality screwdriver set with insulated handles is invaluable for safe, efficient repairs. I prefer Wiha screwdrivers—they fit comfortably and resist wear, which is crucial when dealing with tiny screws hidden behind panels.
For cleaning and preventive maintenance, an ultrasonic cleaner proves surprisingly effective. I use it to remove mineral deposits and dirt from delicate components such as water inlet valves or microwave fan filters. Additionally, a set of silicone-based lubricants like WD-40 Specialist Silicone Spray ensures accessible moving parts stay smooth without attracting dirt. It’s essential to avoid petroleum-based lubricants, which can degrade rubber seals over time.
Having a digital inspection camera, like the Teslong borescope, allows me to peek inside tight spaces—be it behind a dishwasher or inside a dryer vent—without dismantling everything. This saves time and prevents unnecessary disassembly, reducing the risk of accidental damage. Coupled with a quality leak detection spray, these tools help identify and fix issues early, preventing larger disasters.
What’s the Future of Appliance Maintenance?
The trend is moving toward smart diagnostics and remote monitoring. I predict that in the coming years, appliances will increasingly come equipped with built-in sensors that alert homeowners to issues before they become serious—think of it as a health monitor for your appliances. Embracing these innovations now, like installing smart sensors or learning to interpret their data, puts you ahead of the curve and minimizes unexpected breakdowns.
How do I keep my appliances in top shape over time?
Consistent preventive maintenance is key. Regularly inspecting hoses for cracks, cleaning filters, and following manufacturer guidelines can extend appliance life significantly. For example, reading about how to triple your refrigerator’s lifespan underscores the importance of routine care. Using dedicated tools, like a cordless vacuum for coils or a microfiber cloth for surfaces, keeps everything functioning efficiently. Don’t forget, many issues can be caught early with simple visual inspections—saving you from costly repairs down the line. For complex troubleshooting, consulting with professionals or leveraging diagnostic apps can be beneficial. Remember, investing in the right equipment and habits today ensures appliances work reliably long into the future.
By adopting these tools and practices, you’ll turn appliance care into an empowering routine, avoiding surprises and ensuring your devices serve you well for years to come. Ready to give your appliance maintenance a boost? Start with a high-quality multimeter or an ultrasonic cleaner—those small investments can lead to big savings and peace of mind.
< >
>
Overconfidence Can Cost You Everything
One of the biggest lessons I learned was not to underestimate the complexity of appliance installations. Rushing through steps or assuming a quick fix is always sufficient can lead to overlooked details, like improper connections or incorrect part orientation, culminating in costly water damage. Patience and thoroughness are your best friends when working on appliances. Never skip the test runs—they reveal hidden issues before they become disasters.
Details Make All the Difference, But No One Tells You
The tiniest detail, such as properly securing the drain hose or verifying the pump’s orientation, can determine the success or failure of a repair. I once thought a loose clamp was a minor issue, only to find it caused a flood the next day. Paying attention to every clip, seal, and connection is essential. Trust me, mastering these small but critical steps will dramatically reduce your chances of dealing with water spills and warranty hassles.
When to Seek Help Isn’t Always Clear-Cut
Even with the perfect setup, some problems need a professional touch. Knowing when a leak or malfunction surpasses DIY limits can save you time and frustration. If water continues to leak despite correct installation, or if strange noises persist, it’s time to call a specialist. Remember, delaying professional assistance might void warranties or cause more extensive damage—sometimes, it’s the wisest investment.
Curated Tools I Use to Stay Ahead
Over the years, I’ve discovered that having the right tools transforms a stressful repair into a manageable task. A precise multimeter, like the Fluke 115, helps diagnose electrical issues quickly. An ultrasonic cleaner keeps delicate parts spotless, preventing buildup that can cause leaks. A reliable digital inspection camera uncovers hidden blockages or damage without disassembly, saving headaches. Lastly, using OEM parts and trusted sealants ensures my repairs last longer and resist water damage.
Your Next Step Beckons
Now that you’re familiar with the lessons that can turn a repair nightmare into a smooth process, it’s time to put these insights into action. Remember, proper installation and maintenance don’t just protect your appliances—they safeguard your home and peace of mind. As you approach your next repair or installation, embrace patience and precision, and know that the effort is worth the long-term peace of mind.
What’s the biggest challenge you’ve faced when repairing an appliance? Share your story below—I’d love to hear what lessons you’ve learned along the way!
.