Last summer, I ignored that faint, musty smell creeping from my fridge and shrugged it off. A little cleaning could wait, I thought. Weeks later, my fridge started making strange noises, and then, it refused to cool properly. Turns out, neglecting a simple coil cleaning had silently sabotaged my appliance, leading to costly repairs and a total headache. This was my wake-up call. If you’ve ever wondered why your appliances seem to deteriorate faster than they should, you’re not alone.
Why You Can’t Afford to Skip Routine Coil Maintenance
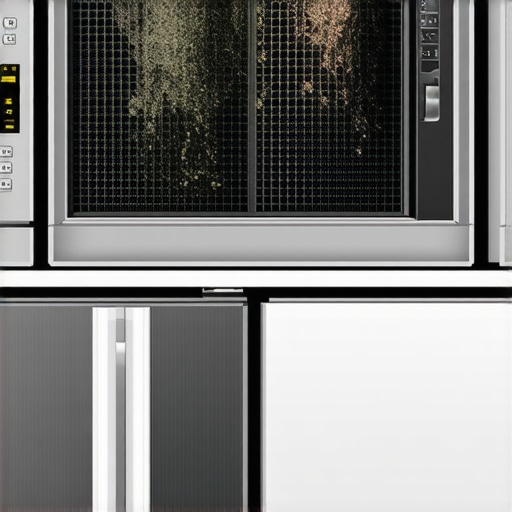
Every year, I hear homeowners complain about sudden appliance breakdowns that seemed to come out of nowhere. One of the most overlooked causes? Dirty coils. These unseen components work tirelessly to keep your fridge running efficiently. When dust, pet hair, and debris accumulate, they insulate the coils, causing your appliance to overheat and work harder. According to the U.S. Department of Energy, routine cleaning of coils can improve energy efficiency by up to 30% and extend the lifespan of your refrigerator. So, neglecting this simple task isn’t just about maintenance—it’s about saving money and avoiding inconvenience.
Have You Faced This Problem?
Maybe you’ve noticed your fridge running louder than usual or your electric bill spiking without explanation—perhaps even some uneven cooling. These signs often point to neglected coils. I made the mistake early on of assuming that my appliance was ‘just aging,’ not realizing that a quick coil clean could have prevented these issues altogether. Trust me, a little preventive care goes a long way.
If you’re wondering whether cleaning your coils is worth the effort, keep reading. Next, we’ll go step-by-step through how to do it properly, so you can protect your appliances without calling in a repair technician every year.
Locate and Prepare Your Tools
Start by gathering essential tools: a vacuum with a brush attachment, a microfiber cloth, a coil cleaning brush (or a long-handled bottle brush), and a mild detergent or coil cleaner. I remember the first time I cleaned my refrigerator coils—initially, I thought it would be messy, but with everything at hand, the process was smoother. Lay a towel beneath the fridge to catch dust and debris falling during cleaning.
Unplug and Access the Coils
Always unplug your appliance before beginning. For refrigerators, typically, the coils are located either at the back or beneath the unit. Depending on your model, remove the cover panel or toe kick plate using a screwdriver. During my first attempt, I had to unscrew multiple panels, which seemed daunting, but took just minutes. Remember, consulting your owner’s manual can simplify this step. For detailed guidance, you might refer to this resource about warranty transfer tips.
Remove Loose Debris Carefully
Using the vacuum brush attachment, gently remove dust, pet hair, and dirt from the coils. Think of it like cleaning a dusty radiator—you want to get rid of the surface grime without bending the fins. During my first cleaning, I vacuumed with enthusiasm, but found that a soft brush helped loosen stubborn debris without damaging delicate fins.
Apply Coil Cleaner and Let It Sit
If your coils are heavily soiled, apply a coil-specific cleaning foam or mild detergent mixed with water. Follow the manufacturer’s instructions. Spray evenly along the coils, ensuring full coverage. Allow the cleaner to sit for the recommended duration—usually 10-15 minutes. In my experience, letting the foam work its magic prevents me from having to scrub excessively later, saving time and effort. For sanitizing tough spots, see this quick tip on properly sanitizing appliances.
Scrub with a Coil Brush
Using the coil cleaning brush, gently scrub the fins to dislodge any remaining dirt. Think of it like brushing teeth—gentle but thorough. During my attempt, I found that longer, softer brushes reach tight spaces better, preventing damage. Be cautious not to bend the fins; a gentle touch preserves coil integrity. If fins are bent, you can realign them carefully with a fin comb, which saves you a costly service call.
Rinse and Dry Thoroughly
Wipe away residual cleaner with a damp microfiber cloth. If possible, use a gentle stream of water to rinse thoroughly—only if the manufacturer’s guidelines permit. Dry the coils and surrounding area completely to prevent rusting. This step ensures no moisture is left behind, which could cause corrosion over time. I recommend double-checking that all panels are securely reattached before plugging the appliance back in.
Restore Power and Monitor Performance
Once everything is dry and reassembled, plug the appliance back in. Observe its operation for a few hours. A well-cleaned fridge should run more quietly and stabilize temperature more efficiently. For ongoing maintenance, create a routine—clean coils every six months to prolong appliance life and boost energy efficiency. If your appliance exhibits persistent issues, exploring signs that indicate whether a fridge needs gas or a new motor might be next. Proper coil maintenance can even help in case of warranty claims by showing proactive care.When it comes to appliance maintenance and repairs, many homeowners hold onto misconceptions that can cost them time and money. A prevalent myth is that using generic parts for repairs won’t impact warranty coverage; however, most warranties stipulate the use of OEM (original equipment manufacturer) parts to remain valid. Failure to adhere to this can inadvertently void your warranty, making repairs more costly. Instead, always verify warranty terms by visiting warranty transfer policies. Another common misunderstanding is that quick fixes are acceptable when an appliance malfunctions, but cutting corners by ignoring proper diagnosis and repair procedures can lead to recurring issues, further damage, or safety hazards. Professional diagnosis ensures the root problem is addressed, saving you money over time. An advanced mistake many overlook is attempting DIY repairs on complex systems like sealed refrigerant lines or gas connections without proper training, which can result in leaks, safety risks, and warranty voidance. Industry experts often emphasize that proper training and certification are essential for handling such components safely. Here’s an important question for savvy homeowners:
How do you differentiate between a quick fix and a proper repair that preserves warranty and safety?
Understanding the nuances—such as inspecting the compatibility of replacement parts, following manufacturer guidelines, and knowing when to call a licensed technician—can make a significant difference. For example, improperly installed or unverified repairs can trigger prompts in smart appliances or cause long-term damage, which may not become evident until much later. Remember, preventative measures like routine proper sanitization and maintenance can avert many costly repairs. Equip yourself with knowledge and best practices by educating yourself on the intricate details of appliance systems and warranties, rather than relying solely on surface-level fixes. Have you ever fallen into this trap? Let me know in the comments.Maintaining appliances effectively isn’t just about quick fixes—it’s a long-term commitment that pays off by extending their lifespan and ensuring reliable operation. Over the years, I’ve refined my toolkit to include specific, high-quality equipment tailored for different repair scenarios, which helps me achieve professional results every time.
Invest in a Magneto-Optical Thermometer for Precise Readings
My go-to device for checking core temperatures in appliances like refrigerators, ovens, and dishwashers is a magneto-optical thermometer. Unlike infrared thermometers, these provide accurate readings through magnetic field detection, which is crucial when verifying if a compressor or heating element is functioning within manufacturer specifications. This level of precision allows me to diagnose issues early and prevent costly breakdowns.
Use a Multi-Function Screwdriver Set for Versatility
When it comes to opening panels or removing specific components, I rely on a high-quality multi-function screwdriver set with interchangeable bits. This saves space in my toolbox while giving me the adaptability to handle various screw types and sizes commonly found in appliance assemblies. Always choosing tools with ergonomic handles reduces fatigue during prolonged repair sessions, ensuring accuracy and safety.
Employ a Digital Leak Detector for Gas Appliances
For gas-powered appliances, I incorporate a digital leak detector into my routine. It helps identify small leaks at connections or valves that might not be visible to the naked eye. Testing for leaks periodically can prevent dangerous situations and warranty voidance caused by improper handling or unnoticed damages.
Continue Routine Maintenance to Save Money and Time
Regular cleaning, such as coil maintenance on refrigerators, coupled with these precise tools, positions me to catch problems early. Advanced diagnostics also involve software tools—like checking error codes via manufacturer apps or diagnostic ports—which enable faster trouble-shooting. Incorporating these methods into your maintenance routine can lead to long-term savings and superior appliance performance.
Looking Ahead: The Future of Appliance Maintenance
Emerging technologies like smart diagnostics and IoT-connected devices will revolutionize how we care for home appliances. Soon, predictive maintenance alerts from appliance apps could notify homeowners of issues before symptoms appear, making repairs even more efficient. Staying updated with these innovations ensures you’re prepared for seamless scaling of maintenance practices.
How do I maintain these tools over time?
Regular calibration of digital measurement devices, proper storage to prevent damage, and updating any associated software or firmware are essential steps. Keep tools clean and handle with care—they’re investments that pay dividends in accurate diagnostics and successful repairs. Remember, a well-maintained toolkit is the backbone of effective appliance repair, especially when aiming for same-day service or managing warranty compliance. For example, consulting professional guides such as industry standards found in warranty transfer tips can help you avoid common pitfalls and ensure your repairs uphold warranty requirements. Try incorporating a digital leak detector into your next service for gas appliances—you might discover hidden issues before they escalate.
Lessons I Wish I Learned About Appliance Repairs
One of the most impactful lessons I discovered was that neglecting simple tasks like coil cleaning can silently damage appliances, leading to costly repairs down the line. I used to believe that waiting until something broke was fine, but proactive maintenance saves both time and money.
Another insight is the importance of understanding warranties. I’ve realized that using OEM parts and keeping up with manufacturer guidelines is crucial to preserve coverage. Ignoring these details can invalidate warranties and turn minor issues into expensive headaches.
Lastly, I’ve learned that investing in quality tools and educating myself about appliance systems empowers me to handle repairs confidently. This knowledge transforms a daunting task into a manageable, even enjoyable, routine that extends appliance lifespan.