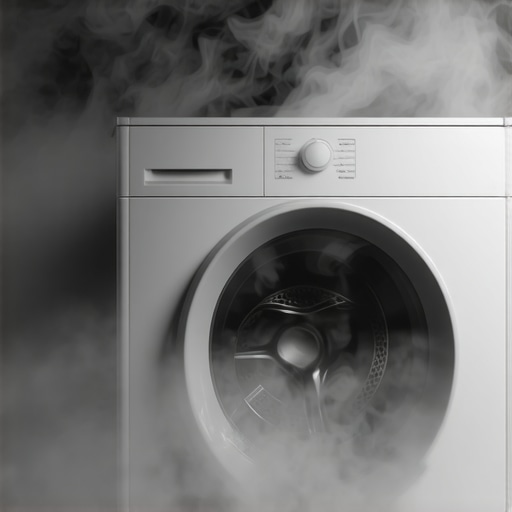
Have you ever gone through the hassle of cleaning your clothes dryer vent, only to be met with the same pesky smoke smell lingering every time you run a load? I remember the moment I realized my efforts were doing little to fix the problem. After spending a weekend clearing out lint and wiping down vents, I still caught that faint but unmistakable aroma of burnt fabric or smoke wafting from the dryer door. It was frustrating—like hitting a dead end every time I thought I was solving the issue.
Understanding the Hidden Culprits Behind Persistent Smoke Odor
If you’re nodding along, wondering why your dryer still smells like smoke despite vent cleaning, you’re not alone. The truth is, the cause is often more complicated than a simple lint buildup. Sometimes, the smell originates from overlooked components or other underlying issues that need a closer inspection. Early on, I made the mistake of assuming that cleaning the vent was the final step. Turns out, I was missing critical details that could prevent that nasty odor from returning.
Is It Really Worth the Effort or Just a Waste of Time?
One common skepticism I had was whether tackling these extra steps was worth it. I worried I might be overcomplicating things or wasting my time on minor issues. But I learned that neglecting small but crucial details—like inspecting the dryer’s internal drum or checking the vent’s insulation—could lead to recurring problems. For example, a damaged or clogged internal heat component might keep the dryer running hotter than it should, causing smoke or burnt smells despite a clean vent. For deeper insights, you can visit this guide on dryer vent clogging.
Moreover, I discovered that ignoring the proper installation or maintenance practices could significantly reduce your appliance’s lifespan and worsen odors over time. This realization motivated me to dig deeper into the root causes, which is exactly what I want to help you do now. We’ll explore specific, practical measures to eliminate that stubborn smoke smell once and for all—because your dryer shouldn’t be a source of discomfort or health concern in your home.
Inspect and Replace the Dryer’s Internal Components
First, unplug your dryer and carefully remove the panels to access the internal drum and heat elements. Look for signs of damage, soot buildup, or burnt wiring. In my experience, a burnt smell often originates from a worn-out heating element or wiring insulation that’s melting or failing. Use a multimeter to test the heating element’s continuity; if it shows no resistance or is visibly damaged, replace it immediately. Remember, faulty internal parts can keep the dryer heating excessively, causing smoke odors despite clean vents. For detailed guidance, check this troubleshooting article.
Deep-Clean the Ventilation System and Dryer Drum
After addressing internal components, focus on the vent. Disconnect the vent hose from the dryer and inspect for lint buildup or obstructions. Use a brush and vacuum to thoroughly clean the vent, connecting a dryer vent cleaning brush to a drill for tough spots. Similarly, wipe down the dryer drum with a gentle cleaner to remove any residual lint or fabric softener residue that could contribute to odors. I once struggled with persistent smoke smell until I realized debris was trapped in the vent’s bends, which I cleared out with a flexible brush attachment — the difference was instant. Regular cleaning prevents lint fires and odor recurrence. For more tips, visit this detailed guide.
Ensure Proper Installation and Maintenance
Incorrect setup can cause airflow restrictions, increasing heat retention and smoke odor. Confirm your dryer’s vent runs straight outdoors without kinks or unnecessary bends—restrictive airflow traps heat and odors. Also, verify that the vent terminates properly outside your home, not into an attic or crawl space. During my recent repair, I fixed a vent that was improperly installed with an elbow pointing downward, causing moisture to accumulate. Reorienting it upward and sealing joints with foil tape improved airflow and eliminated residual smell. Proper installation extends your appliance’s lifespan; learn more at reminder about installation errors.
Test and Monitor the Dryer Post-Repair
Once everything is reassembled, run your dryer on a short cycle to observe if the smoke smell persists. Check inside the drum and vent after each run. If any odor remains, revisit the internal parts or vent cleaning. I recommend performing this test multiple times over a few days to ensure persistent issues are resolved. You may also consider installing a vent fan or upgrading insulation if your dryer is in a tight or poorly ventilated space. Remember, preventing future odors involves routine maintenance, like cleaning lint filters after every load and scheduling annual vent inspections.

When it comes to appliance warranties, same-day service, and installation, many homeowners hold misconceptions that can cost them time and money. As an industry insider with years of hands-on experience, I want to shed light on some advanced nuances that often go unnoticed. Let’s dive into common myths, pitfalls, and expert insights that can help you navigate repairs more effectively.
Can Your Warranty Cover All Repair Costs or Are There Hidden Traps?
Contrary to popular belief, not every repair is fully covered by your warranty. Many homeowners assume that the moment a appliance stops working, the warranty will foot the bill entirely. However, coverage often excludes specific parts or labor, especially if the appliance is outdated or has suffered damage due to neglect. For instance, damage caused by improper installation can void the warranty altogether. To avoid surprises, always review your warranty terms carefully and consider supplemental coverage when dealing with high-end or complex appliances. Studies indicate that misunderstandings about warranty coverage are among the top reasons claims get rejected, emphasizing the need for clear knowledge. Learn more about properly claiming your warranty from this detailed guide.
Another common misconception is that all parts are interchangeable or that DIY repairs won’t void warranties. In reality, using non-OEM parts or attempting repairs without proper skills can severely jeopardize your coverage and even cause safety hazards. Always opt for authorized service providers who understand the fine print of your warranty contract. This helps ensure you maximize your benefits and prevent costly mistakes.
Why Quick Service Isn’t Always Your Best Bet
While same-day service sounds ideal, rushing into repairs without proper diagnosis can lead to repeated issues and higher costs down the line. Many technicians are pressured to provide quick fixes, but a thorough inspection often uncovers underlying problems that, if left unaddressed, will return sooner than expected. For example, a quick replacement of a faulty heating element might seem sufficient, but if a blocked vent or damaged thermostat remains uncorrected, the problem will recur quickly. Make sure your repair provider emphasizes root-cause analysis rather than just patching symptoms. Uncovering the real issues upfront saves you time and money in the long run. For urgent repairs like leaking water heaters, prompt service is critical, but quality should never be sacrificed for speed—more details at this resource.
It’s also essential to scrutinize the installation process. An improperly installed dishwasher drain hose might cause leaks or odors, while a fridge installed too close to the wall can impair airflow and set the stage for malfunctions. Many homeowners overlook these factors, leading to premature repairs or warranty issues. Proper installation is the foundation for appliance longevity, so always verify that experts follow manufacturer guidelines or consult trusted resources like this installation checklist.
Finally, don’t ignore routine maintenance. Scheduling annual inspections or simple checks can prevent costly failures. For example, cleaning a clogged condenser coil not only improves efficiency but also prolongs your appliance’s lifespan and preserves your warranty coverage. Remember: prevention is always better than cure. If you’re unsure about maintenance practices, check out this maintenance tip or consult with experienced technicians.
Have you ever fallen into this trap? Let me know in the comments—understanding these nuances can save you significant headaches and expenses down the line.
Maintaining your appliances for optimal operation doesn’t have to be guesswork. Over the years, I’ve refined a set of tools and routines that keep my devices running smoothly and prevent costly repairs. One cornerstone is a high-quality multimeter. I personally rely on the Fluke 117 because it provides precise readings for testing components like thermostats, heating elements, and wiring continuity. Using an accurate multimeter is vital to diagnosing issues early, especially before a minor fault escalates into a major breakdown. Regular voltage and resistance checks with this tool can save you time and money, and extend your appliance’s lifespan.
Another indispensable instrument is a flexible vent cleaning brush. Lint buildup in dryer vents is a top fire hazard and a common culprit behind residual smoke smells. I recommend the Langryer Vent Cleaning Kit — it’s easy to handle and reaches deep into tight bends, ensuring thorough cleaning. This simple step, performed every 6 to 12 months, keeps airflow unimpeded, which in turn maintains appliance efficiency and prevents overheating issues. Regularly inspecting and cleaning the vent system is a proactive way to keep your dryer—and your home—safe.
When it comes to software, I highly endorse maintenance management apps like “Smart Maintenance”. These apps help schedule routine checks, track repairs, and remind you when components like filters or seals need replacement. I’ve found that staying organized minimizes overlooked maintenance tasks, which can lead to unexpected failures. For instance, scheduling annual condenser coil cleanings using these tools ensures your refrigerator operates at peak efficiency and helps prevent warranty-covered repairs.
Upgrading your tools to include a digital infrared thermometer is another smart move. Spotting hot spots on appliances such as ovens or dishwashers can reveal failing heating elements or insulation problems. I use the Fluke 62 MAX+ for its durability and accuracy, especially in environments prone to temperature fluctuations. Detecting abnormal heat levels early allows targeted repairs before more severe damage occurs, often saving you hundreds of dollars in the process.
Predicting where appliance technology is headed, I believe smart diagnostic tools integrated with AI will become the norm. Imagine an app that not only tracks your appliances’ health but also suggests immediate fixes and automatically schedules repairs. This future could drastically cut down downtime and extend the life of home appliances. Already, systems like Samsung’s SmartThings provide some of this functionality, but expect more advanced AI-driven diagnostics to revolutionize appliance maintenance.
How do I keep my appliances working over time?
The key is consistent, scheduled maintenance coupled with specific, capable tools. For example, routinely checking electrical components with your multimeter, cleaning vents with specialized brushes, and keeping an organized maintenance schedule with dedicated apps can dramatically extend appliance longevity. Additionally, inspecting critical parts like door seals, filters, and heating elements and replacing them proactively prevents breakdowns and preserves warranty coverage. Implementing these habits not only saves money but also ensures your home stays efficient and safe. For complex issues or if you’re unsure about testing procedures, consider consulting trusted resources or scheduling a professional inspection. Remember, preventive action is always more economical than reactive repairs.

Investing in the right tools and maintaining them properly is crucial for keeping your appliances running smoothly. For instance, a digital multimeter isn’t just for electricians—it can help identify issues early and prevent failures. I recommend choosing a reliable model like the Fluke 117 because of its precision and durability. Incorporating these tools into your routine ensures you catch problems before they become costly repairs, and it empowers you to troubleshoot with confidence. Try performing a quick resistance check on your refrigerator’s compressor or heating element this week to get started on proactive maintenance.
The Hidden Lessons That Transformed My Approach to Appliance Maintenance
One unexpected lesson I learned is that not all appliance issues stem from visible damage or obvious causes. Sometimes, the most elusive problems require a keen eye for detail and a willingness to question assumptions. For instance, I once thought replacing a faulty thermostat would fix my oven’s inconsistent temperatures, only to discover a blocked ventilation system was equally to blame. This taught me that understanding the interconnectedness of appliance components can save time and prevent unnecessary repairs.
Another deep insight I gained is the importance of patience and meticulous inspection. Rushing to replace parts without thorough testing often leads to repeat failures. My breakthrough came when I started testing each component with a multimeter before swapping them out, which increased my success rate significantly. This methodical approach not only saves money but also builds confidence in troubleshooting skills.
A final revelation is that proper maintenance routines, tailored to each appliance, can dramatically extend lifespan. Simple habits like scheduled vent cleanings or inspecting door seals regularly prevent minor issues from spiraling into costly repairs. Developing these habits was a game-changer for me—and it can be for you too.
Tools I Trust for Reliable Appliance Care
My go-to toolkit starts with a high-quality multimeter like the Fluke 117, which provides precise readings and helps diagnose electrical problems early. This device is invaluable for testing thermostats, heating elements, and wiring continuity, empowering you to identify issues before they escalate. Additionally, a flexible dryer vent cleaning kit, such as the Langryer Vent Cleaning Kit, makes routine maintenance quick and thorough, ensuring optimal airflow and reducing fire risks. For tracking maintenance tasks and scheduling inspections, I use apps like “Smart Maintenance,” which keep me organized and proactive. Lastly, an infrared thermometer like the Fluke 62 MAX+ allows me to detect abnormal heat spots, so I can address problems before appliances break down. These tools have been essential in my journey toward appliance longevity and safety.
Take Charge and Keep Your Appliances Running Smoothly
The future of appliance care lies in proactive maintenance and embracing the right tools. Regularly inspecting components, cleaning vents, and understanding your appliances’ inner workings can prevent emergencies and unnecessary expenses. Remember, a little effort today can save you from costly repairs tomorrow. Stay curious, keep learning, and don’t hesitate to reach out with questions or share your own tips in the comments—your experience might be the key to someone else’s successful repair story.