I’ll never forget the moment I discovered my microwave’s plate had suddenly stopped spinning during a late-night snack run. There I was, staring at a half-warmed plate of leftovers, wondering why my trusty appliance decided to act up just when I needed it most. It’s a frustrating, almost personal betrayal—your microwave is supposed to make life easier, not add to your list of household mysteries. If you’ve ever experienced that awkward pause, where your plate refuses to turn, you’re not alone. And the good news is, this isn’t necessarily a sign of a dead microwave—it’s often a fixable problem that, with a little know-how, you can handle yourself.
How a Tiny Issue Can Stop Your Microwave Plate from Spinning
The reason your microwave plate might suddenly cease its spinning involves a surprisingly small component—the turntable motor or the drive coupling. Initially, I thought it was a major repair or a need to replace the whole microwave! But after digging around, I found that the root cause was often something simple, like the drive coupling having worn out or the motor losing power. In fact, these tiny parts are the silent heroes that keep your food turning evenly, ensuring proper heating. When they malfunction, your microwave’s performance drops, but it’s usually a straightforward fix. This is a common complaint among homeowners, and it’s worth understanding the underlying cause before rushing to replace your unit entirely.
Many amateur repairs fail because of a simple mistake I made early on: I tried to force the turntable to spin without inspecting the motor or the coupling first. Remember, appliances are delicate, and forcing parts can cause further damage. If you’re confident, you can probably handle minor repairs—just be sure to disconnect the microwave from power first. To better understand what might be causing your microwave’s spinning problem, I recommend checking out detailed guides or consulting trusted repair resources. If this sounds familiar, perhaps it’s time to tackle the fix yourself or know when to call in a professional for same-day service. For more insights on safe DIY repairs and appliance care, you can visit [the warranty trap of using non-OEM parts](https://discountappliancehub.com/the-warranty-trap-of-using-non-oem-replacement-parts) to avoid common pitfalls.
Is a Microwave Fix Worth the Effort or Should I Call a Pro?
One concern I had early on was whether attempting a repair myself was worth the risk or if I’d end up spending more on parts and damages. Many homeowners worry about voiding warranties or making things worse. According to appliance repair experts, a quick DIY fix is often enough if you’re comfortable with basic tools and know the parts involved. Otherwise, knowing when to seek same-day professional help can save you time and frustration. Did you know that a lot of microwave spinning issues are minor and easily fixed with some patience? Still, always prioritize safety—unplug the appliance before opening it, and if you’re unsure, consulting a repair technician is the smart move.
Remove and Inspect the Turntable Components
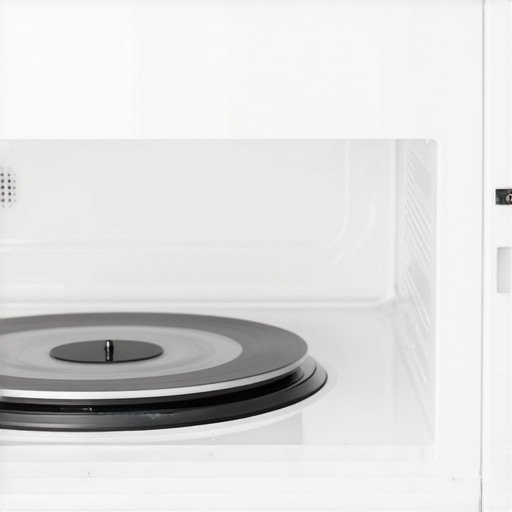
Start by unplugging your microwave for safety. Carefully remove the glass plate and any surrounding rings. Take out the drive coupling and observe if it’s cracked or worn. During a repair I did, I found the coupling shattered into pieces, which was causing the plate to stay still. Replacing the drive coupling with an OEM part is straightforward; avoid using generic ones, as explained in this guide to prevent warranty issues.
Check the Turntable Motor
Locate the motor beneath the rotating mechanism. Test its operation with a multimeter—if you’re unsure, consult the specific model’s repair manual. In my experience, the motor was unresponsive, which indicated it had burned out. Testing the motor’s circuitry helps determine if it’s dead or if wiring is faulty. If faulty, replacing the motor restores the spinning function; otherwise, proceed to wiring checks.
Clean and Lubricate Moving Parts
Clean any debris, food splatters, or grease that might hinder movement. Use a soft cloth and mild detergent. Lubricate the drive coupling and motor shaft with a silicone-based lubricant—avoid petroleum-based lubricants, as they can damage plastic parts. During my repair, a thorough cleaning improved the motor’s function temporarily, but replacing the worn parts was necessary for a long-term fix.
Reassemble and Test Hands-On
Carefully reassemble all parts in reverse order. Ensure the drive coupling is seated correctly and the motor wiring is secure. Plug in the microwave and run a test cycle with water inside. If the plate spins smoothly, you’ve solved the issue. Remember, always disconnect power before opening your microwave to avoid shocks. When in doubt, consult detailed guides or contact professional repair services.
Evaluate the Repair Ease and Warranty Risks
If repairs seem too complex or risky, consider the warranty implications. Using non-OEM parts might void your warranty, as discussed in this resource. For a quick repair, replacing the drive coupling and motor yourself can save money and prevent appliance replacement. However, if uncertain, contacting a same-day professional technician ensures safety and correctness. This approach is especially wise if your microwave is under warranty or if you’re inexperienced with electrical repairs.
Many homeowners operate under common assumptions about appliance warranties and repair services, but diving deeper reveals critical nuances that can significantly impact your experience and costs. While it’s tempting to believe that a warranty covers everything or that same-day service is always guaranteed, the reality is often more complex. Understanding these subtleties can save you time, money, and frustration in the long run.
One widespread misconception is that extending a warranty or purchasing an extended service plan guarantees priority repairs or instant coverage. In reality, many warranties come with fine print—such as exclusions, waiting periods, or limited coverage on certain parts—that owners often overlook. For instance, some warranties void if non-OEM replacement parts are used, a trap explained thoroughly in this guide. Rushing to fix a broken appliance with aftermarket parts can inadvertently void your warranty, leaving you liable for repair costs later.
What Advanced Buyers Need to Watch For in Service Agreements
Many consumers believe that calling for same-day repair services guarantees swift resolution, but availability depends on multiple factors—technician scheduling, parts stock, and the nature of the problem. A common trap is assuming that a service provider’s promise of rapid response applies universally; in practice, certain repairs might require special parts or technical expertise that extends repair times beyond initial expectations. Advanced customers understand that verifying a company’s parts inventory or technician specialization ensures more reliable service, rather than relying solely on catchy promises.
Moreover, the misstep of underestimating installation complexity can lead to warranty issues. Improper setup or neglecting manufacturer guidelines—like incorrect leveling or inadequate clearance—can void warranties or lead to malfunction, which many overlook. For example, proper installation plays a pivotal role in appliance longevity, as covered in this detailed guide.
Advanced Repair Mistakes That Cost You
One advanced mistake many make is attempting to DIY a repair without fully understanding the warranty implications. For instance, replacing critical components with non-OEM parts might seem economical, but it can trigger warranty voidance or future repair complications. Systems like refrigerators or washing machines are sensitive to the quality of replacements, and using subpar parts may cause further damage, extending repair costs. An informed approach involves verifying part compatibility beforehand and consulting professional advice when necessary.
Another common pitfall is neglecting to consider the long-term implications of quick fixes. Rushing to resolve a minor issue—like topping off freon or DIY wiring—may temporarily restore function but can cause additional damage if done improperly. For example, ignoring a slight rattle in the convection fan or refrigerant leaks could lead to major system failures down the line, as discussed in this expert analysis. Prioritizing proper diagnostics and professional repairs preserves your warranty and assures safety and efficiency.
Ultimately, navigating warranty terms, repair options, and installation intricacies requires a nuanced understanding. Being aware of the fine print and avoiding common traps ensures you get the best value from your appliance investments. For instance, understanding the specifics of what voids your appliance warranty or how to choose between DIY and professional repairs can make all the difference. If you’re ever in doubt, consulting trusted sources or professional technicians can help you avoid costly mistakes.
Have you ever fallen into this trap? Let me know in the comments and share your experiences with appliance warranties or repair dilemmas. Being informed is the best defense against unexpected expenses and prolonged downtime.
Prioritizing My Repair Toolkit for Long-Term Success
Over the years, I’ve refined my maintenance arsenal to ensure efficient and effective appliance repairs. A laser thermometer is vital—it quickly pinpoints overheating components, preventing potential failures before they escalate. I personally use a Fluke 62 MAX Infrared Thermometer because of its accuracy and durability, especially useful when diagnosing issues like a fridge’s compressor or an oven’s heating element. For electrical diagnostics, a good digital multimeter, like the Klein MM6000, offers reliable readings of voltage and resistance, saving time and avoiding guesswork.
In addition, I keep a set of micro screwdrivers for delicate disassembly and OEM replacement parts on hand—using genuine components is crucial; see this guide for details. To streamline repairs, I rely on a portable LED work light that illuminates tight spaces, making complex repairs safer and more manageable. These tools have been instrumental in reducing repair times and improving long-term appliance performance.
Embracing Software and Digital Resources
Beyond hardware, I leverage thorough online manuals and diagnostic apps, such as the Appliance Troubleshooter app, which provides step-by-step guidance tailored to specific models. Access to repair forums enables real-world troubleshooting tips and sharing experiences, which often reveal novel solutions. Documenting each repair step with photos ensures easy reassembly and troubleshooting in future incidences.
Looking ahead, the trend points toward smarter diagnostics integrated directly into appliances and more advanced diagnostic tools compatible with smartphones. Embracing these will further reduce guesswork and enhance diagnostic precision, ultimately extending appliance lifespan and reducing service calls.
How can I keep my appliances working longer through maintenance?
Regular cleaning of critical parts like filters, vents, and drain loops is foundational. For example, a vent cleaning can prevent overheating and prolong the life of your dryer and washer. Scheduling annual inspections of belts and seals, especially before high-use seasons, helps identify wear and prevent unexpected failures. Moreover, applying appropriate lubricants to moving parts, such as the drive coupling on your microwave, preserves functionality and avoids costly replacements.
Finally, keep detailed maintenance logs, tracking parts replaced or serviced, which assists with warranty claims or future troubleshooting. Consistent, proactive maintenance not only extends the functional life of your appliances but also enhances efficiency, saving energy and reducing utility bills over time.
If you’re aiming to prevent common issues and improve your repair confidence, try performing a routine vent and filter cleaning this month. Not only will your appliances thank you, but you’ll also gain firsthand experience with maintaining your household’s vital systems.
What I Wish I Knew About Hidden Appliance Weak Points
One of the most eye-opening lessons I learned is that seemingly minor parts, like drive couplings or motors, can make or break your appliance’s operation. Over time, I realized that ignoring these small components often leads to bigger headaches and costly replacements. The lightbulb moment was understanding that regular inspections and using quality OEM parts could save me from unnecessary expenses and warranty disputes. This knowledge transformed my approach from reactive repairs to proactive maintenance, ensuring my appliances lasted longer and performed better.
Tools and Resources That Turn Repair From Frustration to Confidence
My repair success hinges on having the right tools at hand. A reliable multimeter helps me troubleshoot electrical issues without guesswork. The guides on OEM parts protect my warranty and ensure durability. Digital manuals and video tutorials from trusted sources give me step-by-step clarity. These resources turn daunting repairs into manageable tasks, boosting my confidence and saving money in the process.
Embracing the Repair Mindset for Long-Term Appliance Health
Understanding that maintenance is an ongoing journey has been my biggest takeaway. I now schedule annual check-ups, keep detailed logs, and address small issues before they escalate. This mindset not only extends appliance life but also minimizes emergency repairs. Investing in a few key tools and leveraging expert advice creates a cycle of empowerment—making me less dependent on costly professional fixes and more capable of ensuring my household keeps running smoothly.
What’s Your Next Step in Mastering Appliance Care?
Now that I’ve shared my insights, I’d love to hear from you—are you ready to take a closer look at your appliances and tackle small repairs yourself? Sharing your experiences or questions can help others avoid similar pitfalls. Remember, your proactive approach today could save you significant time and money tomorrow. How will you empower yourself to maintain your appliances better?