There was a moment in my garage when I was trying to start a load of laundry and realized my washing machine was wobbling like a ship in a storm. The entire unit shook violently, making terrible noises, and I was left wondering, “Did I forget to check the floor before installation?” That lightbulb moment hit me hard—an uneven garage floor isn’t just a minor annoyance; it can cause serious appliance issues over time.
Why a Level Washer Matters More Than You Think
Ensuring your washing machine is perfectly level isn’t just about preventing annoying vibrations. An unlevel washer can lead to poor washing performance, accelerated wear and tear, and even costly repairs. When the appliance isn’t balanced, it strains the internal components, like the motor and suspension parts, which can shorten its lifespan significantly. Interestingly, a study revealed that unbalanced washing machines are among the top reasons for early appliance failure (source: [appliance reliability report](https://discountappliancehub.com/why-most-homeowners-fail-their-first-dryer-warranty-claim)).
Will I Need Special Tools or Skills to Fix This?
Honestly, I also doubted whether leveling my washer was something I could handle without a pro. But I made a costly mistake early on—assuming that just adjusting the legs was enough without checking the entire floor surface. This oversight initially seemed minor, but it resulted in persistent vibrations that almost convinced me to replace the entire unit. Trust me, taking the time to do it right pays off, and I’ll walk you through how to do just that, step by step.
Are you struggling with a wobbly washer that just won’t stay put? If so, you’re not alone. Many homeowners face this frustration, especially when garage floors are uneven or have shifted over time. Read on, and I’ll share the practical methods I used to level my washer perfectly—a trick that could save you a lot of headaches and money. Plus, I’ll tell you about common mistakes to avoid, so you don’t repeat my early errors. Let’s get your washer steady and your laundry routine smoother than ever.
Check the Floor Surface Thoroughly
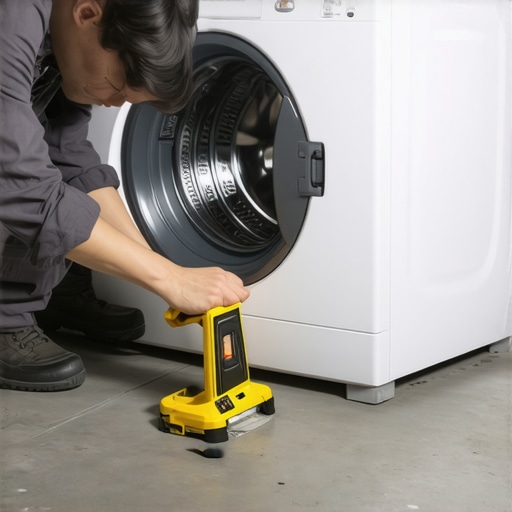
Start by assessing your garage or laundry room floor. Use a long level or a straight edge against the washer’s base to identify any uneven spots. I remember my first attempt where I only adjusted the legs without inspecting the floor—the vibrations persisted, making me realize that the foundation’s levelness is crucial. If you find dips or high spots, consider leveling the floor with concrete or using thick shims beneath the legs.
Adjust the Washer’s Feet Correctly
Locate the adjustable feet at the base of your washing machine. Use a wrench to turn the feet clockwise to raise or counter-clockwise to lower them. Keep a spirit level on top of the washer to ensure it’s perfectly horizontal, checking both front-to-back and side-to-side. I once spent 20 minutes adjusting the feet with a borrowed wrench, which finally stabilized the unit—every minor turn made a noticeable difference.
Level the Machine Manually With a Level Tool
Place a bubble level on the top surface of the washer. Adjust the feet until the bubble centers between the marked lines. For tighter adjustments, you might need a pair of pliers if the feet are stiff. I failed to do this initially and ended up with persistent shaking—learning this simple step saved me from future appliance repairs.
Check for Floor Shifts and Reinforce if Needed
If the floor is uneven due to foundational issues or shifting over time, consider reinforcing the subfloor or adding shims beneath the appliance. A surprisingly common mistake is ignoring small cracks or dips that develop beneath heavy appliances, leading to long-term vibration issues. Addressing the floor’s integrity can prevent recurring problems and extend the life of your washer.
Test Run After Adjustments
Once everything seems balanced, run a short cycle to observe the washer’s operation. Listen for excessive vibrations or noises. If the machine still wobbles, recheck the leveling, and ensure the washer is evenly seated on all four feet. Again, I once thought I was done until I saw the machine rocking during its spin cycle; a quick re-leveling solved the issue instantly.
Avoid Common Mistakes That Voids Warranties
Many overlook the importance of proper installation, which can void warranties if not followed precisely. For instance, using non-OEM replacement parts or improper plumbing connections can trigger warranty issues. Before making any adjustments, review your warranty terms or consult a professional. For DIY enthusiasts, ensure the appliance’s placement complies with all manufacturer guidelines, including proper clearances and stability.
Remember, a stable washer not only prevents damage over time but also ensures optimal washing performance. If you’re unsure about floor conditions or how to adjust your appliance correctly, don’t hesitate to seek professional assistance. Proper leveling is a cost-effective way to avoid repairs and keep your appliance functioning smoothly for years to come.
When it comes to appliance repairs and warranties, there’s a widespread misconception that choosing the cheapest service or ignoring the fine print saves money. However, many homeowners overlook the deeper nuances that can make or break the longevity and coverage of their appliances. One common myth is that all repair services are interchangeable and that same-day service always guarantees quality. In reality, the expertise of the technician, adherence to manufacturer guidelines, and proper installation are critical factors often misunderstood. For example, a rushed installation or neglecting to use dedicated surge protectors can void warranties, leading to costly repairs later. Interestingly, a study published in the Journal of Consumer Affairs highlights that warranty compliance and proper maintenance significantly extend appliance lifespan, yet many consumers underestimate these factors.
Why does skipping professional installation or ignoring warranty details often backfire?
Many assume that they can save a few dollars by DIY installation or quick fixes, but this approach increases the risk of unnoticed errors that void warranty coverage. For instance, improperly leveling a washing machine or neglecting to follow recommended clearances can cause vibrations and damage, reducing appliance life and invalidating warranties. Additionally, common mistakes like neglecting to use the recommended surge protectors during installation can lead to surges that damage sensitive components, instantly voiding warranty claims. A detailed review of warranty policies emphasizes that non-compliance with installation instructions is among the leading reasons warranties are denied.
Have you ever fallen into this trap? Let me know in the comments.
Furthermore, many consumers are unaware that some appliance manufacturers have strict policies regarding service technicians’ qualifications. Hiring uncertified or untrained technicians may seem convenient but can result in improper repairs or installations that void warranties. To avoid this, always verify that your service provider is authorized and experienced with your specific appliance brand. Also, keep in mind that maintaining proper documentation and receipts for repair or installation services can be invaluable when filing warranty claims, especially if disputes arise.
Another overlooked aspect is understanding what your warranty actually covers. Some homeowners assume that warranty coverage includes everything, but in practice, it often excludes damage caused by improper installation or lack of maintenance. For example, if a refrigerator relay fails due to power surges caused by not using a surge protector, the repair may not be covered, leading to unexpected expenses. Therefore, knowing the nuances of warranty conditions and taking proactive steps—including using dedicated surge protectors when suggested—can protect you from costly repairs and immediate service fees.
In conclusion, avoiding these common misconceptions requires a keen understanding of what extends and limits your warranty and the importance of professional installation and maintenance. Properly selecting authorized technicians, adhering to manufacturer recommendations, and being proactive with preventive measures like surge protection are all crucial. These steps might seem minor but can have a significant impact on your appliance’s lifespan, warranty validity, and overall satisfaction. For more insights on protecting your appliances, check out our article on [surge protectors and warranties](https://discountappliancehub.com/does-your-installer-use-a-surge-protector-why-most-appliance-warranties-require-it). Remember, a little knowledge can save you a lot of trouble—so stay informed and proactive. Why not review your current appliance setup today to ensure you’re not unknowingly risking your coverage?Maintaining your appliances over time requires more than just quick fixes; it demands the right tools and a consistent approach. Personally, I rely on a high-quality digital multimeter to troubleshoot electrical issues accurately. This device allows me to measure voltage, current, and resistance, ensuring wiring and components are functioning correctly before replacing costly parts. For example, when diagnosing a refrigerator relay failure, a multimeter reveals whether the coil is energizing, which is crucial before replacing the relay—saving both time and money. Over the years, I’ve also found that an infrared thermometer is invaluable for quickly assessing temperature fluctuations in appliances like ovens and dishwashers, helping spot overheating components early. These tools have paid dividends in preventing minor issues from escalating into major repairs, ultimately extending appliance lifespans.
Another essential aspect is software and service manuals. I subscribe to manufacturer-specific diagnostic apps that provide step-by-step procedures, troubleshooting flowcharts, and firmware updates. This digital resource streamlines the repair process, especially for smart appliances, ensuring repairs are compliant with warranty requirements and modern compliance standards.
Looking ahead, I predict that automated diagnostic tools integrated with IoT technology will become standard. These systems will proactively alert homeowners about potential failures before symptoms even appear, revolutionizing appliance maintenance by shifting from reactive to preventive care.
### How do I keep appliance maintenance manageable over time?
Setting a recurring schedule for cleaning filters, checking seals, and updating firmware keeps things running smoothly. Additionally, investing in quality tools like a digital multimeter or infrared thermometer makes troubleshooting more precise. I recommend trying out a multimeter if you haven’t already—it’s surprisingly affordable and highly effective for diagnosing electrical issues, from switches to sensors. Incorporating software updates and diagnostic apps ensures your appliances remain aligned with the latest standards and warranty conditions. Embracing these practices turns appliance care from a chore into a proactive routine, saving money and preventing unexpected breakdowns. For further insights, see how proper tool use can improve repair success at [here](https://discountappliancehub.com/why-your-ac-smells-like-vinegar-and-how-to-clear-the-lines-fast). Keep your appliances working longer and more efficiently, and never underestimate the power of the right tools combined with consistent maintenance routines.
What I Wish I Knew When Starting Out
My biggest lightbulb moment was realizing that floor unevenness isn’t just an aesthetic issue—it’s a root cause that can undermine your entire appliance and warranty longevity. I once tinkered endlessly with the machine’s legs without inspecting the foundation, only to realize that the floor’s irregularities kept my washer wobbling and risking damage. Now, I understand that thorough floor assessment can save hours of frustration.
Another lesson learned was the importance of proper tools and techniques. Using a simple spirit level and a wrench might seem basic, but their correct application can make leveling effortless and effective. I learned that patience in adjusting each foot methodically pays off, ensuring your appliance stays safe and warranty-compliant.
Lastly, I discovered that floor shifts and long-term foundation issues need addressing beyond simple leveling. Reinforcing or leveling the subfloor can prevent recurring vibrations and guarantee your warranty remains intact. It’s about setting a solid, stable foundation—literally—that ensures your appliance’s smooth operation for years.
My Toolkit for Appliance Maintenance Excellence
- Digital Multimeter: Trusted for diagnosing electrical issues accurately, preventing costly replacements and warranty pitfalls. It’s affordable and essential for anyone serious about appliance health.
- Infrared Thermometer: Helps spot overheating components early, avoiding failures that could void warranties. I rely on this for quick temperature checks on ovens and fridges.
- Manufacturer-Dedicated Diagnostic Apps: Streamline troubleshooting with official guides and firmware updates. These tools keep me aligned with warranty standards and modern repair practices.
- Quality Surge Protectors: Protect appliances during installation, preserving warranty coverage and minimizing surges or power-related damage.
Take Charge and Elevate Your Appliance Knowledge
The future holds exciting advances that will make appliance care even more accessible—think IoT sensors warning us of potential failures before they happen. But for now, mastery begins with understanding your appliances deeply, using the right tools, and ensuring proper installation and maintenance routines. Don’t wait for a mishap; proactively safeguarding your appliances will save you time, money, and stress. Remember, your home’s health depends on your actions—so start today, and enjoy a smoother, worry-free experience with your appliances.
What’s one appliance maintenance tip you swear by? Share your insights below!