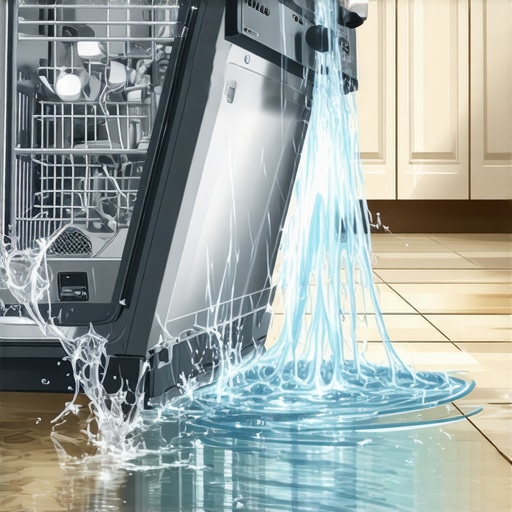
I remember the moment vividly—standing in my kitchen, watching a mini flood creep from underneath my brand-new dishwasher. Initially, I thought I had installed it wrong or perhaps needed to tighten a pipe. Turns out, the problem wasn’t just installation; it was the trap I fell into by leveling it the wrong way. That small mistake turned into a messy leak, and honestly, I felt pretty stupid for not catching it sooner. But the good news? I learned a lot—and I want to share my experience to help you avoid the same costly pitfalls.
Why Properly Leveling Your Dishwasher Is Crucial for Preventing Leaks
Your dishwasher might seem straightforward—push it in, connect the hoses, and you’re set. But beneath the surface lies a detail that many overlook: leveling. An unlevel dishwasher isn’t just a cosmetic issue; it can lead to water spilling out during cycles, damaging your floors and increasing your water bills. A significant part of this is because of improper installation of the drain hose, which relies heavily on correct leveling to function properly.
When I first installed mine, I was in a rush, eyeballing the position without double-checking the level. The result? During the wash cycle, water would pool and eventually leak out from the door or the base. It was a frustrating and costly lesson. That’s why I started researching, and I found a startling fact—according to appliance repair experts, improper leveling is one of the top causes of dishwasher leaks. You can read more about common causes of dishwasher flooding in their detailed guide on [same-day repair steps](https://discountappliancehub.com/dishwasher-flooding-3-steps-for-same-day-repair-in-2026).
Have you ever faced a leak that just wouldn’t quit, no matter how many times you tightened the door or checked the hoses? If so, chances are, it comes down to this often-overlooked mistake. Fortunately, the fix is straightforward—if you know what to look for and how to correct it.
Now, let’s dive into how to get your dishwasher perfectly leveled and avoid these leaks altogether. Trust me, a little effort here saves you from major headaches—and repairs—down the line.
Check the Floor and Clear Obstacles
Start by ensuring your dishwasher is installed on a flat, stable surface. Remove any debris or objects underneath that could interfere with leveling. Think of it as preparing a foundation before building a house—it sets the stage for everything to function properly.
Use a Reliable Leveling Tool
Place a carpenter’s level or a digital level on the dishwasher door or top edge to assess its tilt. I once skipped this step and eyeballed it, leading to water pooling during cycles. When I finally used a proper level, I immediately saw that the unit was slightly off to one side, which caused the leak.
Adjust the Feet Carefully
Locate the adjustable feet at the base of your dishwasher. Turn them clockwise to raise or counterclockwise to lower each corner until the bubble in your level centers. Remember, small turns make big differences—if one corner is too high, water may unevenly flow toward the door or seals. When I adjusted mine, I noticed the water pool prevented proper drainage, risking leaks or damage.
Maintain Consistent Contact and Stability
Ensure all four feet touch the floor firmly. Sometimes, one foot might be slightly loose or uneven, causing tilting. Tighten or readjust as needed. Keep checking with your level after each adjustment—the goal is to achieve a perfectly horizontal position.
Test the Setup with a Short Cycle
Run a quick wash to observe if the dishwasher remains steady and if water stays inside during the cycle. Watch for any signs of leakage or tilting. During my first test, I noticed water pooling at one corner—indicating I needed further adjustment. Fixing this saved me from future water damage or appliance replacement costs.
Ensure Drain Hose Positioning Aligns with Level
The drain hose’s height and loop are critical. A common mistake is improperly looping or positioning the hose, which relies on correct leveling to function seamlessly. I discovered that even after leveling the dishwasher, a poorly positioned hose caused water backflow. For proper guidance, consult the correct drain hose height tips to prevent these issues.
Regularly Recheck and Adjust
Over time, vibrations and house settling can cause your appliance to shift slightly. Make it a habit to recheck the level every few months, especially after house movements or renovations. This proactive approach keeps leaks at bay and prolongs your dishwasher’s lifespan.
Many homeowners believe they understand appliance repair basics, but there are hidden nuances that can undermine both repairs and warranties. One prevalent myth is that DIY fixes are always cheaper and faster; however, incorrect attempts can void warranties and lead to costly damage, especially if non-OEM parts are used, which might not meet manufacturer specifications (learn more about warranty protection in this detailed guide). Another misconception is that a quick same-day service always resolves the issue effectively, but some problems require specialized diagnostics that only authorized technicians can perform properly, as highlighted in expert analyses of appliance troubleshooting.
A common trap involves improper installation—many assume that once the appliance is plugged in, it’s ready to operate. Yet, subtle details like incorrect leveling or failing to follow setup procedures can lead to leaks or safety hazards. For example, improperly leveled dishwashers often cause leaks and can prematurely damage internal components, making repairs more complex and costly. Always double-check installation steps and don’t skip crucial checks, as skipping these can void your warranty, especially when it comes to crucial setup areas like drain hose positioning.
A sophisticated question homeowners should ask themselves is: How does warranty transfer work when I upgrade or relocate my appliance? It’s a nuanced process that many overlook, possibly resulting in coverage loss if not properly handled. A recent industry study emphasizes that understanding warranty terms and conditions is vital—many falsely assume warranties are automatically valid regardless of changes in ownership or installation locations.
Moreover, the misconception that all service providers are equal can lead homeowners astray. Unlicensed or unverified repair services might offer cheaper rates but often lack the expertise necessary for complex diagnostics or warranty-covered repairs. Always verify the credentials of your service provider and confirm they follow manufacturer guidelines, which can save you from future troubles.
Lastly, ignoring regular maintenance—like cleaning door seals or checking hoses—can be a significant mistake. These small habits prevent larger problems down the line, ensuring your appliances function efficiently and stay under warranty. For instance, a simple gasket cleaning move can prevent leaks and extend the service life of your fridge.
If you’re interested in the finer details of appliance care or want to avoid common pitfalls, check out resources on specific issues like [leak repairs](https://discountappliancehub.com/dishwasher-flooding-3-steps-for-same-day-repair-in-2026) or [warranty tips](https://discountappliancehub.com/fridge-seal-broken-3-ways-to-save-your-2026-warranty-claim). Remember, understanding these hidden nuances is the key to effective, long-lasting appliance ownership.
Have you ever fallen into this trap? Let me know in the comments.
Staying ahead in appliance maintenance and repair requires more than just basic knowledge; it demands the right set of tools that enable precision, efficiency, and long-term reliability. Over the years, I’ve honed my toolkit to include specific equipment that ensures I can diagnose issues accurately and perform repairs confidently on various household appliances.
Investing in Quality Diagnostic Equipment
One staple in my toolkit is a digital multimeter. I prefer models like the Fluke 117 because of their accuracy and durability. These meters help me measure voltage, current, and resistance, which are crucial when troubleshooting complex issues, such as detecting faulty wiring or sensor problems in refrigerators or dishwashers. Having a reliable multimeter saves time and prevents guesswork, especially when dealing with warranty-sensitive repairs.
Precise Leveling and Alignment Tools
Properly leveling appliances is fundamental to avoiding leaks and operational hiccups. I rely on a high-accuracy digital spirit level, which can detect minute tilts—down to 0.1 degrees. This precision is vital when installing or releveling units like dishwashers or washing machines. Even slight misalignments can lead to issues that are costly over time, as discussed in our guide on same-day dishwasher repair.
Specialized Removal and Installation Tools
For disassembly and component replacement, I use a set of high-quality screwdrivers, including magnetized Phillips and flat-heads, and a variety of socket wrenches. For delicate parts like control panels or gaskets, plastic pry tools help prevent damage. These tools make my work smoother and protect the appliance’s integrity, which is critical for maintaining warranties and ensuring long-term performance.
Advanced Leak Detection Equipment
Detecting hidden leaks can be tricky, so I use ultrasonic leak detectors like the UE Systems Model 9060. This device helps me identify the precise location of leaks in internal components or under units, even when water isn’t visibly present. This saves time during repairs and reduces unnecessary part replacements, aligning with best practices for efficient service.
Embracing Software and Digital Resources
In addition to physical tools, I leverage diagnostic apps and manufacturer manuals stored digitally. These resources guide me through troubleshooting steps tailored to specific brands and models, ensuring I follow recommended procedures that uphold warranty conditions. Staying updated with software tools also prepares me for future trends, like IoT-enabled appliances that require remote diagnostics.
Looking Toward the Future of Appliance Maintenance
As technology advances, I predict a growing reliance on smart diagnostics and AI-powered troubleshooting tools. Devices that self-diagnose issues and communicate directly with technicians will become standard, reducing downtime and increasing repair accuracy. Preparing for this shift means investing in adaptable tools and honing digital diagnostic skills now.
How do I maintain these tools over time?
Regular calibration and proper storage are key. For example, digital multimeters need periodic calibration—many manufacturers offer calibration services or guidelines, which I strictly follow to ensure accuracy. Proper storage in a dry, lint-free environment prevents damage. Documenting maintenance routines for my tools helps me stay on top of their condition and ensures they remain reliable for critical repairs.
Try implementing a digital multimeter like the Fluke 117 into your toolkit and see how it elevates your troubleshooting precision. The investment pays off by reducing repair time and improving service quality, which is essential for maintaining warranties and long-term appliance health.
The Hidden Lessons That Can Save Your Floor and Wallet
One of the most eye-opening lessons I learned in my appliance repair journey was how a simple oversight—like neglecting proper leveling—could lead to hours of work and unexpected expenses. I realized that dedicating a few extra minutes to ensure perfect leveling before installation could have prevented the entire leak fiasco. This taught me to always prioritize foundational details, because neglecting them might seem minor but can snowball into major issues down the line.
Another insight I gained involved the importance of regular rechecks. Houses settle, vibrations occur, and minor misalignments happen over time. Staying vigilant and re-leveling periodically doesn’t just keep things functioning smoothly—it preserves warranties and extends your appliance’s lifespan. The peace of mind that comes from proactive maintenance is worth every bit of effort.
Lastly, I discovered that understanding the role of drain hose positioning is crucial. Even if your dishwasher is perfectly leveled, a poorly positioned hose can cause backflow and leaks. Combining correct leveling with proper hose setup creates a reliable, leak-free environment. Invest time here, and you’ll save money and frustration in the long run.
Tools That Transformed My Repair Approach
My go-to equipment includes a digital multimeter, which offers precise diagnostics and helps uncover electrical issues that might otherwise be hidden. The reliability of a good multimeter, like the Fluke 117, empowers me to perform quick checks and avoid unnecessary parts replacement. I also rely on high-accuracy digital spirit levels—they catch subtle tilts invisible to the naked eye and ensure that each installation is spot-on. These tools have become essentials that make all difference when aiming for professional-quality results, maintaining warranties, and preventing leaks.
For tight spaces or delicate adjustments, plastic pry tools and the right socket wrenches provide control without damage. Incorporating ultrasonic leak detectors has revolutionized my approach—detecting leaks before they cause damage saves time and money. I always keep manufacturer manuals and troubleshooting apps handy, which streamline the repair process and help me stay updated on best practices. Embracing these tools has turned DIY challenges into opportunities for confidence and mastery.
The Power of Taking Charge and Staying Curious
Perhaps the most vital lesson is that proactive learning and curiosity are your best allies. Don’t shy away from double-checking installation steps, re-evaluate your work regularly, and always seek out trusted resources. Whether it’s a quick calibration or a detailed drain hose adjustment, every small effort adds up to long-term savings and peace of mind. With the right mindset and tools, you can prevent leaks, safeguard your warranty, and keep your appliances running smoothly—empowering yourself to handle unexpected issues before they escalate. How about sharing your own appliance repair wins or questions? Let’s learn from each other and keep our homes leak-free and trouble-free.