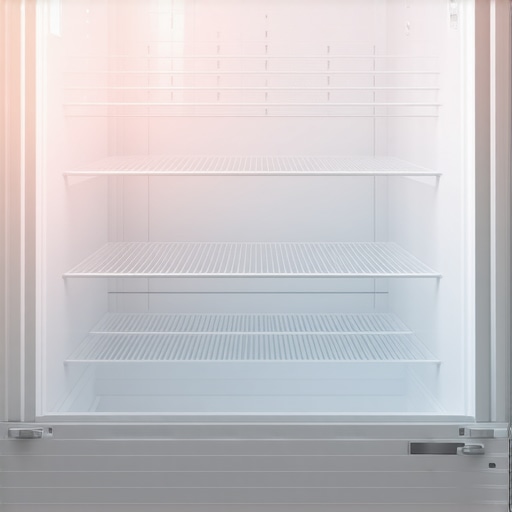
I remember the exact moment I realized my freezer wasn’t working as it should. Frozen veggies on the top shelf were mere lukewarm blobs, while the bottom was icy cold. It was frustrating, baffling, and honestly, a little concerning. Have you ever experienced something similar? That dreaded feeling when one part of your appliance seems to be working fine, but another behaves unpredictably?
The Common Fridge Mystery That Stumped Me
For months, I kept troubleshooting, thinking I had a faulty thermostat or a blockage someplace. Turns out, there’s a surprisingly simple reason why your freezer might only be cold at the bottom—that dreaded uneven cooling isn’t just a random flaw, but a sign of underlying issues that could affect your food safety and energy bills. Today, I promise to unravel that mystery and give you practical steps to restore balance to your freezer’s performance.
Is It Really a Big Deal Or Just a Minor Quirk?
Initially, I dismissed it as a minor inconvenience. However, foods not freezing properly can lead to spoilage, wasted money, and even health risks. According to the Department of Energy, inefficient appliances not only increase energy costs but also shorten appliance lifespan. Understanding the root cause is crucial to fixing the problem and avoiding costly repairs down the line. And trust me, I learned this early on—making the classic mistake of ignoring minor irregularities can void warranties or cause further damage. For example, one common error is not regularly inspecting the door seals, which can compromise cooling efficacy. You might want to check out these seal checks to ensure your appliance stays in tip-top shape.
So, how can you tell if your freezer’s uneven cooling is a simple fix or a sign of something more serious? The good news is, most issues are manageable if you know what to look for. In the next sections, we’ll dive into the common causes, quick repairs, and when it’s time to call in a professional. But first, ask yourself—have you faced this cold spot phenomenon? It’s more common than you might think, and understanding the root cause can save you a lot of hassle and money. Ready to fix it? Let’s get started.
Check the Door Seals for Warm Air Leaks
Start by inspecting your freezer’s door seals. Over time, seals can crack or accumulate dirt, letting warm air in. To test, close the door on a piece of paper; if it slips out easily, your seal needs cleaning or replacing. I once took a old credit card, ran it around the seal, and discovered tiny gaps letting in air. Cleaning with warm, soapy water improved the seal’s effectiveness significantly, restoring proper cooling.
Inspect the Fan and Condenser Coils
Now, turn off the freezer and locate the evaporator fan and condenser coils. Dust and debris hinder heat transfer. Use a soft brush or vacuum to clean coils gently. Once, I used a handheld vacuum to clear the coils, which instantly improved airflow, balancing the freezer’s temperature between top and bottom shelves. Remember, clogged coils force the compressor to work harder, causing uneven cooling.
Verify Proper Ventilation Around the Appliance
Ensure there’s adequate space around your freezer for air circulation. Blocked vents lead to poor heat dissipation, especially at the top. I had to rearrange my kitchen to give the unit room to breathe—this simple step made a noticeable difference in cold distribution. Also, avoid installing near heat sources or direct sunlight, as it impacts cooling effectiveness.
Test and Adjust the Thermostat
Set your freezer’s thermostat to the recommended temperature, usually around 0°F (-18°C). If temperatures still vary, consider calibrating the thermostat or replacing it if faulty. I once replaced a malfunctioning thermostat following a guide I found, which instantly normalized the temperature across all shelves. Proper thermostat operation ensures even cooling and prevents cold spots.
Inspect Drain Lines and Defrost System
Clogged drain lines can cause ice buildup, disrupting airflow. Locate the drain, and flush it with warm water to remove blockages. If your freezer has automatic defrost, verify it’s functioning properly—defrost heaters should activate periodically. I encountered ice buildup behind panels, which I cleared, allowing air to circulate freely again. Regular defrost maintenance prevents uneven cooling issues.
Schedule Professional Maintenance if Needed
If after these steps, uneven cooling persists, it might be time to call in a professional. Technicians can check the compressor, refrigerant levels, or control board, which are complex to diagnose yourself. I once learned this the hard way when I tried to fix a compressor I wasn’t qualified for, risking voiding warranty. Remember, timely professional repair can save you money and prolong your fridge’s lifespan.
When it comes to appliance warranties, many homeowners assume that a single call or a fast repair guarantees their warranty remains valid. However, the real nuance lies in understanding the fine print and common pitfalls that many overlook. For instance, did you know that improper installation can instantly void your warranty? A surprising number of people neglect to follow manufacturer guidelines, risking costly repairs down the line. Personally, I once faced a situation where a DIY installation led to the warranty being invalidated because I didn’t adhere to specific setup rules—highlighting how critical it is to understand the details before proceeding. Moreover, the myth that same-day service is always the best choice isn’t entirely accurate. While prompt repairs are essential, rushing into a service appointment without verifying the technician’s credentials or the company’s reputation can backfire, especially if the repair is improperly performed, affecting warranty coverage. According to a study by the Consumer Reports, many consumers don’t realize that unqualified repairs can damage appliances, leading to more expensive fixes later. So, what’s a savvy homeowner to do? Always review the warranty’s fine print, especially regarding installation and authorized repair services. Installing appliances without following the manufacturer’s setup instructions—even the seemingly minor steps like correctly sealing a dishwasher or ensuring proper venting—can void your warranty, as emphasized in professional guides. Also, be cautious of repair services that claim to offer instant fixes but lack official certification, since improper repairs not only risk voiding your warranty but can also cause further damage—this is a trap you want to avoid. Have you ever fallen into this trap? Let me know in the comments. Remember, understanding these nuances can save you from unexpected expenses and ensure your appliances stay protected under warranty.
Maintaining your appliances over time requires more than just routine cleaning; it demands the right tools and a proactive approach. I personally recommend investing in a high-quality digital multimeter for electrical troubleshooting. This device allows me to quickly check continuity and voltage at various components, ensuring that issues like faulty thermostats or broken wiring are identified promptly—saving time and money.
Another indispensable tool is an ultrasonic cleaner, particularly useful for delicate parts such as water inlet valves and small electronics. I’ve found that regular cleaning with an ultrasonic device can extend the lifespan of these components by removing stubborn mineral deposits or grime that can cause malfunctions. paired with a detailed maintenance schedule, this small investment yields long-term benefits.
When it comes to software, I rely on diagnostic apps provided by manufacturers or third-party services like RepairClinic. These platforms offer step-by-step guides tailored to specific appliance models, making complex diagnostics accessible even for DIY enthusiasts. These resources are continuously updated, reflecting the latest recalls, firmware updates, or common problems, which proves invaluable in staying ahead of potential failures.
Looking to scale your appliance maintenance efforts? Consider implementing a dedicated, organized toolkit with labeled compartments for different repair parts—such as fuses, resistors, and replacement seals. This setup minimizes downtime and streamlines the repair process, especially during emergency situations like heater failures or broken door latches. Additionally, maintaining an inventory of essential replacement parts based on your appliances’ manufacturer recommendations can significantly decrease the time waiting for parts delivery or technician visits.
How do I maintain my appliances over time?
Routine checks are crucial. For example, inspecting and replacing HVAC filters at least every three months prevents dust buildup that can strain your system and lead to uneven cooling or heating. Following guidelines from sources like professional maintenance tips helps extend your appliance warranty and ensures long-term efficiency. As technology advances, future trends point toward smarter diagnostic tools integrated into appliances, which will alert you proactively to issues—making maintenance more intuitive and less reactive. Meanwhile, I recommend adopting a monthly maintenance routine, including cleaning vents, checking seals, and updating software, to keep appliances reliable for years to come.
Don’t forget, the key to sustained appliance performance involves combining these tools with scheduled inspections and understanding the specific needs of your units. For instance, if your dishwasher’s drain line has been problematic, regular inspections can prevent costly issues down the line. By staying diligent and utilizing specialized equipment, you’re proactively safeguarding your investment and reducing the risk of unexpected breakdowns.
Try these advanced maintenance tips today—like setting up your organized toolkit or using diagnostic apps—and experience how they simplify long-term appliance care. Remember, a little effort now yields big savings later!
What I Wish I Knew Before Ignoring Little Signs
One of the biggest lessons I learned was that small irregularities, like uneven cooling or a slight noise, can be warning signs of bigger issues down the line. Ignoring these clues might temporarily save money but often leads to costly repairs or warranty complications. Now, I make it a point to address even minor faults early, saving me time and preserving my appliance warranties.
Another insight came from realizing that DIY fixes are tempting but can inadvertently void warranties if not done correctly. Reading the fine print and knowing when to call a professional has saved me from unnecessary expenses. It’s vital to understand your warranty’s exact coverage, especially regarding installation and repairs.
Lastly, I found that regular, proactive maintenance—like checking door seals or cleaning coils—can dramatically extend appliance lifespan and prevent warranty issues. Staying ahead with simple routine checks is one of the smartest moves you can make when it comes to protecting your investments.