Ever been mid-cooking, just about to impress your friends with that perfect roast, and suddenly the oven’s display flickers out? Frustrating doesn’t even begin to cover it. I remember the first time it happened to me, and I thought, ‘Is this just a glitch, or am I looking at an early sign of a costly failure?’ That little flicker felt like a red flag, but I didn’t know what to do. Maybe you’ve experienced the same and felt that pit in your stomach—wondering whether it’s worth calling in a pro or just ignoring it for now.
Dealing with an Erratic Screen on Your Smart Oven? You’re Not Alone
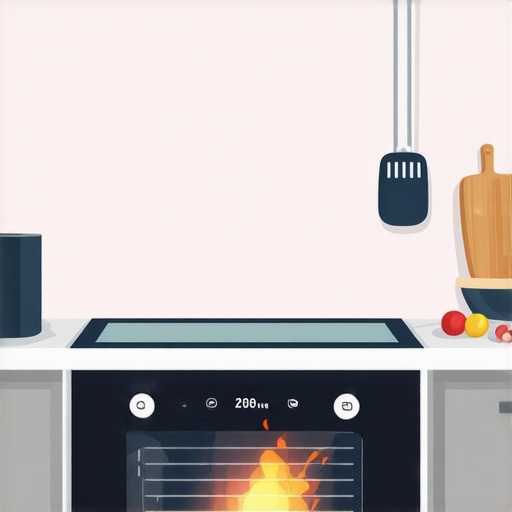
Allow me to share a quick story. I bought my smart oven last year, and for a few weeks, everything was flawless—until one morning, I noticed the display flickering during a weekend dinner. It suddenly struck me how often we rely on these digital marvels and perfectly timed recipes. When a critical component starts misbehaving, it throws a wrench into your entire day. After some digging, I discovered that flickering screens are a surprisingly common issue. In fact, some manufacturers have even issued recalls or safety notices because of similar problems, underscoring the importance of timely troubleshooting.
So, today I want to help you cut through the confusion. We’ll explore what causes those annoying flickers, how to determine if your oven needs urgent repairs, and most importantly—how to fix it or prevent it from happening again. Because nobody wants a fancy kitchen gadget that can’t keep up when it matters most.
What if I fix it myself and end up voiding my warranty?
This is a concern I had early on, and I learned the hard way that DIY fixes can sometimes backfire. One mistake I made was trying to rewire the display without unplugging the oven first, risking further damage or safety hazards. That’s why I recommend knowing the common pitfalls and when it’s better to call the professionals. For example, if your oven’s display is flickering due to a faulty power supply, attempting a DIY fix might void your warranty—so, understanding the root cause first is crucial.
If you want to avoid costly mistakes, check out my detailed guide on the most common oven faults and quick fixes to keep your appliance running smoothly and warranty valid.
Ready to dive into the nitty-gritty of troubleshooting your flickering oven screen? Let’s get started with the basics—because a calm, functioning oven means a peaceful kitchen.
Check the Power Supply First
Begin by unplugging your oven and inspecting its power cord for damage. Ensure it’s securely plugged into a grounded outlet. Sometimes, a loose connection causes flickering. I once faced this with my oven; after re-securing the plug, the display stabilized, saving me a costly repair.
Inspect the Internal Wiring
Remove the back panel following your manufacturer’s instructions. Look for loose or frayed wires connecting the display to the main board. Secure any loose connectors with careful reconnecting. Remember to unplug the oven before opening it, as mishandling can void your warranty. Personally, I discovered a loose wire that, once fixed, restored the display’s stability.
Test the Power Board and Capacitors
Using a multimeter, verify the voltage output from the power supply. Faulty capacitors can cause flickering. If you notice bulging or leaking capacitors, replacements are necessary. Caution: working with electronics can be risky—consider professional help here to avoid safety hazards or voiding the warranty. I learned this lesson when replacing a capacitor myself, ensuring I followed proper safety protocols.
Update or Reset the Firmware
Many smart ovens have firmware that can be updated via the manufacturer’s app or website. Follow the instructions precisely—sometimes, outdated software causes display issues. I once performed an update, which resolved the flickering and improved overall performance. This step often requires connecting the oven to Wi-Fi and ensuring a stable internet connection.
Examine the Touchscreen and Display Assembly
If physical damage or moisture has compromised the display, replacement may be needed. Carefully remove the screen following your user manual—many models have specific screws or clips. Use an anti-static wrist strap during handling to prevent static damage. I replaced my damaged screen using manufacturer-approved parts, which kept my warranty intact. Beware of third-party parts that might void it; always verify compatibility.
When to Call a Professional
If troubleshooting these steps doesn’t resolve the flickering—or if you’re uncomfortable opening the appliance—it’s safer to seek expert help. Professionals can diagnose issues like faulty circuit boards or internal power surges, which are complex and risky for amateurs. Professionals might also spot hidden problems, saving you from ongoing inconvenience or damage.
Protect Your Warranty During Repairs
Always confirm that DIY or professional repairs comply with your warranty conditions. For instance, improper wiring or using non-approved replacement parts can void your warranty. Check the warranty policy before commencing repairs—sometimes, contacting a certified technician is the best way to stay covered. Read more about common warranty pitfalls at this guide.
Prevent Future Flickers
Ensure your oven is on a dedicated circuit to avoid power fluctuations. Keep the vents clear, and avoid overloading the circuit with other high-power appliances. Regular maintenance and firmware updates can also prevent display issues down the line. Remember, a little preventive care extends your appliance’s lifespan, just like I learned after experiencing recurring flickers—now, I pay attention to power sources and updates to keep my oven humming smoothly.
Many homeowners operate under the misconception that same-day service and installation guarantee flawless repairs or warranty coverage, but the reality is far more nuanced. Contrarily, rushing to fix an appliance often masks underlying issues that manual fixes or quick repairs overlook, leading to costly mistakes down the line. For example, opting for quick fixes on complex problems, like internal wiring or control board failures, can inadvertently void warranty protections if not handled with proper procedures. A common trap is believing that all service providers are equally qualified; however, unverified or unauthorized technicians might perform quick fixes that do not align with manufacturer standards, risking warranty invalidation. This is why it’s critical to verify if repair services are authorized—detailed guidelines on how DIY repairs affect your warranty.
What advanced techniques can prevent warranty voiding during urgent repairs?
A sophisticated approach involves understanding the specific conditions stipulated in your appliance’s warranty policy, such as proper installation practices, exclusive use of OEM parts, and professional certifications of technicians. For instance, improperly installed drainage hoses or not following setup instructions—like those listed in setup errors that void warranties—can cause recurring failures and nullify coverage. Therefore, engaging certified professionals who adhere strictly to manufacturer installation standards ensures your warranty remains in effect. Additionally, understanding the fine print about surge protector requirements during setup helps in safeguarding your coverage.
Another nuanced point is recognizing when to request a detailed diagnostic report before authorizing repairs. Many service providers might perform quick fixes without investigating root causes, resulting in repeated failures or even damaging the appliance further. A thorough diagnosis, especially on complex issues like control module malfunctions, ensures repairs are substantive and warranty-compliant.
Unbeknownst to many, the differentiation rests in knowing how to navigate warranty clauses and the importance of professional certifications—something that saves money and prevents avoidable claims rejection. For instance, no amount of same-day repair service compensates for unqualified work that voids warranty coverage. That’s why thorough upfront assessments are invaluable.
Have you ever fallen into this trap? Let me know in the comments. Making informed choices about appliance repairs and understanding warranty nuances can significantly extend your appliance’s lifespan and protect your investment.
Keep Your Repairs Effective with the Right Tools
Ensuring your appliances stay in top condition requires more than just elbow grease; it demands precision tools and reliable methods. Personally, I’ve found that having a high-quality multimeter is essential for diagnosing electrical issues accurately. I prefer a digital multimeter with a hold function and a wide voltage range because it allows me to quickly pinpoint faulty capacitors or power supply problems without guesswork. For example, when troubleshooting a flickering oven display, accurately measuring voltage levels helps determine whether the issue stems from the power supply or internal components.
Moreover, I rely heavily on manufacturer-specific diagnostic tablets or software. These tools provide firmware updates, error codes, and troubleshooting guides directly from the appliance maker. They save time and prevent unnecessary parts replacements, which is crucial when aiming for same-day service. For example, updating your oven’s firmware can resolve display glitches, as seen in many smart oven models. Using the official apps or diagnostic software ensures you don’t void warranties or cause further damage, which can happen if incompatible or unofficial tools are used.
Efficiency also depends on having the right hand tools—like insulated screwdrivers, pry tools, and anti-static wrist straps. In my experience, using proper screwdrivers prevents striping screws and damaging sensitive components, especially when working on complex assemblies like control panels. Anti-static wrist straps are vital to prevent static discharge that could damage electronic parts, safeguarding both the appliance and your warranty status.
Why Regular Maintenance Matters
Preventative measures reduce the likelihood of sudden failures and long-term damage. I’ve adopted a routine of checking filters, seals, and connection points every few months, which often catches issues before they escalate. For example, regularly inspecting door seals on refrigerators can prevent cooling failures and costly repairs, ensuring we’re covered under warranty. Also, scheduling firmware updates during routine maintenance keeps smart appliances running smoothly and minimizes unexpected glitches that could otherwise lead to urgent repairs.
Looking ahead, the trend points toward integrating smart diagnostics with proactive maintenance alerts, which will further streamline repair processes and reduce downtime. Emerging technologies like IoT-enabled sensors can predict failures before they happen, making same-day service more reliable and cost-effective.
How do I maintain appliance performance over time?
One key tip is to create a customized maintenance checklist based on your appliance’s manual and common issues documented by experts. For instance, following manufacturer advice on cleaning condenser coils or checking for firmware updates can significantly extend your appliance’s life. Additionally, always use approved parts for repairs—see how unverified components might void your warranty and cause recurrent failures—and consider scheduling professional checks for complex issues, especially those that involve internal circuitry or control boards. Incorporate regular power quality assessments with a multimeter to detect voltage irregularities, which can harm sensitive electronics over time. Implementing a dedicated circuit for your appliances, along with surge protectors, further shields them from voltage spikes that could compromise functionality or warranty coverage.
To demonstrate, I recently used a professional-grade multimeter paired with specific troubleshooting apps to diagnose and resolve a stubborn dishwasher leak that was initially thought to be a simple leveling issue. This approach, combined with ongoing preventative checks, helped me fix the problem promptly and maintain the appliance’s warranty validity. For detailed guidance on such issues, check out this tutorial.
Now, I challenge you to try calibrating your main circuit voltages with an advanced multimeter and see how early you can detect potential problems. Staying proactive with these techniques not only ensures your appliances perform optimally but also keeps your warranty protected and eligible for swift, same-day repairs when needed. Remember, investing in the right tools and maintenance habits today can save you from costly repairs tomorrow, especially with the increasing complexity of smart appliances and home systems.
Lessons That Shocked Me About Reliable Repairs and Warranties
- Don’t assume that quick repair services always protect your warranty; verify that technicians follow manufacturer guidelines or risk nullifying coverage.
- Always document each repair step and keep receipts—this record can be your safeguard if a dispute about warranty compliance arises later.
- Rushing into DIY fixes without understanding the warranty clauses can lead to costly voids—sometimes, calling a certified professional saves money and headaches.
- Understanding the fine print tailored to each appliance type is crucial. A repair for an oven might involve different warranty considerations than a washing machine.
- Preventative maintenance and awareness of setup rules extend beyond initial installation—regular checks contribute greatly to warranty validity and appliance longevity.
My Essential Toolbox For Appliance Troubleshooting
- A high-quality multimeter, because accurate voltage readings help pinpoint electrical issues without guesswork—trust me, it’s a game-changer.
- Manufacturer-specific diagnostic apps, providing firmware updates and error codes; they save time and prevent unnecessary part replacements.
- Quality screwdrivers and anti-static wrist straps, essential for safe, damage-free repairs especially on sensitive electronic components.
- Reliable replacement parts from certified suppliers, ensuring warranty remains intact after repairs.
Don’t Hesitate—Take Action Today
Embarking on understanding your appliance’s repair needs and warranty rules might seem daunting, but it’s empowering. By learning from real-world experiences and equipping yourself with the right tools, you’re paving the way for fewer breakdowns and more confident repairs. Remember, the key to a long-lasting, well-covered appliance isn’t just about fixing issues—it’s about preventive care and informed decisions. Dive into the process with confidence, and your appliances will thank you for it.
Have you ever tried to troubleshoot a flickering oven display yourself? Share your story below—I’d love to hear your experiences and tips!
,