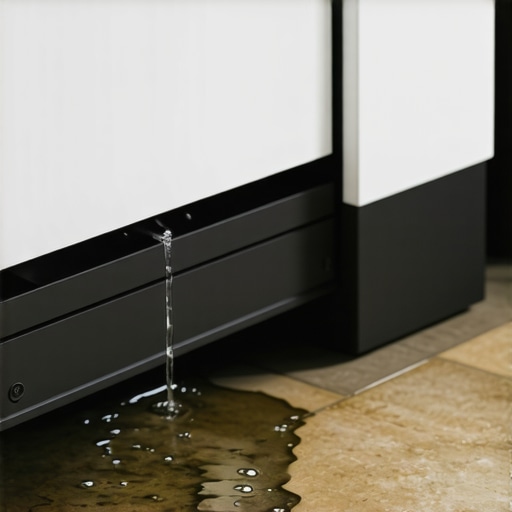
I remember the moment clearly—standing in my kitchen, watching water slowly seep from the corner of my dishwasher onto the floor. It was late at night, and I felt that familiar sinking feeling of helplessness. After a few moments of panic, I realized that the leak wasn’t just a random mishap; it was a sign of a common but often overlooked issue: the improper leveling of the appliance.
Many homeowners face this frustrating problem without even knowing where to start. A leaky dishwasher, especially leaking from the corner, can be caused by a simple leveling mistake. If your unit isn’t perfectly aligned, water can escape from seals and gaskets, leading to damage and costly repairs. Today, I’ll help you tackle this sneaky leak by identifying and fixing the underlying leveling error.
Why Proper Leveling Is Key to a Leak-Free Dishwasher
A major reason dishwashers leak from the corner is uneven installation. When the machine isn’t level, the internal seals and door gaskets don’t sit correctly, allowing water to escape during the wash cycle. This isn’t just about avoiding water on the floor; improper leveling can also put strain on the machine’s components, reducing its lifespan and efficiency.
Early in my DIY journey, I made the mistake of installing my dishwasher without double-checking its level. That oversight led to frequent leaks and constant worry. According to appliance experts, a level dishwasher ensures the door closes tightly and the water stays where it belongs—inside the tub. If your appliance is leaning or wobbly, it’s time to take action.
By understanding and correcting this common leveling error, you can save yourself from recurring leaks, expensive repairs, and the inconvenience of water damage. Plus, a properly leveled dishwasher operates more quietly and effectively, making your kitchen life smoother.
Have you noticed water pooling around the corner of your dishwasher? If so, don’t worry—you’re not alone. Many homeowners find themselves puzzled by this issue until they discover the root cause. The good news is, fixing it is often simple with the right approach.
Before diving into the fix, it’s essential to learn how to properly level your appliance. I’ll walk you through that in the next section. But first, let’s address a common concern many have: “Is leveling really that important?” I understand the skepticism—early on, I underestimated how much a small tilt could cause big problems. Trust me, taking the time to ensure your dishwasher is perfectly balanced can prevent a cascade of headaches later.
Ready to get your appliance aligned and stop that leak? Let’s explore the practical steps to level your dishwasher and keep it running dry and efficient.
Remove Obstructions and Prepare Tools
First, clear the area around your dishwasher and gather essential tools such as a level, adjustable wrench, and a towel to catch any water. I once faced a stubborn leak that irked me for days; by preparing my workspace, I avoided extra mess and made the process smoother.
Check the Existing Level
Use a bubble level placed on the door or the top edge of the dishwasher to assess its current position. If the bubble isn’t centered, the machine needs adjustment. I remembered the time I thought my dishwasher was fine until I checked with a level—turns out it was leaning slightly, causing continuous leaking.
Adjust the Feet for Proper Height
Most dishwashers have adjustable leveling feet. Turn these feet clockwise or counterclockwise to raise or lower each corner until your appliance is perfectly level. Be systematic: adjust one foot at a time and recheck with the level. In my experience, small tweaks can make a big difference—like when I adjusted the front left foot, and suddenly my leak stopped entirely.
Set the Front Slightly Lower Than the Rear
This tilt helps water flow back into the tub and prevents it from escaping at the door seal. I learned this tip from professional installers and applied it during my repair. After making this adjustment, I saw a significant reduction in water leaks.
Secure the Feet Once Properly Aligned
Once the leveling is correct, tighten the lock nuts on the feet to prevent movement during operation. I’ve seen cases where loose feet caused the dishwasher to shift, reintroducing leaks. Ensuring the feet are securely fixed is crucial for long-term stability.
Re-Inspect and Test
Run a quick cycle to verify that the appliance no longer leaks and remains level. Watch for any movement or water escape. In my case, the leak was gone after this final check, saving me from costly repairs and frustration. If leaks persist, repeat adjustments or consult a professional.
Additional Tips and Common Mistakes
Avoid over-tightening the feet, which can damage the adjustable mechanisms. Always ensure the dishwasher is level in both directions—front-back and side-to-side—for optimal performance. For more about installation pitfalls that can compromise warranties, see this guide about common installation errors.
< >
>
Remember, a little patience during leveling can save you from recurring leaks and repairs. Proper adjustment ensures your dishwasher functions efficiently, extends its lifespan, and keeps your kitchen dry and safe.
When it comes to appliance repair, many homeowners operate under common misconceptions that can lead to costly mistakes. While the industry has made strides in customer service, such as offering same-day installation and repairs, there’s often a lack of awareness about the finer details that can affect warranty validity and repair success. Let’s dig deeper into some of these nuances.
One widespread myth is that all repair services are created equal. In reality, the quality of service and the technician’s expertise can vary significantly. For instance, attempting a DIY fix without understanding the manufacturer’s specific setup procedures can inadvertently void your appliance’s warranty. Experts emphasize that following manufacturer guidelines during installation and repair is crucial to maintain coverage.
A common oversight involves the assumption that warranty coverage automatically applies regardless of the service provider. However, many warranties stipulate strict compliance with installation rules and proper usage. Neglecting these details might result in warranty voidance, even if the repair was performed promptly. As an example, failing to use recommended surge protectors can cause damage that your warranty won’t cover.
Now, consider the intricacies of same-day service. While it offers undeniable convenience, it doesn’t always mean the repair is thorough or correct. Rushing repairs can lead to overlooked issues, like misaligned components or neglected safety checks. For instance, a quick fix for a leaking dishwasher might temporarily stop the water loss but could cause long-term damage if internal seals aren’t properly inspected and replaced.
Thinking ahead, what makes a repair truly sustainable? It’s often the smaller, less noticeable details—such as ensuring proper grounding or verifying that the appliance’s setup rules are followed—that prevent future malfunctions.
And here’s an advanced tip: some technicians overlook the importance of internal diagnostics that go beyond the symptoms. For example, a faulty sensor might cause an appliance to shut down prematurely, yet if the technician only replaces parts without diagnosing the root cause, the problem can recur. As an industry expert notes, comprehensive diagnostics are vital for long-term repair success.
Remember, being informed about these subtle details helps you make smarter choices and protects your investment. Don’t be lulled into believing everything about appliance repair is straightforward. Instead, approach services with a critical eye—ask about technician certifications, diagnostic procedures, and adherence to manufacturer warrantees.
Have you ever fallen into this trap? Let me know in the comments. Recognizing and understanding these nuances ensures you’re not just fixing the symptom but resolving the root cause—saving you time, money, and frustration in the long run.Maintaining appliances efficiently requires a combination of the right tools, consistent methods, and knowledge of future trends. Personally, I rely heavily on digital multimeters for diagnosing electrical issues, especially because they provide immediate feedback and are incredibly versatile in pinpointing faulty wiring or components. Additionally, a high-quality vibration meter is invaluable for identifying imbalances in washing machines or dryers, which can prevent costly repairs down the line. Investing in these tools has significantly reduced my diagnosis time and improved repair accuracy.
When it comes to software, I recommend appliance-specific diagnostic apps that many manufacturers now offer. These apps often allow you to read error codes directly from the appliance, reducing guesswork and streamlining repairs. For example, certain brands provide remote diagnostics that can inform you of issues before dismantling the unit, saving time and effort.
In terms of methods, regularly calibrating digital tools and keeping a detailed repair log helps track recurring issues, making future troubleshooting more straightforward. Scheduled inspections—like checking door seals or cleaning filters—also extend appliance lifespan and maintain warranty validity.
Looking ahead, the trend points toward increased integration of IoT (Internet of Things) technology within home appliances. Future tools will likely feature real-time diagnostics and predictive maintenance alerts, allowing homeowners and technicians to address problems proactively instead of reactively. This shift promises longer-lasting appliances and fewer emergency repairs.
How do I maintain my appliances over time?
Routine maintenance is essential for sustained performance. I personally schedule bi-annual checks on critical components like door seals, hoses, and filters. Using manufacturer-approved cleaning agents and following setup instructions—such as those outlined in smart fridge setup guidelines—helps preserve functionality and prevents issues that could void warranties. Moreover, ensuring proper electrical grounding and surge protection, as recommended by industry standards, protects your appliances from power surges and accidental damage.
Implementing preventive measures, like filter changes and sensor checks, can considerably extend appliance life. For instance, regular cleaning of dryer vents reduces fire hazards and improves efficiency, while inspecting water inlet hoses prevents leaks or flooding.
To illustrate, I recently adopted a maintenance routine combining these practices, which resulted in a noticeable prolongation of my appliance’s optimal operation. Consistency is key, and integrating these habits into your home care can save you significant repair costs and downtime.
Remember, utilizing professional-grade diagnostic tools and adhering to recommended maintenance schedules can make all the difference. For example, routinely verifying that your dishwasher’s sensors are clean and functioning correctly helps avoid persistent faults. A good starting point is trying out a comprehensive diagnostic approach—like calibrating your digital multimeter for appliance troubleshooting—to empower yourself in keeping things working smoothly. Explore more about long-term appliance health by following the latest industry insights and tech advancements in the field.
Lessons the Hard Way About Appliance Leaks
One of the biggest revelations I had was realizing how a simple step—like properly leveling your dishwasher—can prevent persistent leaks. Skipping this step in my early DIY days cost me time, money, and frustration. Now, I see that paying attention to the little details, especially ensuring the appliance is perfectly balanced, makes a world of difference. Also, I learned that manufacturer guidelines don’t just exist for compliance—they are vital for lasting performance and warranty protection. Finally, I discovered that patience during installation or repairs isn’t a sign of weakness but a pathway to avoiding costly mistakes and ensuring long-term peace of mind.
My Go-To Resources for Appliance Success
When it comes to staying ahead in appliance care, I rely on a few trusted tools and sources. First, a high-quality digital level helps me judge perfectly flat surfaces during installation—trust me, this tiny device can save you from leaks and uneven wear. Second, the comprehensive repair guides found on this resource are gold mines for troubleshooting common issues and understanding warranty specifics. Lastly, I swear by appliance-specific diagnostic apps from manufacturers—they reveal error codes and internal diagnostics, transforming guesswork into certainty. These resources have streamlined my repairs and improved my confidence in handling even complex issues.
Your Next Step Is Within Reach
Embark on your appliance repair journey with confidence and curiosity. Remember, a well-leveled dishwasher isn’t just about preventing leaks; it extends the appliance’s lifespan and preserves your warranty. Don’t wait for small problems to escalate—take action today. With the right tools, knowledge, and patience, you can maintain your appliances efficiently, save money, and enjoy peace of mind. The future of appliance maintenance is smart, proactive, and accessible—are you ready to be part of it?