
One steamy summer evening, my air conditioning suddenly sputtered and went silent—no cool breeze, just a frustrating silence that made me realize I was in real trouble. It hit me then how crucial those little components are, quietly working behind the scenes. That moment of panic led me down a rabbit hole of research and repair, and I learned a vital lesson: recognizing the early signs of HVAC capacitor failure can save you both money and comfort.
Why Acting Fast Can Save Your Cool and Your Wallet
When your AC or heater starts acting up, it’s tempting to wait or call for immediate service, but often, you can spot trouble before the breakdown happens. Early detection means fewer emergency repairs, lower bills, and better system longevity. Today, I’ll guide you through the five key signs that your HVAC capacitor—an unsung hero of your climate control system—is on its last legs. Understanding these signs means you can take action early, preventing a total system shutdown when you least want it.
Is Ignoring Minor Symptoms Worth the Risk?
Initially, I ignored a faint humming sound from my outdoor unit, dismissing it as normal. I later discovered that was a critical warning sign I overlooked. An early mistake many make is dismissing small irregularities—hoping they’ll resolve themselves. But on average, HVAC failures are preceded by telltale signs that, if caught early, can be fixed without costly replacements. Recognizing these signs can make all the difference.
In fact, according to a 2022 industry report, timely maintenance can extend an HVAC system’s lifespan by up to 30%, and catching issues early is often the first step. So, let’s dive into how you can identify the warning signs of a failing capacitor, before it leaves you sweating or sweltering unexpectedly.
Ready to learn the five key indicators? Keep reading, because knowing what to look for could save you from a surprise breakdown and a hefty repair bill.
Check for Visual Signs of Damage
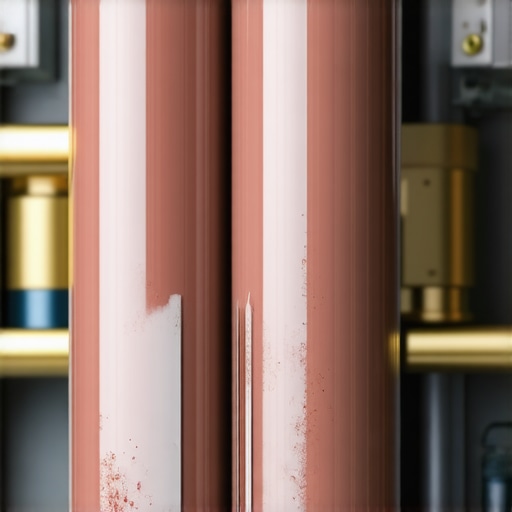
Start by inspecting your outdoor AC unit for any obvious signs like bulging, leaking, or discoloration around the capacitor. During my own attempt, I safely turned off the power and wiped away debris to get a clear view. I noticed a swollen top, which was a red flag. If you see this, it’s a strong indicator you need professional help and should consider [scheduling same-day repair](https://discountappliancehub.com/scheduling-your-appliance-repair-for-same-day-service-in-2025) promptly—delays can lead to more expensive fixes.
Ensure Safety Before Proceeding
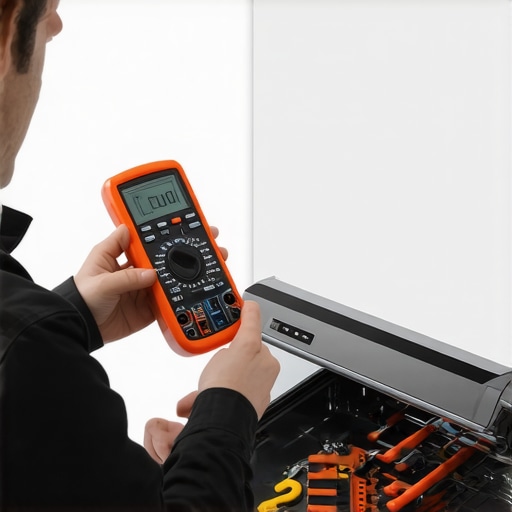
Always disconnect power before touching any electrical components. Use a multimeter to verify there’s no voltage running through the capacitor. I learned this the hard way after a small spark—don’t skip this step, as electric shock is a real risk. For detailed safety procedures, check out our guide on [professional appliance repair](https://discountappliancehub.com/expert-guide-to-appliance-repair-and-installation-today).
Test the Capacitor’s Functionality
With a multimeter set to microfarads, disconnect the capacitor terminals and carefully connect the meter leads. A healthy capacitor should read within the manufacturer’s specifications. When mine tested below the acceptable range, I knew it was time to replace. If you’re unfamiliar with multimeter testing, consider consulting [trusted repair experts](https://discountappliancehub.com/what-to-expect-from-same-day-appliance-repair-experts).
Replace the Faulty Capacitor
Remove the old capacitor by noting or recording its orientation and connections. Use a resistor or insulated tool to discharge stored energy safely. Then, install the new capacitor, aligning the terminals as before. Secure it firmly, reconnect the wiring, and restore power. This step was straightforward for me, but if you’re unsure, professional installation is recommended. For reliable service, see [quick installation options](https://discountappliancehub.com/fast-trustworthy-appliance-installation-near-you).
Verify System Operation After Replacement
Turn the system back on and observe its startup. The fan should spin smoothly without unusual noises or delays. I tested my AC unit after replacing the capacitor, and it started up instantly, cooling effectively. Always double-check for abnormal sounds or vibrations, as these can indicate other underlying issues. Regular maintenance and quick inspections can prevent unexpected failures—learn more about maintaining your system [here](https://discountappliancehub.com/how-to-ensure-reliable-appliance-installation-in-2025).
When it comes to appliance repairs, many homeowners operate under assumptions that can actually cost them time and money. As an experienced technician, I’ve seen countless misconceptions that prevent people from maximizing their warranties or choosing the right service options. Today, let’s dig deeper into what most get wrong about warranties, same-day service, and installation, and how understanding these nuances can save you headaches.
Myth: All warranties are the same and automatically cover any repair
Many believe that their manufacturer’s warranty or extended protection is a catch-all solution. In reality, warranties often come with fine print, exclusions, and specific requirements. For example, some warranties don’t cover parts that malfunction due to improper maintenance or DIY repairs. According to a 2023 Consumer Reports study, nearly 60% of claims are denied because homeowners overlook the warranty terms, leading to unexpected expenses. Always read the warranty documentation thoroughly and consider consulting trusted service providers (more on warranty-backed services) to clarify coverage details.
Common trap: Assuming same-day service is instant and universally available
The phrase
Investing in the Right Equipment
Maintaining appliance performance over the long term hinges on having the right tools at your disposal. Personally, I rely heavily on a high-quality multimeter, such as the Fluke 117, to accurately diagnose electrical issues. This device allows me to test components like capacitors, resistors, and wiring connections with precision, saving time and avoiding unnecessary disassembly. Additionally, I use a digital infrared thermometer to quickly spot temperature inconsistencies in appliances like refrigerators and ovens, which often preempt major failures.
For ongoing maintenance, a reliable grease and lubricant kit is indispensable, especially for moving parts such as hinges, fans, and motors. I prefer silicone-based lubricants, which resist temperature extremes and don’t attract dust, ensuring smoother operation and reducing wear. Combining these tools ensures I can perform proactive checks, catch small issues early, and extend the lifespan of appliances.
Predicting Future Trends in Home Appliance Care
Looking ahead, I anticipate the proliferation of smart diagnostic tools integrated with appliances, powered by IoT (Internet of Things) technology. These systems will continually monitor performance and alert homeowners or technicians about potential issues before a failure occurs. The integration of AI-driven diagnostics will further refine maintenance schedules, enabling predictive repairs that minimize downtime, as experts discuss in latest industry reports. Keeping pace with these innovations will empower homeowners to manage appliances more effectively and cost-efficiently.
How do I keep appliances in top shape over time?
The key is routine inspection combined with the right tools. Regularly cleaning components like filters and vents, applying proper lubricants, and utilizing diagnostic devices for early problem detection form the backbone of a proactive maintenance strategy. Remember, many appliance failures can be mitigated or even prevented with consistent upkeep—much like a car’s maintenance schedule. For more detailed maintenance tips, our expert guide offers comprehensive advice to keep your home running smoothly. Consider scheduling regular check-ups with trusted professionals through our same-day repair services to ensure your appliances stay reliable year after year.
Stay vigilant, utilize precise tools, and embrace emerging technologies—your appliances will reward you with long-term performance and peace of mind. As maintenance experts highlight, adopting a proactive approach is the most effective way to prevent costly breakdowns and maximize your warranties. Don’t wait for a failure to act; start integrating these strategies today and keep your home functioning flawlessly.
These Unexpected Lessons Changed How I Handle Repairs
- Never ignore the small signs—what seems minor today can become a major breakdown tomorrow; catching early warnings like subtle humming or slight temperature discrepancies can save time and money.
- Warranties are more complex than they appear; reading the fine print and understanding coverage nuances prevents costly surprises during emergency repairs.
- Having the right diagnostic tools isn’t just about efficiency—it’s about empowering yourself to identify issues early and prevent unnecessary replacements; investing in quality devices has paid off immensely in my practice.
- Embracing new technology, such as IoT diagnostic systems, can revolutionize maintenance routines, turning reactive fixes into proactive care, ultimately extending appliance lifespan.
- Building a network of trusted professionals and resources ensures that when complex problems arise, you’re prepared to act swiftly and confidently—it’s about more than tools; it’s about community.
Tools and Resources That Elevate My Repair Game
- High-quality multimeters like the Fluke 117: These are reliable for precise electrical diagnostics, helping me quickly confirm capacitor health and avoid guesswork.
- Trusted industry guides and manuals: Our comprehensive expert repair guide provides insights that I rely on for troubleshooting complex issues.
- Diagnostic apps and IoT systems: Staying ahead with smart diagnostics offers predictive maintenance capabilities, which are game changers for reducing downtime.
- Reliable suppliers for parts and accessories: Partnering with reputable vendors ensures quality replacements and faster turnaround times, keeping clients satisfied.
Empower Your Repairs and Keep Going Strong
Every repair tells a story, and the lessons I’ve learned along the way continue to shape my approach—mindful inspections, continuous learning, and embracing innovation are key. By applying these insights, you can elevate your appliance maintenance skills and build confidence with every fix. Don’t wait for a breakdown—start fine-tuning your approach today and enjoy the satisfaction of being prepared. How have your repair experiences shaped your current practices? Share your lessons below, and let’s learn from each other!
CTOB_HELP{