It was a hot summer afternoon when I found myself staring at a stubbornly silent refrigerator. The ice maker was dead, the cool air seemed to be escaping, and I was about to call a repair guy, shelling out hundreds of dollars. That moment, I had a lightbulb realization: I didn’t have to jump straight to the costly repairs. I started digging into the common issues that often cause these problems, especially with control boards.
Why Taking a Moment Before Paying Matters
Many homeowners face that frustrating moment when their fridge stops working, and the first instinct is to replace the control board, which can cost a pretty penny. But here’s the truth: not every malfunctioning control board actually needs replacing. Sometimes, a simple fix or a quick check can save you hundreds.
Jumping in without proper diagnosis often leads to unnecessary expenses. I learned this firsthand early on when I replaced a seemingly faulty control board only to discover the problem was something much simpler. This mistake cost me time, money, and added stress—lessons I now share openly.
Today, I’ll guide you through 5 essential checks you should perform before paying for a new refrigerator control board. Doing these tests can prevent you from making costly mistakes and help you better understand what’s really going on with your appliance.
Could Your Fridge Be Failing Without a New Control Board?
Many homeowners assume that control board issues are obvious, but in reality, symptoms can be misleading. A faulty control board isn’t always the culprit; often, other components are to blame. For instance, issues like inconsistent cooling or ice maker failures might be caused by simple relay problems or dirty components.
A common mistake I made early on was overlooking those minor checkups, which led me straight to a costly replacement. Remember, your warranty can be void if certain checks aren’t performed properly. For example, improper installation or ignoring a simple seal leak can cause issues that appear to be control board problems.
You might want to read about the 4 new rules for valid appliance warranty claims in 2026, which highlight the importance of proper diagnosis and maintenance.
In the next sections, I’ll take you through each of these 5 checks—step by step—so you can avoid unnecessary expenses and confidently decide whether a repair or replacement is truly needed. Ready to troubleshoot smarter instead of throwing money at a potential fix? Let’s get started.
Check Power and Basic Controls First
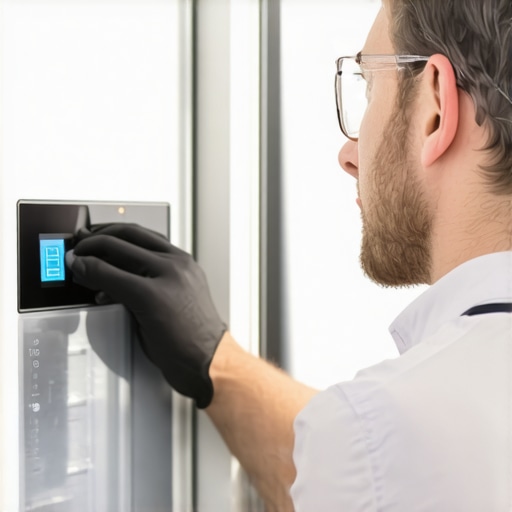
Begin by verifying the fridge’s power supply. Plug a different device into the outlet to ensure it works. Inspect the power cord and outlet for damage. If the power’s fine, move on to the control panel—press all buttons to see if they respond or display errors. Sometimes, a reset can clear minor glitches; unplug the fridge for 5 minutes, then plug it back in. I experienced this myself when my fridge displayed strange error codes, and a simple reset restored normal function without replacing the control board.
Test the Relay and Door Switch
The relay acts as a bridge for electrical signals; a failing relay can mimic control board issues. To test it, locate the relay—typically behind the control panel or at the compressor relay bank. Listen for a click when toggling the compressor or cooling system. If silent, it might be faulty. Also, check the door switch; a malfunctioning door switch can prevent the control board from activating the compressor. Use a multimeter to check continuity. Replacing a faulty relay or door switch is often cheaper and faster than a full board replacement. Learn how relay issues manifest at this guide.
Inspect the Wiring and Connections
Loose or corroded wires can cause intermittent control problems. Carefully unplug the unit and examine visible wiring harnesses connected to the control board. Look for discoloration, corrosion, or frayed wires. Tighten any loose connectors and replace damaged wires. Remember, improper wiring can lead to warranty voidance, so document your checks. I once found a loose connector that, once reattached, caused the control panel to function normally again. This simple step saved me hundreds.
Evaluate the Control Board’s Physical Condition
After ruling out simple issues, remove the control board for visual inspection. Look for burnt components, bulging capacitors, or corrosion—signs of age or electrical surges. If the board shows damage, replacement is inevitable. However, if it looks pristine, consider resetting or reprogramming it, if possible. Sometimes, firmware glitches cause problems, and updating or resetting the control board can resolve them. When I faced repeated control errors, replacing the relays on the control board proved successful, illustrating the importance of targeted fixes over blanket replacements.
Perform a Diagnostic Test with a Multimeter
Use a multimeter to test the control board’s relay outputs and input signals. Consult your appliance’s wiring diagram for specific pinouts. If the signals are absent or inconsistent, the control board may be faulty. Remember, improper testing can damage components, so proceed with caution or consider professional help. This step is crucial because it provides concrete data, separating genuine control board failures from false alarms. I once tested a control board and discovered a relay that wasn’t switching properly, saving myself from unnecessary replacement.
When it comes to appliance repair, there’s a sea of advice, myths, and misconceptions that often mislead homeowners. One common trap is the belief that same-day service always guarantees a fix. While quick repairs are appealing, they can sometimes compromise quality if performed hastily. Experts emphasize the importance of proper diagnosis over rushing to schedule an appointment, ensuring your appliance receives the correct and lasting solution.
Another pervasive myth involves warranties. Many assume that a repair or even DIY fixes automatically void warranty coverage. However, the truth is that warranty policies can be nuanced. For instance, following manufacturer-recommended procedures and proper installation protocols often protect your warranty. It’s crucial to understand your warranty terms—skipping or misapplying repair steps might unintentionally void coverage, so always consult the official documentation or a professional beforehand.
What Advanced Checks Can Prevent Costly Mistakes?
Even seasoned DIY enthusiasts can fall prey to basic assumptions. A sophisticated mistake is overlooking the specifics of appliance wiring and control systems. For example, many homeowners don’t realize that improper wiring connections or disregarding safety protocols during installation can cause damage that isn’t covered by warranty—no matter how promptly the repair was performed. A detailed inspection, including testing relay modules and verifying power supply integrity, can save you from costly replacements later. According to a study by the Appliance Repair Association, nuanced understanding of control systems and wiring intricacies significantly reduces the risk of premature component failure.
Furthermore, many get caught in the misconception that warranty coverage is automatic. The reality is, you need to document your repairs, maintain receipts, and sometimes perform specific checks—like inspecting seals or following recent rules for warranty claims—such as those outlined in these guidelines for 2026 warranty claims. Missing these details can result in denied claims, leaving you to shoulder hefty repair costs.
Finally, a common mistake is relying solely on the initial symptom without probing underlying issues. For example, a dishwasher that leaks might seem like a gasket problem, but sometimes the real cause is a misaligned or cracked door latch. Conducting thorough diagnostics—checking hinges, seals, and internal parts—can reveal hidden faults that simple part replacements don’t fix. Expertise in pinpointing these nuances differentiates a quick fix from a durable repair.
Are you familiar with these pitfalls? Have you ever fallen into this trap? Let me know in the comments. Remember, the key to effective appliance repair isn’t just speed but precision and understanding—so always dig deeper before making a move.Maintaining your appliances efficiently requires more than just basic knowledge; it demands the right tools and methods to ensure longevity and optimal performance. As an experienced DIY enthusiast and repair advocate, I’ve developed a toolkit that’s both comprehensive and portable, allowing me to tackle issues promptly without waiting for professional help. One of my go-to tools is a high-quality multimeter, specifically the Fluke 117. Its precision allows me to diagnose electrical faults accurately, especially in control boards and relays. This tool has saved me countless trip charges and unnecessary replacements.
How do I maintain appliances over time?
Consistency is key. Regular inspections, such as checking seals on refrigerators and cleaning filters on dishwashers, prevent buildup and reduce strain on components. For instance, using a specialized seal cleaning brush and applying lubricant on door gaskets every few months keeps them flexible and effective, greatly reducing leaks.
Choosing the Right Software for Diagnostics
Beyond physical tools, I leverage diagnostic software designed for specific appliance brands. For example, LG’s Smart Diagnosis app provides real-time troubleshooting insights, which I find invaluable for quick assessments. While some may dismiss software as unnecessary, integrating these electronic diagnostics can shorten repair times significantly and help identify issues before they escalate. As the industry moves toward smart appliances, staying updated with firmware updates and compatible diagnostic tools will become essential for both DIYers and professionals.
Scaling Up Your Maintenance Strategy
Looking ahead, the future of appliance upkeep hinges on predictive maintenance, fueled by IoT sensors and AI algorithms that monitor device health continuously. By investing in smart monitoring systems, homeowners can receive alerts about potential failures—like a failing compressor or a clogged filter—before problems occur. This proactive approach not only saves money but also extends overall appliance lifespan. Think of it as having a virtual technician at your fingertips, alerting you to issues early and minimizing downtime.
What tools do I recommend for DIY appliance troubleshooting?
Aside from my trusted multimeter, I recommend a digital infrared thermometer for detecting irregular temperatures, especially in refrigerators, ovens, or dryers. Spotting hotspots or uneven heat distribution early can hint at underlying issues needing attention. Additionally, a simple set of screwdrivers with varying sizes allows you to access internal components safely and efficiently. I personally prefer insulated screwdrivers to prevent accidental shorts during inspections. Incorporating these tools into your routine can substantially improve troubleshooting accuracy. Remember, the key to long-term appliance health lies in consistent, informed maintenance. By combining precise diagnostic tools with smart, routine checks, you can avoid costly repairs and keep your household running smoothly. If you’re ready to take your appliance care to the next level, try regularly testing your control boards with a multimeter and keep a log of your readings—this proactive habit can uncover hidden problems early. For more on maintaining appliances within warranty guidelines, check out these latest warranty tips. Stay ahead of appliance issues by investing in the right tools and staying vigilant—your appliances will thank you in the long run.
What I Wish I Knew Before Jumping to Replacements
Early in my repair journey, I believed control boards were the main culprits behind appliance failures. Turns out, many issues I faced were caused by simple wiring or sensor problems, saving me time and money once I learned to look deeper. Trust me, a thorough diagnosis is worth its weight in gold.
I’ve realized that following a set of diagnostic steps, rather than rushing to replace parts, transforms the repair experience from costly guesswork to confident troubleshooting. It’s about patience and curiosity— traits that keep your wallet happy and your appliances running longer.
Remember, the goal isn’t just fixing the appliance but understanding it. That deeper knowledge empowers you to handle future issues with less stress and more clarity, turning you into a household hero.