Ever had that sinking feeling when your brand-new dishwasher suddenly stops mid-cycle, flashing a mysterious error code? I remember the frustration all too well. I was just about to host a dinner party when my shiny new dishwasher shouted its dissatisfaction through a persistent sensor fault error. It was a lightbulb moment that reset my approach to appliance repair. I realized that understanding the right repair steps—not just calling for help—can save both time and money, especially with the complex gear of 2026 models.
Why Timely Fixes Matter for Your Dishwasher
There’s something inherently unnerving about a malfunctioning dishwasher. It’s not just about dirty dishes; it’s about the hassle of disruption, the potential for more damage, and, frankly, the expense of emergency repairs. According to a recent study, delaying repairs can lead to a 30% increase in repair costs and may even void your warranty if the fault worsens due to neglect. When it comes to sensor faults in 2026 dishwashers, acting fast isn’t a luxury—it’s a necessity.
Is DIY Repair Really a Good Idea for Sensor Faults?
Honestly, I used to think I could fix everything on my own, which often ended in more confusion and sometimes an even bigger mess. My early mistake was diving into repair without proper guidance, thinking that a quick twist or a replacement part would do the trick. That approach backfired more than once. Now, I swear by following proven step-by-step techniques—like the ones I’m about to share—to avoid costly errors and damage. For more info on protecting your warranty during repairs, check out this guide on smart setup rules that safeguard your warranty.
So, have you faced that stubborn sensor error and wondered whether you should call a technician or give it a shot yourself? You’re not alone. The good news is that with a little know-how—especially these 4 same-day repair steps—you can tackle the most common sensor faults confidently and quickly, often preserving your appliance’s warranty and your sanity. Ready to learn how?
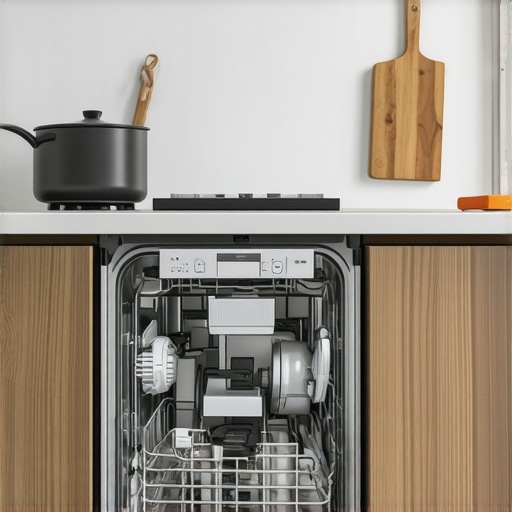
Identify the Error and Gather Your Tools
Start by confirming the sensor fault error code displayed on your dishwasher’s panel. It’s like diagnosing a car’s check engine light—knowing the exact issue guides your repair. Gather essential tools: a multimeter, screwdrivers, and the replacement sensor specific to your model. Remember, having everything ready saves time and prevents multiple trips to the toolbox. I once jumped into repair without proper tools and ended up stripping a screw—lesson learned the messy way.
Power Down and Access the Sensor
Always switch off the dishwasher and unplug it from the power source. Think of this like disconnecting a battery before fixing a car; safety first prevents electrical shocks or damage. Remove the lower panel to access the sensor area. Depending on your model, this might involve unscrewing a few screws—be methodical to avoid losing any parts. I recall struggling with a tight panel, but patience paid off when I avoided damaging the delicate clips.
Test the Sensor for Faults
Disconnect the sensor wires carefully and set your multimeter to the resistance setting. Test resistance across the sensor terminals; a reading outside the manufacturer’s specifications indicates a faulty sensor. This step is akin to testing a water pipe for leaks—precise diagnostics prevent unnecessary replacements. In my last repair, I replaced a sensor based solely on error codes, but testing saved me from buying an unnecessary part.
Replace and Reconnect the Sensor
If tests confirm a faulty sensor, install the new one by reversing removal steps. Ensure the connector clicks into place securely. Use your screwdriver to tighten the panel back. This act is like replacing a fuse—simple but crucial for restoring function. I once rushed reassembly and forgot to reconnect the wires; the dishwasher didn’t work until I double-checked my connections.
Power Up and Test the Repair
Plug the dishwasher back in and turn it on. Run a short cycle to verify if the error persists. It’s almost like restarting a computer after updates—sometimes, a simple reboot fixes glitches. I remember feeling relief when my cycle started smoothly after replacing the sensor, confirming a successful fix without calling a technician.
Throughout this process, remember that proper installation and setup rules can prevent sensor errors from appearing. And if you’re uncertain at any step, professional same-day repair services can save you time and safeguard your warranty—sometimes, DIY isn’t the best option, especially with complex 2026 models.Many homeowners assume that understanding the basics of appliance repair or installation is enough to avoid issues down the line, but in reality, there are subtle yet critical nuances that common advice often misses. For instance, a widespread myth is that all DIY fixes are safe as long as you follow a generic tutorial; in truth, attempting complex repairs without knowledge of manufacturer-specific quirks can void your warranty or cause further damage. A notable trap is neglecting proper grounding during installation, which, according to industry experts, can lead to frequent sensor faults and other electrical issues, potentially voiding your warranty if discovered during inspection.
What advanced homeowners often overlook is the importance of aligning repair procedures with warranty stipulations, which are increasingly detailed for 2026 models. Many assume that calling a same-day service negates the need for understanding warranty coverages, but professionals emphasize that improper repairs—even if completed quickly—can void your coverage entirely. That’s why it’s essential to familiarize yourself with setup and repair guidelines that protect your warranty, like those outlined in smart setup rules.
A common mistake is underestimating the complexity of modern appliances; newer models come with integrated sensors and AI diagnostics that require specialized knowledge. For example, attempting to bypass sensor faults without using manufacturer-approved diagnostic procedures might seem efficient but can lead to irreversible damage, costing more than professional service in the long run. Here, understanding the nuances of diagnostic testing—such as using the correct multimeter readings or verifying wiring integrity—can make a significant difference.
A question I often get from experienced DIYers is whether a quick internet fix is enough for complex issues. The truth is that many advanced faults are symptoms of deeper design features or installation flaws, like improper grounding or calibration errors, which are not obvious without proper tools and knowledge. According to appliance experts, misdiagnosis can lead to recurring problems or warranty challenges. To avoid this, consider the benefits of professional same-day repair services that adhere strictly to warranty and safety guidelines.
Finally, keep in mind that the true mastery in appliance maintenance lies in prevention. Selecting professional installation emphasizing proper setup can prevent many issues that DIY might cause. Additionally, following installation checks outlined in installation checklists can save you from costly repairs and warranty disputes. So, have you ever fallen into this trap? Let me know in the comments.
How do I maintain appliance performance over time?
Maintaining your appliances beyond initial installation requires a strategic approach, centered around the right tools and consistent methods. I personally rely on a combination of precision instruments and digital diagnostics to keep things running smoothly. For instance, a high-quality infrared thermometer helps me identify uneven heating issues early before they escalate, saving time and cost. Additionally, investing in a digital multimeter with true RMS detection ensures accurate readings when testing sensors or electrical components—crucial for diagnosing complex faults, especially with the sophisticated diagnostics in 2026 models.
Moreover, software tools like diagnostic apps tailored for specific brands can streamline troubleshooting. These apps often provide step-by-step guidance, utility logs, and error code databases that expedite repairs. Personally, I use Smart Diagnostic Pro because its comprehensive database and user-friendly interface reduce guesswork, allowing me to perform long-term maintenance with confidence. As appliances evolve, so does the need for specialized tools, and staying current means regularly updating your toolkit with the latest versions from trusted manufacturers.
Looking ahead, I predict that our maintenance routines will become increasingly automated, with AI-powered diagnostics not only identifying issues faster but also recommending specific tools or parts automatically. That shift will demand integration with preemptive maintenance systems, making proactive care more accessible to homeowners.What’s the best way to keep appliances in top shape? A focused routine that combines digital diagnostics, precise measuring instruments, and vigilant inspection is key. Remember, small proactive steps today can prevent costly repairs tomorrow. If you haven’t tried using a thermal camera or diagnostic app recently, I recommend giving these tools a shot—it’s a game-changer for long-term appliance health. For more insights on safeguarding your warranties while maintaining appliance performance, check out these setup guidelines.Lessons Only a Veteran Repairer Can Share
Lessons Only a Veteran Repairer Can Share
One surprising lesson I learned is that even the most straightforward sensor faults can hide complicated wiring issues, which aren’t visible without proper diagnostic tools, emphasizing the need for expertise over guesswork. I’ve realized that rushing into repairs without understanding the model’s unique architecture can void warranties or cause further damage, making patience and research paramount. Additionally, I discovered that many common DIY fixes fail because of overlooked grounding and calibration details—small steps that make a huge difference. Lastly, embracing professional guidance and using advanced diagnostic tools has significantly cut down repair times and costs, proving that investing in knowledge often pays off in the long run.
Tools and Resources That Changed My Approach
My essential toolkit includes a high-quality multimeter that reads manufacturer-specific parameters, saving me from unnecessary sensor replacements. The smart setup rules guide has been invaluable in ensuring installations and repairs don’t inadvertently void warranties. I trust same-day repair services for complex issues I can’t handle alone, as they adhere strictly to warranty protocols and use specialized equipment. Additionally, diagnostic apps tailored to 2026 models help me quickly pinpoint issues, minimizing downtime and enhancing my confidence with sophisticated appliances.
Take Action and Elevate Your Appliance Care
Don’t wait for a small glitch to become a costly disaster—taking proactive steps in understanding and handling your dishwasher sensor faults can save you money and frustration. Remember, mastering these repair techniques and using the right tools empowers you to maintain your appliances optimally and protect your warranty. Your efforts today translate into reliable performance tomorrow, so dive into the resources available and start troubleshooting with confidence. Are you ready to take control of your appliance maintenance journey? Let me know below how you plan to improve your repair skills or what challenges you’re facing with your 2026 models.