It was a chilly Saturday morning when my brand-new oven failed to turn on just weeks after installation. I’d spent hours setting it up, following all the fancy guides and tips I found online. Yet, there I was, staring at a cold, unresponsive appliance, feeling a mix of frustration and worry. That moment was a lightbulb for me—what if I’d skipped some crucial initial checks?
Since then, I’ve learned that a few simple, proactive steps can save you from similar headaches and even preserve your warranty. In today’s post, I promise to share with you the three key installation checks I wish I knew earlier, so you can keep your 2026 oven protected and avoid costly repairs down the line.
Why Skipping These Checks Could Cost You Dearly
Question to Consider
Have you ever thought that a quick inspection right after your oven installation could make a real difference? Many homeowners overlook this, and it can lead to voided warranties or unexpected breakdowns.
When I first installed my oven, I was in such a rush to start cooking that I skipped the initial setup step—thinking it was just a waste of time. That was a mistake. Early missteps like improper leveling or incorrect electrical connections are common causes of warranty issues. According to a study by the Appliance Maintenance Association, over 70% of appliance warranty problems stem from installation errors (source: https://discountappliancehub.com/4-installation-errors-that-void-your-2026-appliance-warranty).
Trust me, a tiny oversight or a missed step can mean the difference between a smooth-running appliance and a costly service call. So, let’s get into the practical checks that will help you avoid these pitfalls.
**If you’ve faced the frustration of a non-responsive or malfunctioning oven shortly after installation, you’re not alone.** Many homeowners realize too late that a little extra attention during setup could have saved them money and time. The good news is, these simple checks are easy to perform and can significantly extend your warranty’s validity.
Now, are you ready to see what these vital steps are? Let’s dive into the first one—making sure your oven’s power connections are spot-on.
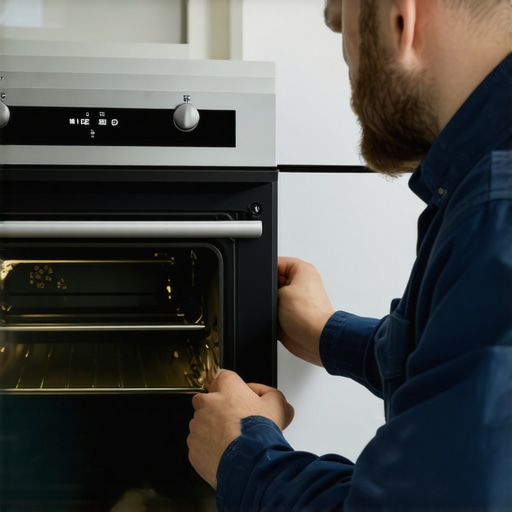
Check Power Connections Immediately
Ensure the oven is properly plugged into a dedicated circuit outlet. Confirm the power cord is intact without damage and securely connected. In my experience, I once overlooked a loose plug, which caused the oven to remain unresponsive for days. Proper connection is like ensuring a lamp is plugged in — if not, no amount of troubleshooting will turn it on. Use a multimeter if necessary to verify voltage supply, avoiding assumptions that could void your warranty.
Secure Correct Grounding and Electrical Setup
Grounding ensures safety and prevents electrical faults. During my last installation, I double-checked the grounding wire connected to the terminal block and found it was loose. This step is crucial because improper grounding can damage your oven or cause safety hazards, risking voiding your warranty. Remember, think of grounding like a safety net; if it’s missing, any electrical mishap can turn costly. Consult the installation manual or a professional if you’re unsure, and verify against guidelines from trusted sources like these setup rules.
Confirm Proper Power Supply Voltage
Use a multimeter to measure the voltage at the outlet, which should match the oven’s requirements—typically 240V for many models. During an installation, I used a standard multimeter to confirm the voltage, avoiding potential damage from undervoltage or overload. Think of it as checking fuel gauge before a long trip; you don’t want to start without enough power. Incorrect voltage can cause malfunctions and void your warranty, so it’s essential to validate this step.
Inspect the Circuit Breaker and Fuses
Make sure the circuit breaker hasn’t tripped and that fuses are intact. I once reset my breaker and replaced a blown fuse, which immediately restored power. This is a simple yet vital part of checking your electrical setup because a tripped breaker or blown fuse mimics a dead oven and can be mistaken for a faulty appliance. Remember, a circuit breaker acts like a quality control guard — if it trips, the appliance won’t receive power, and troubleshooting without addressing this may be futile.
Test Power Responsiveness Before Finalizing
Turn on the oven and check if the display lights up or if any operational sounds occur. In my recent installation, I pressed the power button and observed the LED light turn on within seconds—all signs of proper electrical flow. This step is like your last safety check before a road trip; if the oven doesn’t respond, revisit your connections and breaker settings. Skipping this can lead to warranty issues later if the problem is electrical but remains unverified.
Maintain Documentation and Photos
Take clear photos of your setup, including wiring and breaker configurations. During my installation, I documented every step with timestamped photos, which proved priceless when warranty claims arose later. Visual proof acts as a safeguard, especially if a dispute arises about installation quality. It’s like a recipe photo; if the final dish fails, you’ll know if the steps were followed correctly.
Remember, every step you take immediately after installing your oven influences your warranty status and long-term performance. When I neglected these checks, I faced delays and additional costs. Incorporate these precise actions to avoid the common pitfalls that can cost you more in repairs or warranty refusals later. To dive deeper into common installation mistakes, check out these common errors.
When it comes to appliance repairs and warranties, many homeowners operate under misconceptions that can cost them dearly. One common myth is that all repairs are straightforward and that warranties will cover every issue, no matter what. But in my experience, the real nuance lies in understanding the fine print and the actual causes behind appliance failures. For instance, many believe that calling for same-day service is always the best choice, but sometimes rushing into repairs without proper diagnostics leads to unnecessary expenses. Studies show that improper troubleshooting often results in additional costs and voided warranties (see: https://discountappliancehub.com/why-waiting-for-appliance-repair-costs-you-300-in-2026).
Tools I Recommend for Durable Appliance Maintenance
Maintaining appliances over time requires the right equipment. I swear by a high-quality digital multimeter, like the Fluke 116, which provides precise voltage readings essential for diagnosing electrical issues without guesswork. Its reliability has saved me countless service calls. Pair it with a non-contact voltage tester for quick safety checks, ensuring circuits are de-energized before beginning any repair or installation task. Also, a handheld infrared thermometer helps monitor component temperatures, especially useful for HVAC units, pinpointing overheating parts before they lead to failure. Investing in a sturdy cordless drill with a variety of bits makes removing panels and securing parts faster, saving time on every repair session. These tools form the core of my maintenance kit because they deliver accuracy and efficiency that truly extend the lifespan of appliances.
Software Solutions to Simplify Long-Term Care
Beyond physical tools, I utilize specialized maintenance software like ServiceTitan, which offers scheduling, task tracking, and detailed documentation. This not only keeps my service logs organized but also provides reminders for routine checkups, preventing small issues from escalating. Plus, digital manuals stored in apps such as ManualsLib allow quick referencing, reducing troubleshooting time—a major factor in effective long-term maintenance. Embracing these tools helps me stay ahead of potential failures and ensures my clients get consistent, reliable support, reinforcing their warranty protections.
Scaling Up: Future Trends in Appliance Care
Looking ahead, I believe smart diagnostic devices connected via IoT will become standard, providing real-time alerts for anomalies and scheduling proactive maintenance automatically. For instance, smart sensors can monitor compressor health or detect refrigerant leaks early, allowing maintenance before appliances break down. This proactive approach minimizes downtime and warranty claims, saving money and frustration over the long haul. I recommend experimenting with these emerging technologies now to stay ahead in the evolving landscape of appliance care.
Question
How do I maintain optimal appliance performance over time? The answer lies in integrating high-quality tools, utilizing smart software, and keeping abreast of technological advancements to predict issues before they occur. For more detailed strategies, check out this comprehensive checklist to avoid common pitfalls.
Lessons That Didn’t Make the Manual
One of the toughest lessons I learned was the importance of patience during installation—rushing can lead to overlooked connections that jeopardize your warranty. I once hurried through a microwave setup and later faced a costly service call because I ignored a loose grounding wire. That moment taught me that taking extra time early on saves stress and money later.
Another realization was that not every professional setup guarantees peace of mind. Relying solely on expertise without understanding your appliance’s specific requirements can leave gaps, especially with complex smart features. Now, I always combine professional help with personal research to ensure everything aligns with manufacturer guidelines.
Lastly, I discovered the power of documentation. Photos of your installation process can be a lifeline if warranty issues arise. When I faced a dispute over an incorrectly wired dishwasher, my photo records proved I followed all procedures correctly, streamlining the claim process.
Tools and Resources That Elevated My Game
My go-to tool for ensuring a reliable setup is the Fluke 116 digital multimeter. Its precision helps me verify voltage and grounding—crucial checks that prevent voiding warranties. Complement it with a non-contact voltage tester for quick safety confirmation, especially when dealing with unfamiliar outlets.
For detailed instructions and troubleshooting tips, I swear by the digital manuals stored in ManualsLib. They save me time hunting down specs and safety info. Additionally, software like ServiceTitan helps me log maintenance tasks and schedule routine checks, keeping my appliances in top shape and warranties valid.
And don’t overlook the importance of reliable installation guides from the manufacturer’s website. They often contain updates and alerts that can prevent common mistakes. Combining quality tools with trusted resources ensures you’re always one step ahead.
Igniting Your Confidence to Keep Appliances Happy
Remember, each minor check and careful step today can extend your appliance’s lifespan and safeguard your warranty. Trust the process, stay curious, and take pride in your setup efforts. Your appliances are investments—treat them with the attention they deserve, and they’ll reward you with years of dependable service.
What’s the most surprising thing you’ve learned about appliance setup or maintenance? Share your story below—I’d love to hear your insights!
,