
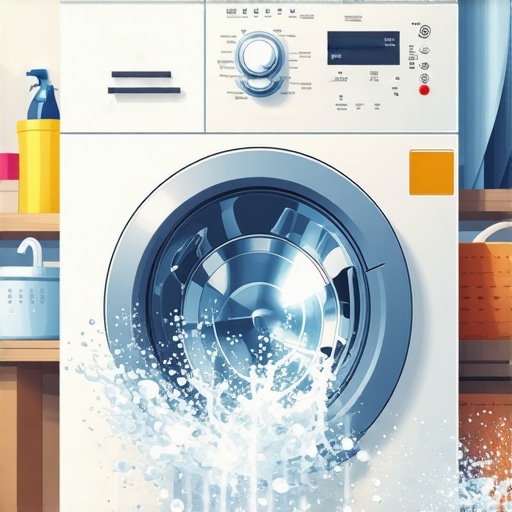
It was a morning like any other when I suddenly felt the entire floor vibrate under my feet—turns out, my front-load washer was so unsteady it was shaking the whole house. At first, I thought it was just a one-time wobble, but the persistent shaking continued, making me wonder if my appliance was trying to stage a home rebellion.
As a homeowner who loves DIY fixes but isn’t an appliance expert, I knew I had to face this problem head-on. Today, I want to share my journey—from initial frustration to finally understanding how to stop that relentless shake—and give you the steps to troubleshoot and fix your own washer. Trust me, once you figure this out, your laundry days will be so much calmer.
Why Your Front-Load Washer Is Shaking the Whole House
The truth is, there are a few common reasons why your washer might be vibrating or wobbling excessively. It could be as simple as an unlevel machine or as serious as worn-out shocks or a damaged drum bearing. I learned early on that ignoring these signs could lead to more severe issues, like damaging the foundation of your home or ruining your appliance.
One thing I discovered is that a lot of homeowners overlook basic setup mistakes. For example, during installation, I didn’t double-check if my washer was perfectly level. That seemingly minor oversight turned into a major shake that echoed through my walls. If you want to avoid similar chaos, ensure your machine is sitting on a flat surface and is properly balanced.
Understanding these issues is essential because excessive vibration is not only noisy but can also cause long-term damage. According to appliance experts, improper leveling is the leading cause of washing machine vibrations—so it’s worth starting your troubleshooting there. Plus, if your machine is older or heavily used, parts like shocks or spring supports may need replacement.
Have you experienced your washer making loud thuds or moving across the floor? If so, you’re far from alone. Many homeowners face this issue at some point, but the good news is, most fixes are straightforward and don’t require expensive repairs. In the next sections, I’ll guide you through the most common causes and how to address them, so you can enjoy quiet, steady laundry days again.
If you want to learn how to maximize your appliance warranty during emergency repairs, check out this helpful guide. And if you’re ready to quiet that noisy machine once and for all, keep reading—help is just a few steps away.
Level Your Washer Like a Pro
First, ensure your machine is perfectly level. I once overlooked this step and ended up with a constant wobble. To do this, place a bubble level on top of the washer and adjust the feet accordingly using a wrench. Turn each foot clockwise to raise or counter-clockwise to lower that corner until the bubble sits centered. Remember, a stable washer prevents excessive vibrations and prolongs its life.
Secure the Floor for Stability
If your washer is on a wooden or uneven floor, consider placing a sturdy anti-vibration pad or rubber mat under it. I used a thick rubber mat and noticed a significant reduction in movement. This acts like a shock absorber, keeping the appliance steady during spin cycles. These mats are affordable and can be found at hardware stores—an easy fix to dampen vibrations.
Inspect and Replace Shock Absorbers
Worn-out shock absorbers are a common cause of shaking. To check, unplug the washer, remove the back or front panel (depending on model), and observe the shocks during a gentle shake. If they look cracked or are excessively compressed, replace them. I replaced mine following a YouTube tutorial, which took about 30 minutes, and the difference was remarkable—quieter operation and no more house-shaking spins.
Order the Right Parts
Visit a reliable supplier or appliance parts store to get compatible shock absorbers. Make sure to double-check your model number to avoid ordering incorrect parts. Installing new shocks restores the stability lost over time, saving your floors and walls from damage.
Check for Drum Balance Issues
Unbalanced loads can cause a lot of shaking. Always distribute laundry evenly inside the drum. When washing bulky items like comforters, add some towels to balance the load. During one load, I accidentally placed all heavy towels on one side, leading to excessive vibration. After redistributing items evenly, my washer ran smoothly without any wobble.
Test and Adjust Suspension Springs
Suspension springs support the drum and can lose tension over time. To inspect, tilt the washer slightly and look for springs attached to the tub. If any are broken or detached, replace them. During my repair, I found one spring had snapped, which explained the wobble. Replacing it restored the motor’s smooth operation and prevented future damage.
Consult Professional Help When Needed
If after all these steps your washer still vibrates excessively, it might be time to call in a pro. Professionals have specialized tools to diagnose issues like worn suspension parts or damaged bearings that are not easily accessible. When I reached out for help, I learned about warranty-backed services that provide quick, reliable repairs—this approach saved me time and ensured a lasting fix. Learn more about how to get the most out of your appliance warranty at this guide.
Many homeowners believe that understanding the basics of appliance repair and warranty coverage is enough, but the real pitfalls lie in the subtler details most ignore. Contrary to popular belief, not all warranties are created equal; some have fine print that can void your coverage if you’re unaware of certain actions. For example, some extended warranties exclude damages caused by improper installation or maintenance, so ensuring professional and compliant setup is crucial. Interestingly, many assume same-day service guarantees immediate repairs, but in real practice, it often depends on parts availability and technician scheduling—an aspect sometimes underestimated. Additionally, a common myth is that DIY fixes can fully replace professional repairs; while some tasks are straightforward, complex issues like compressor failures or electronic control problems require specialized diagnostic tools, which can only be operated by certified technicians.
An advanced nuance often overlooked pertains to the interaction between warranty coverage and third-party service providers. Engaging unverified contractors can jeopardize warranty claims, especially if the repair involves parts that aren’t OEM-certified. Experts recommend verifying service providers through manufacturer-approved lists or warranties of quality, which reduces the risk of future disputes. Moreover, many homeowners miss the importance of keeping thorough maintenance logs and original purchase receipts, as these documents can significantly expedite warranty claims and prove the proper care of the appliance when issues arise.
The ‘oops’ factor here is the trap of neglecting these fine details until a breakdown occurs. For instance, attempting to fix a refrigerator’s cooling issue without understanding warranty exclusions might lead to voiding coverage altogether. Similarly, rushing into repairs without proper diagnostics can result in unnecessary costs, especially if the problem is misdiagnosed initially. To avoid these pitfalls, consult comprehensive guides like [this expert overview](https://discountappliancehub.com/expert-guide-to-appliance-repair-and-installation-today) or consider scheduling an appointment with professionals who offer warranty-backed services. Remember, proactive measures—such as verifying service providers, understanding your warranty’s scope, and maintaining detailed records—can preserve your coverage and save you significant money in the long run.
Have you ever fallen into this trap? Let me know in the comments.Maintaining appliance performance over the long term requires more than just occasional cleaning; it involves using the right tools and adopting effective methods to diagnose and fix issues promptly. One tool I rely on extensively is a high-quality digital multimeter, which allows me to test electrical components safely and accurately. For example, when dealing with a malfunctioning microwave control panel, measuring voltage and continuity helps pinpoint the source of the problem without guesswork. Additionally, a reliable T25 Torx screwdriver set is essential for accessing internal panels on most modern appliances, making disassembly straightforward and damage-free. I personally prefer the Wiha brand because of its durability and precision, which minimizes slipping and stripping screws during repairs. For diagnosing complex issues, I utilize smartphone inspection apps that can analyze images or videos of components, helping me decide whether parts like thermostat sensors or relays need replacing, before ordering them. This tech-savvy approach speeds up repair times and saves money, especially when combined with ordering parts from reputable suppliers specializing in OEM components. Looking ahead, I predict that smart diagnostic tools—integrating AI to interpret sensor readings—will become standard, further simplifying appliance troubleshooting.
What’s the best way to keep your appliance tools in top condition over time?
Regularly clean your multimeter probes and store tools in a dedicated, organized toolbox to prevent damage and ensure quick access during repairs. Developing a routine maintenance schedule for your tools—like calibrating your multimeter annually—can also extend their lifespan and keep readings accurate. Remember, investing in high-quality repair tools pays off by reducing the risk of damaging expensive components and ensuring precise diagnostics. When professional help is needed, choosing appliance repair services that offer warranty-backed support ensures that your long-term investment remains protected. For instance, reliable technicians will often carry advanced diagnostic equipment, enabling them to identify issues faster and more accurately. To learn more about effective, long-term appliance maintenance strategies, check out this expert guide. Don’t forget—try upgrading your toolkit with a digital multimeter and see how much quicker and more reliable your repairs become, saving you both money and frustration over time.
Lessons That Changed How I Approach Appliance Troubleshooting
One of the biggest insights I gained was that a seemingly minor issue—like an unlevel machine—can escalate into significant household disruptions. Addressing these root causes early on saved me from frantic repairs later. Additionally, I realized that regular maintenance, like checking suspension springs, can prevent shake-related damage, extending my washer’s lifespan. A lightbulb moment for me was understanding that DIY repairs, when guided properly, can be both rewarding and cost-effective, as long as I know when to seek professional help. Finally, trusting reputable parts suppliers and keeping detailed repair records has made warranty claims smoother, saving headaches and money.
Tools and Resources That Make All the Difference
Equipping myself with a good digital multimeter has been invaluable for diagnosing electrical issues quickly. I recommend the Wiha screwdriver set for its durability when dismantling appliances. When researching, I rely on expert tutorials from reliable channels and manuals specific to my washer model—these resources help me confidently perform fixes. For ordering replacement parts, I trust OEM suppliers who stand behind their components. Lastly, consulting trusted guides on warranty policies, such as maximizing your appliance warranty, ensures my repairs are protected and my investments secure.
Keep Fighting for Quiet, Reliable Laundry Days
Remember, a little patience and the right knowledge can transform your approach to appliance maintenance. Tackling issues like washer shake proactively not only prevents costly repairs but also brings peace of mind. Every repair, big or small, is an opportunity to learn and become more confident in managing your home appliances effectively. Don’t let the fear of the unknown hold you back—empower yourself with the skills and tools to maintain a household that runs smoothly. Your journey toward quieter and more efficient laundry days starts now—roll up your sleeves and get ready to conquer those appliance challenges with confidence.