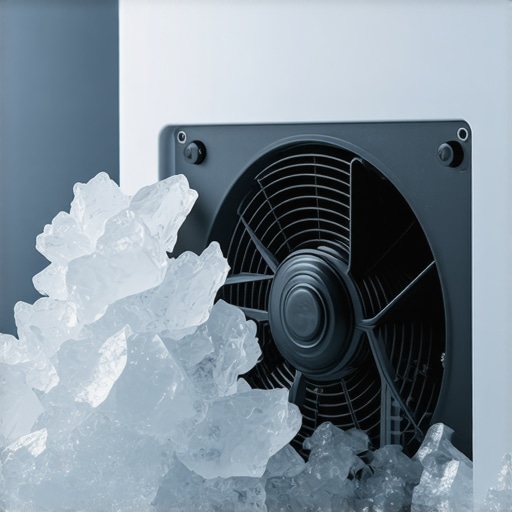
It was late at night, and I was rummaging through my freezer, trying to grab some ice for a drink when I heard it—the unmistakable scraping sound. My heart sank. That dreaded noise meant trouble. Sure enough, I opened the door to a mini snowstorm and an ice buildup that seemed to have taken over my freezer’s fan. It hit me then—this wasn’t just annoying; it could lead to a complete breakdown if I didn’t address it quickly. Have you ever faced that moment when your freezer’s fan starts hitting ice and making weird noises, and you’re left wondering if you’ll have to call in a pro?
Say Goodbye to That Annoying Scrape and Freezer Woes
You and I both know how disruptive a noisy, icy freezer can be. It not only affects the appliance’s efficiency but can also spell bigger problems down the line, like increased energy bills or costly repairs. The good news? I’ve been there, and I’ve learned from my mistakes—so today, I’m going to guide you through understanding why this happens and how to fix it once and for all.
Why Is My Freezer Fan Hitting Ice and Making Noise?
Early on, I made the mistake of ignoring a minor squeak, thinking it was just a bit of dust or a loose screw. That was a rookie move. What I didn’t realize then was that ice buildup around the fan is often a sign of underlying issues—like a door gasket failure or defrost system malfunction—that prevent proper defrosting. When ice accumulates, it can physically hit the fan blades, causing that scraping noise you dread.
In fact, according to appliance experts, consistent ice buildup is frequently linked to improper moisture control within the freezer—something I also overlooked at first. If you want your freezer to run smoothly and quietly, catching these signs early is crucial. Learning the common causes can save you money—and a lot of frustration.
For more on understanding and fixing freezer issues, check out this detailed guide on avoiding common freezer breakdowns: Why Your Freezer Is Leaking Water Into the Crisper Drawers.
Now, let’s get practical. The next steps involve diagnosing the specific cause and applying simple solutions before it turns into a big headache. Ready to tame that icy monster? Let’s dive into what you need to do first.
Inspect the Door Gasket for Leaks
Start by checking the freezer door seal. A worn or loose gasket allows warm air in, increasing humidity and causing frost. I once replaced a faulty gasket and immediately noticed less frost buildup, which stopped the fan from hitting ice and making noise.
Test the Seal
Close the door on a dollar bill; if it slips out easily or the bill isn’t snug, the gasket needs replacing. For a detailed gasket replacement, visit this guide.
Manually Defrost the Freezer
Unplug the freezer and allow it to defrost for several hours. This removes existing ice and resets the system. Use towels to soak up melting water. Personally, I once unplugged my freezer overnight—by morning, the ice was gone, and I could see the interior coils clearly.
Clean the Condenser Coils
Dirty coils can cause excess frost. Use a coil brush or vacuum to remove dust and debris. I found cleaning my coils with compressed air improved airflow and reduced ice formation significantly. This step is crucial because poor airflow hampers the defrost cycle.
Check and Replace the Defrost Thermostat
The thermostat controls defrost cycles. If faulty, ice accumulates. Use a multimeter to test continuity; if there’s none, replace it. I replaced mine after testing, and it fixed the frequent ice buildup problem.
Examine and Replace the Evaporator Fan Motor
If the fan motor is slow or makes noisy sounds, it may be failing. Remove the panel inside the freezer to access the motor. Test it or replace if defective. Once I replaced my fan motor, the fan operated smoothly, and icing ceased.
Adjust Settings and Monitoring
Ensure the temperature is set to around 0°F (-18°C). Overly cold settings can cause excessive frost. After fixes, monitor the freezer’s performance over a few days. I found that setting the thermostat correctly prevented future ice buildup.
When it comes to appliance warranties and repairs, many homeowners hold beliefs that can actually hinder their protection and save money. Understanding the nuances can make a real difference in how you approach service calls and coverage. For example, a widespread myth is that all repairs are automatically covered under warranty; in reality, specific parts or damages might be excluded, especially if improper installation or maintenance is involved.
Can You Rely on Manufacturer Warranties for Major Repairs Without Additional Coverage?
Many assume manufacturer warranties will cover everything, but studies show that most warranties only cover certain components and often exclude damages caused by installation errors or neglect. According to industry experts, reading the fine print is essential. For instance, if you ignore a recurring issue like a leaking dishwasher, assuming warranty coverage will kick in when it fails completely is risky; proactive repairs or maintenance can sometimes be more cost-effective. An often-overlooked trick is that most warranties are voided if non-OEM parts are used during repairs. This is a trap many fall into, thinking aftermarket parts are a cheaper fix, but they can jeopardize warranty coverage and lead to further problems. To avoid this, always verify the warranty terms and use authorized parts. External experts also warn about the importance of proper installation for warranty validity. Skipping professional installation or DIY-ing incorrectly can void your coverage entirely. For example, improper drain line installation in a dishwasher might not only cause leaks but also void the warranty, as outlined in their installation guidelines. Have you ever fallen into this trap? Let me know in the comments. When scheduling same-day appliance service, it’s crucial to understand what exactly is covered and what isn’t. Many mistakenly believe that urgent repairs are always covered fully, but quick response times don’t change warranty stipulations. For instance, I’ve seen cases where expedited service only addressed surface issues, leaving the root problem unaddressed—costing homeowners more in the long run. To get the most out of your warranty and repair plans, always clarify coverage details beforehand and document any service appointments meticulously. Quick, professional repairs are convenient, but they don’t replace the necessity of understanding your warranty’s scope. Being informed can help you avoid costly mistakes and ensure your appliances stay protected. Remember: knowledge is power when it comes to appliance warranties. Properly interpreting the fine print and understanding service protocols can save you money and prevent unnecessary headaches. Do you think your warranty covers all your appliance issues? Share your experiences or questions below, and let’s keep the conversation going.Maintaining your appliances over the long term requires more than just patience; it demands the right tools and techniques. I personally rely on a set of precise instruments, like a high-quality multi-meter to troubleshoot electrical issues accurately, and a digital infrared thermometer to quickly pinpoint temperature inconsistencies in refrigerators and ovens. These tools help me diagnose problems early before they escalate into costly repairs. Additionally, I use specialized screwdrivers from reputable brands because their profiles reduce the risk of damaging delicate screws during disassembly. Employing the correct tools saves time and ensures safety, especially when dealing with complex components such as circuit boards or gas lines.
Looking ahead, I predict that our tools will become even smarter—integrating Bluetooth and IoT technology for real-time diagnostics. Imagine an app that alerts you to potential failures before they happen, based on sensor data collected directly from your appliances.
How do I maintain my appliances long-term?
Regular maintenance is essential. Schedule annual coil cleaning for refrigerators, as neglecting this can void your warranty—see this guide. Keep an eye on seals and gaskets, replacing them promptly to prevent frost buildup that can damage fans or compressors. Use a multimeter to periodically test circuit continuity in critical components. I also recommend investing in a good vacuum with a nozzle attachment to clean vents and filters thoroughly. Staying proactive allows you to catch issues early, saving money and extending the lifespan of your investment.
One crucial aspect is understanding how to perform a hard reset on modern smart appliances when problems arise. Sometimes, all it takes is a well-executed reset—like disconnecting a smart fridge for a few minutes—to clear glitches. However, knowing exactly when and how to do this can prevent further damage. For example, the proper reset procedures vary across brands.
When it comes to scaling your appliance care, consider professional maintenance plans. These often include advanced diagnostics and part replacements, ensuring your appliances stay reliable over many years. Don’t forget, using OEM parts—not aftermarket—can protect your warranty and guarantee compatibility.
Remember, embracing quality tools not only simplifies repairs but also enhances safety. I highly recommend investing in a high-quality multimeter and a digital thermometer for your DIY toolkit. These small upgrades can make a significant difference in troubleshooting efficiency. Want to further sharpen your maintenance skills? Try using an infrared thermometer to quickly check for hot spots in your oven or refrigerator—it’s an eye-opener! For detailed guidance on troubleshooting electrical components, check this resource. Don’t wait until a small issue becomes a major expense—equip yourself today and keep your appliances humming smoothly.
Little Lessons That Changed My Repair Game
One of the most eye-opening moments in my repair journey was realizing that ignoring small signs like frost buildup can lead to big, costly problems—like fan damage and inefficient cooling. It’s easy to dismiss noises or ice as minor issues, but they often point to underlying system faults that, if caught early, can save you from replacing entire units or voiding warranties.
I also learned that reading your appliance warranty carefully can unveil hidden exclusions—such as the importance of OEM parts or the consequences of DIY repairs—which many forget. Knowing these details allows me to make smarter decisions, avoiding pitfalls that could invalidate warranties and cost me more down the line.
Finally, I discovered that simple maintenance like regular coil cleaning and gasket inspections can dramatically extend the life of your appliances. These small actions prevent ice buildup around fans, keep components running smoothly, and ensure your warranties stay intact. Share your biggest appliance lesson—I bet it can help someone else avoid their own costly mistake!
My Go-To Tools and Resources for Kitchen Appliance Care
- Digital Infrared Thermometer: I use this to quickly identify temperature inconsistencies, saving me time during troubleshooting and ensuring appliances operate at optimal levels. It’s reliable and easy to use—highly recommend for preventative maintenance.
- High-Quality Multimeter: Essential for testing electrical components like thermostats and motors. Trust me, having a solid multimeter makes diagnosing issues straightforward and accurate, preventing unnecessary part replacements.
- Guided Repair Websites: I turn to authoritative sites like this resource for step-by-step instructions. They’ve saved me countless hours, especially when tackling more complex repairs, and help me ensure warranties aren’t voided by improper fixes.
- Brand-Specific Manuals: Keeping digital copies of appliance manuals helps me understand warranty terms and proper installation procedures. They’re indispensable when evaluating if a repair or service will impact my warranty coverage.
Embrace the Journey of Appliance Confidence
Taking control of your appliance maintenance and understanding warranty nuances empowers you to protect your home investments. Every small fix, check, or upgrade can make a significant difference—not just in device longevity but also in your peace of mind. Don’t let doubts hold you back—start applying these insights today, and see how confidently you can manage your appliances.
What’s the one appliance repair skill you’re eager to master? Let me know below, and let’s grow together in our home maintenance journey!