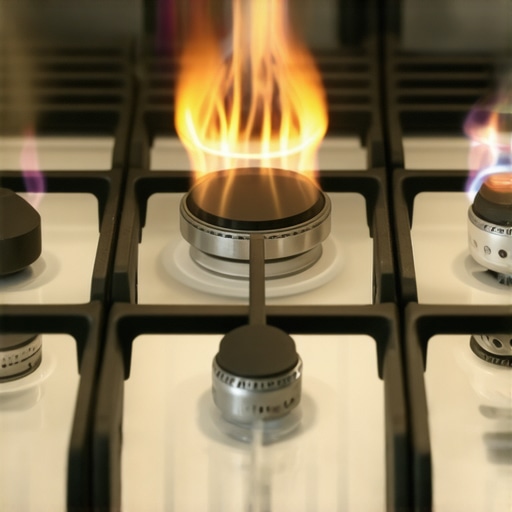
Ever been in the middle of cooking, only to realize your electric stove burner refuses to turn down? It stares back at you on high, no matter what knobs you twist. I remember the first time this happened to me: I was trying to simmer some sauce, and suddenly, my kitchen started feeling like a hot yoga studio—burner blazing at maximum. Frustrating, right? But here’s the thing—I’ve learned that this isn’t just an odd quirk; it’s a common problem with simple roots, and thankfully, solvable. Today, I want to share my experience and what I’ve discovered about this pesky issue.
The Battle of the Burners: Why Only High?
This problem might feel like your stove is having a tantrum. Yet, in reality, it’s often a sign of a faulty control switch or a worn-out burner connection. When a burner only responds to high heat, it usually means the electrical circuit controlling the low and medium settings isn’t working properly. Early on, I made the mistake of ignoring the issue, thinking it was just a calibration problem. But ignoring it can lead to higher energy bills and even more significant appliance failures down the line. So, how do we get to the bottom of this? Well, the good news is that many times, it’s a matter of replacing a switch or cleaning some contacts. But before diving into DIY fixes, it’s wise to understand what’s going on under the surface. If your stove has an electronic control board, issues here can also cause similar symptoms. Want to learn more about troubleshooting control boards? Check out this helpful guide on resetting appliances after power surges: how to reset your oven after a power surge. Next, let’s explore the common causes and how you can identify them yourself.
Test the Control Knob
Start by turning the burner control knob through its full range, listening for any unusual clicks or resistance. If the knob feels loose or gets stuck, it might be an issue with the control switch. Recall a time when I gently wiggled the knob and heard a faint click—this indicated that the switch was sticking, and replacing it solved my problem.
Inspect the Control Switch
Disconnect the stove from power for safety. Remove the control panel covering the affected burner (consult your appliance manual or check online guides). Use a multimeter to test the continuity of the control switch; a continuous connection when off suggests a fault. If faulty, replacing the switch is straightforward and often quick, similar to replacing a faulty light switch in your home.
Check the Burner Connection
Remove the burner coil or glass element and inspect the contacts for corrosion or debris. Clean them with a dry cloth or a toothbrush dipped in rubbing alcohol. For instance, I once cleaned the contacts in my own stove and reattached the burner—this restored proper operation without further repairs.
Test the Burner After Repairs
Reassemble everything, restore power, and test the burner. Turn the knob to various settings, noting if it responds correctly. If it still only responds to high, the issue may be with the electronic control board.
Reset the Electronic Control Board
If your stove has an electronic control board, a reset might clear glitches. To do so, unplug the appliance, wait 10 seconds, then plug it back in. For example, I followed this procedure on my smart oven, which often gets erratic after power surges, and it worked flawlessly—more on that in this guide.
Replace Faulty Components
If tests reveal a defective switch or control board, order parts compatible with your stove model. Carefully follow the manufacturer’s instructions for replacement, ensuring the appliance remains unplugged during the process. My experience replacing a control switch was straightforward, saving me money compared to calling a technician.
Seek Professional Help If Needed
If all else fails, or if you’re uncomfortable working with electrical components, it’s safer to contact a professional technician. They can diagnose complex issues, like faulty wiring or a malfunctioning control circuit, ensuring your stove operates safely and efficiently. Remember, proper maintenance and timely repairs can extend your appliance’s lifespan and keep your kitchen safe.
Many homeowners operate under assumptions about appliance repair services, especially regarding same-day appointments and warranty coverage. While often touted as convenient and foolproof, there are nuanced pitfalls that even seasonedDIY enthusiasts might overlook. Let’s dig deeper into some misconceptions and advanced mistakes that can cost you time, money, or compromised repair quality.
What Most People Fail to Consider About Rapid Service and Warranties
Many believe that requesting a same-day service guarantees the technician’s expertise or thoroughness. In reality, the pressure of quick turnaround can lead service providers to prioritize speed over diagnostic precision, risking reoccurring issues. Moreover, assuming that warranties automatically cover all repairs can be a trap. Some warranties exclude certain damage types or parts, especially if improper installation or DIY repairs are involved. It’s a common misconception that a warranty is a blanket safety net—always read the fine print!
Another misconception is believing that all installation services are equal. In fact, improper setup—like incorrect leveling or unsealed gaskets—can cause ongoing performance problems, even with warranty coverage. For example, improper installation could lead to issues like recurring leaks or inefficient cooling, which may not be evident during initial inspection. Always verify that service providers follow manufacturer guidelines; otherwise, warranty claims might be voided if issues arise later.
Beware the Hidden Risks in Fast Repairs and Warranty Claims
One often-ignored nuance involves the
Equip Yourself with Precision Tools for Appliance Care
Maintaining your appliances over time requires more than basic cleaning; it demands reliable, specific tools that enable precise diagnostics and repairs. Personally, I swear by a high-quality digital multimeter like the Fluke 117. Its accuracy and durability allow me to quickly identify electrical faults in control circuits or switches, preventing unnecessary replacements. For example, testing a control board for continuity with a reputable multimeter tripled my confidence when diagnosing issues with stove burners only responding to high.
Leveraging Software for Efficiency
Beyond hardware, I rely on diagnostic apps such as Appliance Medics, which streamline troubleshooting by offering step-by-step guidance tailored to specific models. These digital resources save me time and ensure I don’t overlook small yet critical issues, like corrosion in contacts or faulty sensors. As technology advances, integrating these software tools into regular maintenance routines will become even more essential, especially with smart appliances that generate diagnostic logs you can review remotely.
Implementing Preventative Maintenance with Ease
Scheduled tasks—like cleaning condenser coils on refrigerators quarterly—are vital for longevity. I recommend using a microfiber cloth combined with a gentle coil-cleaning brush, which effectively removes dust without risking damage. Regular inspections can reveal early signs of wear, such as a loose gasket or a frayed power cord, allowing for prompt action. Notably, a simple gasket wipe, performed every few months, can prevent freezer frost buildup, improving efficiency—a tip supported by https://discountappliancehub.com/the-simple-gasket-wipe-that-stops-freezer-frost-buildup.
Scaling Your Maintenance from DIY to Professional Support
While many routine tasks can be handled with the right tools, complex issues—like control board failures or wiring faults—warrant professional intervention. A professional technician’s familiarity with diagnostic equipment, such as leak detectors or advanced circuit testers, ensures thorough repairs that last. Investing in periodic professional check-ups, especially for high-use appliances, prolongs their lifespan and maintains warranty coverage.
How do I maintain appliances over time?
The future of appliance upkeep leans heavily toward smart diagnostics and IoT-enabled tools, which can alert you to potential failures before they occur. Staying current with tech trends and regularly updating diagnostic software will be empowering for homeowners. To start, I suggest trying the advanced diagnostic tips—like using a multimeter to check for inconsistent voltage supply—that I’ve shared. These proactive measures not only catch issues early but also make repairs faster and more cost-effective, ensuring your appliances serve efficiently for years to come.
The Lessons That Changed My Approach to Appliance Fixes
One unexpected insight I gained from troubleshooting my stove’s high-only burner response was realizing the importance of patience and methodical testing. Rushing to replace parts without proper diagnosis often led me to spend more time and money. Now, I always take a step back, use reliable tools like a quality multimeter, and cross-reference online guides before making any repairs. This approach has saved me countless headaches and deepened my understanding of appliance systems.
Another lightbulb moment was understanding that the comfort of DIY repairs comes with a responsibility to know our limits. While I enjoy fixing small issues, I learned to recognize when a problem surpasses my skill level—like complex control board failures—and I wisely turn to professionals. Knowing when to seek expert help ensures safety and longevity for both the appliance and myself.
I also discovered that preventative maintenance often goes unnoticed but has a huge impact. Regularly inspecting, cleaning contacts, and performing small tasks like resetting control boards can prevent major breakdowns. Embracing proactive care means fewer emergency repairs and extending my appliances’ lifespan, which just makes sense in the long run.
Tools and Resources That Keep Me Ahead of Appliance Glitches
Over time, I’ve curated a set of reliable tools that form the backbone of my repair kit. A high-quality digital multimeter, like the Fluke 117, allows me to test electrical components accurately. Pairing it with diagnostic apps, such as Appliance Medics, helps me follow smart troubleshooting steps tailored to my specific appliances, saving me hours of guesswork.
Good reference materials have been invaluable. The detailed repair guides from trusted online sources teach me the nuances of appliance systems and potential pitfalls. For example, understanding the importance of proper airflow helps me prevent unnecessary issues in my AC unit, and I regularly consult guides like this article to fine-tune my maintenance routine.
Beyond tools and guides, I prioritize scheduled inspections of key components—like cleaning fridge gaskets or checking dryer vents—to catch small problems before they escalate. This routine has made a significant difference in maintaining peak performance, ensuring my appliances serve me well for years to come.
Take Action and Empower Your Appliance Care Journey
If you’re facing similar challenges, remember that knowledge and the right tools make a huge difference. Start small, stay curious, and don’t hesitate to seek professional help when needed. Your appliances are investments that reward regular care and a bit of technical confidence.
What DIY fix have you hesitated to try, and what held you back? Share your experiences below—I’d love to hear your story and support your appliance care journey!
,