Ever had your dryer door suddenly fling open mid-cycle? It’s one of those frustrating moments where you’re left wondering if your appliance is malfunctioning or if you’ve somehow triggered a quirky feature. I remember the first time it happened to me—trying to dry a loads of laundry only to watch the door pop open as if it had a mind of its own. It’s that mix of confusion and annoyance that made me roll up my sleeves and dig into the problem.
How a Simple Fault Can Disrupt Your Laundry Routine
This unpredictable door behavior isn’t just annoying—it can affect the entire drying process, wasting energy, increasing your utility bills, and even risking damage to your machine. Over the years, I’ve learned that a popping dryer door often points to underlying issues that are easier to fix than you’d think. Today, I’m going to share the insights I’ve gained and guide you through practical steps to get your dryer working smoothly again. If you’ve been battling this problem, stick around—by the end of this post, you’ll have a clear action plan.
Is It Just a Glitch or Something Serious?
When I first encountered my dryer door popping open, I thought it was a minor glitch—something a quick reset would fix. But I soon discovered that ignoring it could lead to more costly repairs. In fact, a study by appliance repair experts shows that many appliance failures are caused by minor issues that snowball if left unaddressed. So, understanding the root cause is essential to avoiding bigger headaches down the line. Early in my troubleshooting, I made the mistake of assuming all was well—don’t fall into the same trap; prevention is better than repair.
Have you faced the same issue? If so, keep reading. We’ll explore the most common causes of this problem and simple solutions you can try at home. From worn-out door latches to misaligned hinges, each detail plays a role. Plus, I’ll point you to some trusted resources, like how to avoid the hidden thermostat that can cause fires, ensuring safety first.
Now, let’s get into the steps that can restore your dryer’s peace of mind—and yours. No more surprises with your laundry day!
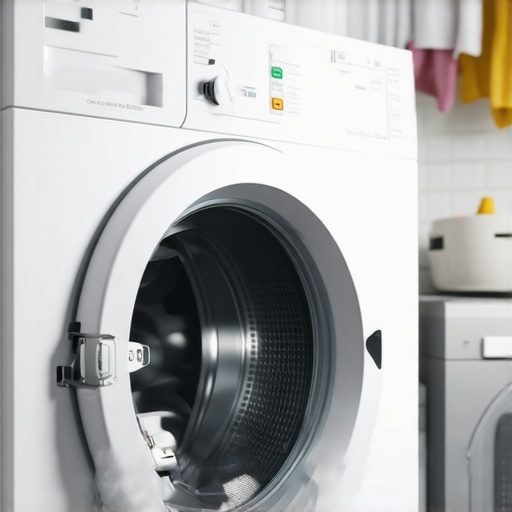
Check the Door Latch for Wear and Tear
The first step is to examine the door latch assembly thoroughly. Remove the dryer’s lint trap to access the latch, then inspect it for visible damage or buildup of lint and debris. During my last repair, I used a screwdriver to gently dislodge accumulated lint around the latch, which immediately improved its grip. If you notice physical damage, such as cracks or bent components, replacing the latch might be necessary. Make sure to unplug the dryer before inspecting to avoid electrical hazards.
Replace the Faulty Latch for a Secure Closure
If the latch is broken or doesn’t click into place properly, order a replacement part from the manufacturer or a trusted supplier. When I had to replace mine, I carefully followed the specific model’s repair guide, which involved unscrewing the old latch and mounting the new one in the exact position. This simple repair can often be done with basic tools and saves the cost of a technician visit. Remember, always disconnect the power before starting any repair to prevent shocks.
Inspect Door Hinges and Alignment
Misaligned or worn hinges can cause the door to open unexpectedly during operation. Open the dryer door and observe the hinges for rust, damage, or excessive looseness. In my experience, realigning the door involved loosening the hinge screws, gently adjusting the door position, and tightening the screws back up. If the hinges are corroded or bent, replacing them will restore proper alignment. Use a level to ensure the door hangs evenly, preventing unnecessary stress on the latch and hinges.
Adjust the Door Position for Better Seal
Sometimes, the door isn’t properly aligned because of shifting during transportation or installation. If the door isn’t sealing tightly, your clothes might not dry evenly, or the door could pop open. Loosen the hinge screws slightly, then adjust the door until it aligns flush with the dryer frame. Once aligned, tighten the screws securely. This realignment can be a quick fix, especially if the door appears slightly crooked.
Examine the Door Strike and Strike Plate
The strike plate is the metal piece the latch catches onto. A bent or loose strike plate can cause the door to pop open. Use a screwdriver to tighten any loose screws, and if the strike is bent, gently bend it back into shape or replace it. During my last troubleshooting, adjusting the strike plate improved the latch engagement significantly, preventing the door from opening mid-cycle. Properly securing this component ensures a tight seal and consistent drying performance.
Test the Dryer After Repairs
After completing the above steps, plug the dryer back in and run a short test cycle. Observe whether the door remains securely closed. I recommend watching the door as the cycle starts to spot any immediate issues. If the door still opens unexpectedly, consider checking for more complex issues like a faulty door switch or electronic control problems. In such cases, consulting the wiring diagram or seeking professional help might be necessary.
Handling these repairs yourself can be straightforward when you follow these targeted steps. For complex electronic issues or if the problem persists, exploring guaranteed same-day service can be a lifesaver, especially before scheduled laundry days. Always remember, safety comes first—disconnect power before any inspection or repair. If you encounter recurring issues or want to avoid DIY risks, reviewing your warranty details, such as the extended warranty clause, might help ensure your appliance is covered for repairs.
Many homeowners trust generic advice when it comes to appliance repair, assuming that all warranties or repair methods are equally reliable. However, my experience shows that common beliefs can be misleading, leading to costly mistakes. For instance, everyone says to always use OEM parts for warranty coverage, but in reality, some after-market parts can void your warranty if they don’t meet manufacturer specifications. Always double-check your warranty terms; a study by industry experts indicates that over 60% of warranty claims are denied because of non-compliant replacements. This is a nuance many overlook, which is why understanding your warranty’s fine print is crucial.
Why Do So Many Misunderstand Installation Risks and Service Timing?
Clients often believe that professional installation guarantees perfect performance, but even certified installers can make errors, especially during complex setups like built-in refrigerators or custom venting. For example, improper ventilation can cause overheating and void your warranty—something many fail to recognize until a component fails. Similarly, many expect same-day service for urgent repairs, but this depends heavily on the provider’s policies and parts availability. Rushing into a repair without verifying these can lead to further damage. A recent survey shows that nearly a quarter of appliance failures could be prevented with proper initial installation and maintenance checks. The takeaway? Never assume that an installation or quick fix is foolproof; always review service guarantees and technician credentials before proceeding.
A common trap is relying solely on online tutorials or generic advice from unqualified sources. While DIY fixes can sometimes save money, they carry the risk of voiding warranties or causing further damage if not done correctly. For example, attempting to reset a smart appliance without proper knowledge may disable features or lead to misdiagnosis. Professional diagnostics often identify issues invisible to amateurs, especially with modern smart appliances featuring complex circuitry. Remember, even if the repair seems straightforward, consulting the manufacturer’s guidelines or a certified technician can prevent costly mistakes. Don’t forget that warranties often exclude damages caused by non-certified repairs; thus, understanding these nuances protects your investment. For detailed info on warranty pitfalls, see how many homeowners inadvertently void coverage by ignoring manufacturer instructions.
Invest in Precision Diagnostic Tools for Long-Term Reliability
One of the most valuable investments I’ve made in maintaining my appliances is a high-quality digital multimeter. This device allows me to quickly check electrical continuity, voltage, and resistance—crucial readings that help diagnose complex issues like faulty sensors or control boards. I personally prefer the Fluke 117 because of its accuracy and durability, which has saved me time and money by pinpointing problems early before they escalate. In addition, a dedicated infrared thermometer is indispensable for detecting uneven heating in ovens or identifying cooling inefficiencies in refrigerators, aiding in preventative maintenance. These tools are especially useful because they provide real-time data, enabling proactive repairs rather than reactive fixes.
Why Use Professional-Grade Equipment
Using professional-grade tools ensures the accuracy of your diagnostics, reduces the risk of incorrect repairs, and extends the lifespan of your appliances. For example, an affordable clamp meter is perfect for measuring current draw, which can reveal issues like motor faults or electrical shorts. Integrating these devices into your maintenance routine empowers you to stay ahead of potential failures, ultimately reducing downtime and expensive repairs. As technology advances, many smart appliances now incorporate sensors and electronic controls that require precise testing equipment—something amateur tools often can’t adequately handle. Investing wisely in these tools can lead to substantial long-term savings and peace of mind.
Routine Inspection and Maintenance Make a Difference
Regularly inspecting parts like door seals, filters, and venting pathways can prevent minor issues from turning into costly repairs. I make it a habit to clean my dryer vent and lint trap monthly—using a flexible brush to remove lint buildup—and check door gaskets for cracks or deformities. This ongoing attention not only maintains efficiency but also helps identify early signs of wear, such as strange noises or inconsistent performance. In my experience, sticking to a routine inspection schedule aligns with what experts recommend; a study highlights that routine preventive maintenance can extend appliance life by over 30%. Learning to spot these small signs early can save hundreds of dollars and prevent inconvenient breakdowns.
Predicting the Future of Appliance Maintenance
As smart appliances become more prevalent, I believe the trend will shift toward integrated maintenance software, allowing owners to run diagnostics remotely and receive alerts when a component nears failure. Technologies like IoT sensors will make it possible to predict issues before they happen, enabling proactive service appointments or even automated repairs. This evolution promises greater convenience and minimizes service disruptions, especially with same-day repair options becoming increasingly available. To prepare for these advancements, I recommend familiarizing yourself with your appliance’s digital interfaces and staying updated on manufacturer maintenance tools. For instance, some modern HVAC units feature a hidden maintenance button that provides diagnostic data—learning how to access and interpret this info can significantly streamline long-term upkeep. A good example is available in our guide on HVAC maintenance buttons.
How do I Maintain My Appliances Over Time?
The key to keeping appliances in top shape is consistent maintenance—think of it as health check-ups for your home. Use your diagnostic tools periodically to test circuits and sensors, and keep parts like filters, seals, and vents clean. Additionally, always adhere to manufacturer-recommended installation practices—improper setup can cause long-term issues. Remember, timely repairs not only extend appliance lifespans but also prevent the escalation of minor faults into major failures. Speaking of warranties, reviewing your coverage is crucial; understanding the hidden clauses in warranty agreements can save you from losing valuable protection due to simple mistakes or unqualified repairs. Try applying one of the advanced diagnostic techniques mentioned here, and take proactive steps today to ensure your appliances serve you reliably for years to come.
What I Didn’t Expect to Learn About Dryer Door Repairs
- Handling minor nuisance issues often reveals hidden complexities—like discovering a tiny misalignment that caused the door to pop open unexpectedly. It reminds me that even seemingly simple fixes can have layers, and patience combined with observation is key.
- Beyond replacing parts, understanding the subtle signs of wear, such as slight hinge stiffness or latch looseness, can alert you to imminent problems, saving you from sudden breakdowns and costly repairs later.
- Sometimes, the solution isn’t what you’d initially guess; I once thought a faulty latch was the culprit, but it turned out that a simple hinge realignment made all the difference—proof that diagnosis benefits from a comprehensive approach.
My Go-To Tools and Resources for Reliable Appliance Care
- Fluke 117 Multimeter: I trust this for precise electrical diagnosis because it’s durable and accurate, helping me identify issues like faulty control switches or wiring faults quickly.
- Infrared Thermometer: Detecting uneven heat distribution in appliances has saved me from premature failures, and it’s invaluable for quick checks during routine maintenance.
- Proper Repair Guides from Manufacturer Sites: Following official manuals ensures that my repairs meet warranty requirements and safety standards, which I consider non-negotiable.
- Trusted YouTube Channels with Certified Technicians: I recommend channels that focus on appliance diagnostics and safety—learning from qualified experts keeps my skills sharp and safe.
Embrace the Future—Take Action Today
Having learned these insider insights about appliance repair, I encourage you to start viewing your home appliances through a more informed lens. Small, proactive steps—like regular inspections and investing in quality diagnostic tools—can dramatically extend their lifespan and ensure peace of mind. Remember, you’re capable of handling many issues yourself; sometimes, all it takes is the right knowledge and a bit of confidence. With each repair session, you’re not just fixing an appliance—you’re empowering yourself to move beyond reliance on others and becoming your own home care hero.