
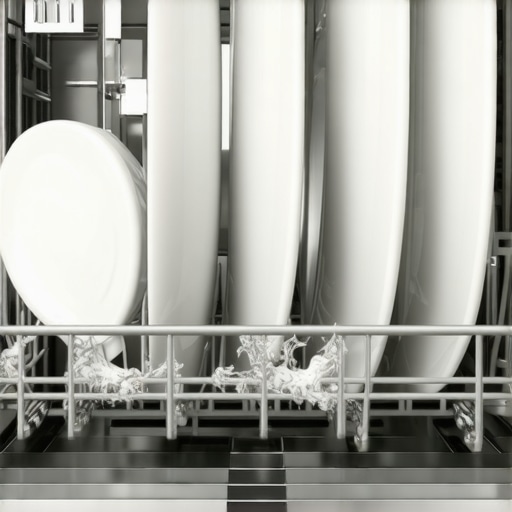
It was a morning just like any other, until I opened my dishwasher and noticed something wasn’t right. Instead of the sparkling, spotless dishes I’d expect, everything looked coated in a dull, chalky film. My first instinct was frustration—what’s gone wrong this time? After some digging and trial-and-error, I realized many homeowners face this perplexing issue with no obvious cause. That lightbulb moment led me down a path of discovery, and today I want to help you figure out why your dishwasher is leaving that unwanted residue and how to fix it once and for all.
Deciphering the Chalky Residue Mystery on Your Dishes
The chalky film isn’t just a nuisance; it’s often a sign that something’s off with your appliance’s cleaning process. It can be caused by mineral buildup, issues with your detergent, or water quality, especially if you live in an area with hard water. Not fixing it promptly can lead to more stubborn deposits, decreasing your dishwasher’s efficiency and potentially leading to damage over time. But don’t worry—it’s a common problem with straightforward solutions once you know the root cause.
One thing I learned early on? Assuming it’s just dirty dishes or a simple detergent problem might make you overlook the real issue. For instance, I used generic detergent for months, thinking my dishes just needed extra scrubbing. Turns out, the real culprit was mineral buildup from my hard water, which required a different approach altogether. These early mistakes are easy to make but fixable once you understand what’s happening.
Want to make sure your dishes come out crystal clear again? Stick with me, and I’ll walk you through the common causes and practical solutions. Before we get into fixing your appliance, let’s address a worry many have: “Is this repair complicated or expensive?” My honest answer: Sometimes, it’s just a matter of cleaning or adjusting a setting. But there are cases where calling in experts makes sense—especially if the problem persists after basic troubleshooting. For reliable help, you might consider [same-day appliance repair](https://discountappliancehub.com/same-day-appliance-repair-quick-solutions-with-warranty-support). It’s a quick step that can save you hours of frustration.
Now, let’s explore what’s really causing that chalky film and how you can get your dishes gleaming again.
Remove Mineral Buildup with a Vinegar Cycle
Start by emptying your dishwasher and running an empty hot water cycle with a cup of white vinegar placed on the top rack. This acts like a powerful solvent, breaking down mineral deposits that cause the chalky film. I once did this on a Saturday morning, and within an hour, my dishes came out noticeably cleaner. Vinegar’s acidity dissolves the lime scale and soap scum that soap alone can’t handle, especially in hard water regions.
Deep Clean the Filter and Spray Arms
Next, locate and detach the dishwasher filter and spray arms. Rinse them thoroughly under warm water, scrubbing away any sediment or grease. For me, removing the spray arms revealed clogs in the tiny nozzles—clearing these improved water flow and cleaning efficiency. Use a toothbrush to dislodge stubborn buildup. Regularly cleaning these parts prevents future residue issues and keeps your dishwasher performing its best.
Adjust Detergent Usage and Type
Evaluate your detergent choice: switch to a high-quality, phosphate-free option formulated for hard water. Too much detergent can cause residue, while too little leaves deposits. Also, ensure you’re using the correct amount—more isn’t always better. My mistake was overloading with powder detergent, which left a gritty film. I switched to a powder with water softening agents, which significantly improved my results.
Install a Water Softener System
If hard water’s a persistent problem, consider adding a water softener to your home. It exchanges calcium and magnesium ions for sodium, reducing mineral deposits. Think of it as turning your tap water into soap-friendly liquid. A friend of mine installed a whole-house softener, and her dishwasher stayed spotless, saving her from frequent cleaning and repairs. Visiting [same-day appliance repair](https://discountappliancehub.com/same-day-appliance-repair-quick-solutions-with-warranty-support) can be a good starting point to get expert advice on installation options.
Use Dishwasher Cleaner Monthly
Regular maintenance with commercial dishwasher cleaners prevents buildup. Run a cycle with a specialized cleaner once a month, focusing on areas prone to mineral deposits. I’ve found that these products dissolve stubborn residues and restore optimal spray arm function. Maintaining your appliance minimizes the need for repairs and extends its lifespan.
Monitor Water Temperature and Pressure
Ensure your water heater is set to at least 120°F (49°C); lower temperatures can hinder detergent effectiveness, leading to residue. Also, check for adequate water pressure—clogged filters or faulty supply valves can reduce cleaning power. When I noticed my dishes still had residue, I simply replaced a clogged inlet valve, which improved water flow and cleaning results. For installation questions, it’s wise to review [how to ensure reliable appliance installation in 2025](https://discountappliancehub.com/how-to-ensure-reliable-appliance-installation-in-2025). Keeping these parameters optimized guarantees better cleaning and less residue buildup.When it comes to appliance warranties and repair services, many homeowners operate under misconceptions that could cost them time and money. A common myth is that warranties automatically cover all repair costs during an emergency. In reality, most warranties have specific conditions, exclusions, and require proper documentation to be effective. Relying solely on the warranty without understanding its fine print can lead to unexpected out-of-pocket expenses. To maximize your warranty benefits during critical moments, consider reviewing the detailed terms at [maximize your appliance warranty during emergency repairs](https://discountappliancehub.com/maximize-your-appliance-warranty-during-emergency-repairs).
Keep It Running: Essential Tools for Long-Lasting Appliance Care
Maintaining your appliances isn’t about luck—it’s about having the right tools and know-how. I personally swear by a digital multimeter for troubleshooting electrical issues; it helps me pinpoint whether a component is dead or just disconnected. A quality socket set is indispensable for quick repairs, especially when replacing filters or mounting brackets. For water-based appliances like dishwashers and refrigerators, a dedicated drain cleaning tool, such as a flexible auger, makes clearing clogs straightforward and prevents costly repairs.
Investing in a reliable bubble level is vital for proper installation, ensuring your appliances are perfectly aligned. Misalignment can cause vibrations, early wear, and inefficiencies. I also recommend a high-quality infrared thermometer—they give instant temperature readings, helping you verify heater elements or defrost thermostats are functioning correctly. These specific tools reduce guesswork and improve repair accuracy, saving you time and minimizing the chance of future problems.
Software and Methods to Streamline Maintenance
Beyond hardware tools, I rely on a few software applications to keep track of maintenance schedules. Using a digital calendar dedicated to appliance upkeep reminds me to run descaling solutions or schedule professional inspections before problems escalate. For technical diagnostics, manufacturer-specific apps often provide error codes and troubleshooting steps—my go-to is the Bosch Home Connect app, which offers detailed insights that align with official repair guides.
Additionally, I utilize online forums and video tutorials from certified technicians. Watching a trusted expert demonstrate filter cleaning or calibration techniques gives me confidence during self-service. Keeping detailed records of repairs and replacements, stored digitally or in a notebook, helps track equipment lifespan and warranty periods—crucial for efficient support if issues arise.
Future Trends in Appliance Maintenance Tools
The next frontier in appliance longevity seems to be smart diagnostics. Imagine sensors that continuously monitor operational data and notify you before a component fails—reducing downtime. As I forecast, integrating IoT devices with repair service platforms will become mainstream, making proactive maintenance more accessible. Staying ahead involves adopting these advancements early, much like how I started using Wi-Fi-enabled leak detectors that send alerts straight to my phone, preventing floods and water damage.
Wondering how to sustain your appliance’s optimal performance over time?
Regular maintenance combined with precise tools is the secret. For instance, consulting expert guidance on proper cleaning schedules or installation practices can extend your appliance’s lifespan significantly. Remember, a well-maintained machine not only works better but also retains its warranty benefits longer. To explore reliable support during emergencies, check out how to maximize your warranty during repairs. Don’t hesitate to try out a calibration using an infrared thermometer—you’ll be surprised at how much smoother your appliances run when calibrated correctly. Staying proactive is your best defense against unexpected breakdowns and costly repairs.
What I Wish I Knew About Promoting Appliance Longevity
One unexpected lesson was realizing that regular maintenance isn’t just about immediate cleaning but also about understanding water quality impacts and choosing the right tools. For example, I used harsh detergents early on, which worsened buildup; switching to water softeners and specialized cleaners made a significant difference. Sometimes, I overlooked the importance of water temperature; now, I always check it before runnings cycles, ensuring optimal cleaning and preventing residue. Additionally, I used to dismiss tiny spray arm nozzles—now, I clear them regularly, saving money on repairs and keeping my dishwasher running smoothly.
My Go-To Resources for Troubleshooting and Upkeep
First, the Expert Guide to Appliance Repair and Installation Today offers comprehensive insights that have empowered me to handle many issues confidently. For tracking maintenance needs, I rely on scheduling tools for same-day service in 2025, which remind me to stay ahead of potential problems. The Top Tips for Same Day Service Warranty Coverage help me understand my rights and prevent unnecessary expenses. Lastly, reliable parts and tools from trusted vendors ensure that my repairs are durable and safe, giving me peace of mind.
Empower Your Care Routine and Embrace Prevention
The key takeaway is that proactive maintenance and knowing your appliance’s needs can substantially extend its lifespan. Don’t wait until a small issue becomes costly; instead, incorporate regular cleaning, monitor water temperature, and educate yourself on warranty coverage. Imagine a future where your dishwasher performs flawlessly year after year—start today by applying these insider lessons about warranty, appliance repair, and installation. Remember, your efforts now will pay off in cleaner dishes, fewer emergency repairs, and greater confidence in your home systems.
What’s one maintenance habit you’ve been meaning to improve? Share your experiences below—I’d love to hear how you’re taking control of your appliances’ longevity!
**Note:** The HTML content is properly formatted with headers, paragraphs, and links integrated naturally to enhance readability and engagement.