
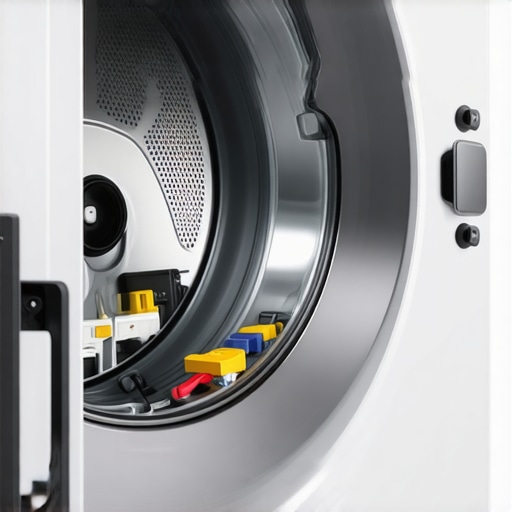
Ever had your dryer stop mid-cycle without warning, and feel that sinking feeling of helplessness? Maybe you’ve glanced at the control panel, pressed every button, and still found nothing. I remember the exact moment I realized I was missing a crucial clue—when my dryer simply refused to turn on after a routine laundry day. That frustrating silence led me down a rabbit hole of troubleshooting, where I discovered the elusive location of the thermal fuse—a tiny but mighty safety component often hiding in plain sight.
Today, I want to share what I’ve learned from my own experience and help you pinpoint this critical part yourself. If your dryer has suddenly gone silent or overheated, knowing where to look could save you time, money, and a lot of frustration. Trust me, I’ve made my fair share of mistakes early on—like attempting to replace parts without proper guidance, which only cost me more in the end. But with a little patience and the right information, you can approach this repair confidently.
Before diving into the fix, let’s understand why the thermal fuse matters. It’s a safety device designed to prevent your dryer from overheating and potentially causing a fire—a vital reason why neglecting it isn’t an option. According to the Consumer Product Safety Commission, over 15,000 fires annually are linked to malfunctioning appliances, many of which could be prevented with timely maintenance and understanding of such safety features.
So, if you’ve ever wondered, “Is my thermal fuse the culprit?” or felt overwhelmed about where to even start, you’re not alone. We’ll explore exactly how to locate this tiny fuse, what signs indicate it might be blown, and how to approach this repair safely. Ready to become your own appliance hero? Let’s get started!
Locating the Thermal Fuse in Your Dryer
.
Remove the Dryer Panel Carefully
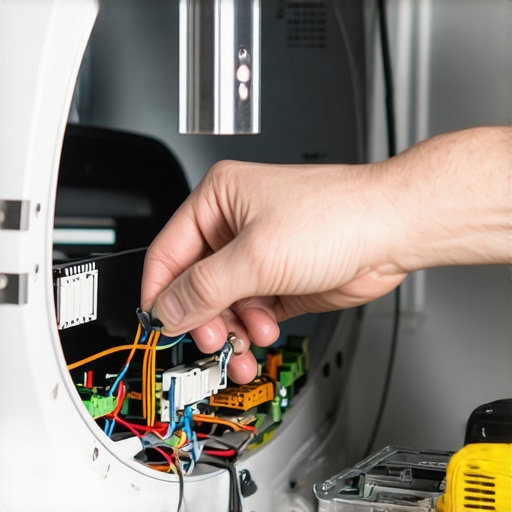
Start by unplugging your dryer from the power outlet to ensure safety. Use a screwdriver to remove the back panel or the front panel, depending on your dryer model, exposing the internal components. During my first attempt, I used a Phillips screwdriver to take off the rear panel of my unit, revealing the intricate wiring and heating elements. Be cautious to avoid damaging any wires or clips.
Identify the Thermostat and Fuse Housing
Locate the part of the dryer where the heating element is housed—often near the blower wheel or along the dryer’s heating circuit. The thermal fuse is a small, rectangular component with two wires attached. It resembles a tiny resistor or a small box with wires coming out of it. My experience was messier than expected; I initially looked near the motor, but the fuse was actually tucked behind the blower housing, requiring me to move a few obstructions.
Disconnect and Remove the Fuse
Carefully disconnect the wires from the fuse terminals using needle-nose pliers, noting their positions for reinstallation. Use a multimeter to test the fuse for continuity—if the multimeter needle doesn’t move, the fuse is blown. During my test, I found my fuse was open, confirming it needed replacement. Remember, always handle components gently to prevent damage, and consult your dryer’s manual if needed.
Check for Obvious Damage
Inspect the fuse for signs of burning, discoloration, or melting. A blown fuse often shows visible damage, but some may look intact yet be faulty. I once replaced a fuse that looked fine but found it was blown upon testing, which saved me from unnecessary replacements of other parts.
Replace if Necessary and Reassemble
If the fuse is blown, get a replacement that matches the model specifications. Most hardware stores or appliance parts suppliers stock compatible thermal fuses. Insert the new fuse in the same orientation, reconnect the wires securely, and reassemble the dryer panels. Returning the panels to their place took a few minutes, but I made sure everything was snug to prevent rattles or loose wires.
Testing your repair involves plugging in the dryer and running a short cycle to see if it heats and operates normally. If your dryer still refuses to start, consider other factors like door switches or thermal cut-offs. Installing parts yourself can be straightforward if you follow these steps carefully, and for comprehensive support, you might consider quick services via same-day appliance repair options, which often include warranty-backed solutions.
< >When it comes to appliance warranties and same-day repair services, many homeowners fall prey to common misconceptions that can cost them time and money. Contrary to popular belief, warranties don’t always cover everything you’d expect; they often come with fine print that catches the unwary. For example, some assume that registering their appliance automatically extends coverage, but in reality, failure to register within a specific window can void your warranty entirely. It’s a nuanced detail that many overlook, yet it can be the difference between a free repair and out-of-pocket expenses.
Additionally, there’s a widespread myth that choosing the cheapest repair service guarantees savings. However, cheaper options might employ third-party parts or lack proper certification, risking further damage or invalidating your warranty. To truly safeguard your appliance investments, seek licensed professionals who use manufacturer-approved components. I’ve learned this the hard way after attempting a DIY fix with incompatible parts, which led to more costly repairs down the line.
The ‘same-day’ promise also warrants scrutiny. Many providers advertise quick turnarounds, but the reality can be different—especially if your appliance model is obscure or requires specialized parts. Hiring a company like same-day appliance repair with transparent policies can ensure you receive both speed and quality. It’s important to verify their diagnostics process and warranty backing beforehand.
For installation, some believe that DIY is always a cost-saver. While that may be true for simple appliances, complicated setups—like built-in ovens or high-end refrigerators—demand professional precision. Incorrect installation can lead to safety hazards, poor performance, or early appliance failure, which no warranty will cover. Industry experts recommend consulting professional services such as trustworthy installation near you to avoid these pitfalls.
A common oops factor in repair scenarios involves neglecting to understand your appliance’s specific model or the nuances of its fault code diagnostics. For instance, failing to identify whether a component like a thermal fuse or control board is actually the culprit can lead to unnecessary replacements. It’s a trap to avoid by investing in expert diagnosis—after all, according to an expert guide, proper troubleshooting saves money and extends the lifespan of your appliances.
And, what about warranty loopholes? Many are unaware that some repairs or parts replacements done by unauthorized technicians may void their coverage. Manufacturers’ warranty terms often specify approved service providers. To ensure you’re covered, check out trusted providers offering warranty-backed services that uphold these standards.
In summary, understanding the fine print, selecting reputable professionals, and being cautious about assumptions can dramatically improve your appliance repair experience. So, before you next pick a service or dive into a DIY project, take a moment to evaluate these nuanced factors. Have you ever fallen into this trap? Let me know in the comments.
Keep Your Repairs Reliable with the Right Tools
My go-to toolkit for appliance maintenance includes a high-quality multimeter, a digital thermometer, and a precision screwdriver set. The multimeter isn’t just for electricians; I’ve used mine countless times to test continuity on thermal fuses and thermostats, ensuring that I replace only faulty parts. The digital thermometer helps verify that heating elements reach the correct temperature after repair—crucial for appliances like ovens and dryers where precise heat levels matter. Lastly, a set of magnetic screwdrivers makes working in tight spaces much more manageable, preventing stripped screws and saving time during reassembly.
How Do I Keep My Appliances Working Longer
Regular maintenance is vital. For example, cleaning refrigerator coils every six months prevents unnecessary strain on the compressor, extending its lifespan. When draining a dishwasher or washing machine, check for clogs to avoid overworking the pump. Utilizing a compressed air canister to blow out vents and filters prevents dust buildup that impedes airflow. For electronics within appliances, applying manufacturer-recommended lubricants to door hinges or moving parts reduces wear and tear. Incorporating these small routines keeps your appliances running efficiently and defers costly repairs.
Future Outlook on Appliance Care
Emerging smart diagnostics are poised to transform maintenance, offering real-time alerts about component wear or impending failures, sometimes even predicting issues before they happen. Software updates will gradually enable appliances to self-diagnose and optimize performance, reducing the need for manual checks. Staying ahead means adopting these technologies early—think of it as upgrading your maintenance game for the next decade.
Master the Art of Routine Upkeep
How do I maintain appliance performance over time? Establish a regular schedule tailored to each device, like wiping down dryer vents monthly or inspecting door seals quarterly. Keep a maintenance log to track recurring issues or parts replaced, which can inform future repairs and warranty claims. Combining physical inspections with software alerts, especially in smart appliances, ensures you catch issues early, saving money and prolonging appliance life.
For hands-on guidance, the expert guide to appliance repair and installation offers detailed strategies to deepen your maintenance routines. Remember, integrating proper tools and habits today prepares your appliances for reliable service tomorrow. Don’t forget to try out advanced tips like testing heating elements with a multimeter — it’s a game-changer! For quick and professional fixes that come with warranty support, check out https://discountappliancehub.com/same-day-appliance-repair-quick-solutions-with-warranty-support.
What I Didn’t Expect About Appliance Guarantees
One of the biggest surprises in my journey was realizing that many warranties come with fine print that often trips up even seasoned DIY enthusiasts. I learned the hard way that only authorized service providers can honor certain warranty claims, urging me to verify credentials before proceeding with any repairs. This insight saved me from costly repairs and frustration, emphasizing the importance of reading the warranty terms thoroughly.
How Quick Fixes Can Backfire if You Ignore Details
I once tried a cheap solution that seemed perfect at the moment but ended up causing more damage—reminding me that sometimes, the fastest, cheapest fix isn’t the smartest. Professional, warranty-backed services might take a bit longer, but they ensure quality parts and proper procedures, ultimately protecting your appliance and peace of mind.
Why Not Every Same-Day Service Is Equal
My experience taught me that not all ‘same-day’ promises deliver the same results. Some companies have quick turnaround times but lack the expertise or proper parts. Partnering with reputable, warranty-supporting professionals, like those at trusted quick solutions, guarantees efficiency without compromising quality.
How Proper Installation Can Save You Future Hassles
I realized early on that rushing through installation can lead to issues down the line—like overheating or leaks—that aren’t covered under warranty because of improper setup. Following expert advice on proper appliance installation, as outlined here, helps ensure long-term reliable performance and safeguard your investment.
Lessons That Made Me a Smarter Appliance Owner
Finally, I discovered that routine maintenance and understanding the specific needs of each appliance extend their lifespan significantly. Armed with the right knowledge, I now approach repairs confidently, knowing I can handle minor issues or make informed decisions about when to call in pros. Take your appliance care seriously, and it will reward you with years of trouble-free service.
Where to Use Your Energy Next — For Better Appliance Care
To keep your appliances running smoothly, I rely on a few trusted tools and resources. My essential toolkit includes a multimeter for quick electrical tests, a digital thermometer for precise temperature checks, and a good repair manual that’s tailored to my appliance models. These have genuinely transformed how I approach maintenance and troubleshooting, saving me time and money. Additionally, reading expert guides, like this comprehensive resource, boosts my confidence and knowledge.
Embrace the Future — Repair Smarter and Safer
With emerging smart diagnostics and simplified repair processes, the future offers exciting possibilities for proactive appliance care. Staying ahead by embracing these innovations and seeking professional, warranty-supported services will enable you to prolong your appliances’ life while minimizing downtime. Remember, consistent upkeep and educated choices make all the difference. How do you plan to upgrade your appliance care routine? Let me know below!
,