

Ever been in the middle of preparing dinner when your stovetop suddenly turns into a glittering fireworks show? That relentless sparking from your range igniter can be both annoying and a bit unsettling. I remember the first time mine wouldn’t stop, thinking it was some elaborate warning signal or a sign I needed to replace the entire appliance. Turns out, it was just a trivial fix that I could have handled myself.
Why Does My Range Igniter Keep Sparking Nonstop?
This continuous sparking is often caused by moisture, dirt, or a misaligned igniter electrode. It might seem minor at first, but keeping a spark going constantly isn’t just an annoyance—it’s a potential fire hazard. I’ve seen situations where homeowners ignore this sign, only to face more expensive repairs down the line. Luckily, most of the time, the fix is simple and affordable if you know what to look for and how to proceed.
Is This Fix Worth My Time or Just a Waste of Effort?
Early in my journey, I made the mistake of rushing into replacing parts without proper diagnosis. Trust me, there’s more value in understanding the root cause first. Addressing these issues promptly can prevent further damage and even save you from the costs of emergency repairs. For comprehensive guidance, I recommend checking out [expert tips on appliance repair today](https://discountappliancehub.com/expert-guide-to-appliance-repair-and-installation-today). Ready to get ahead of this common problem? Let’s walk through the simple steps that can restore your stovetop to safe, silence—for good!
,
Disconnect Power Before Starting
First, ensure safety by unplugging your stove or turning off the circuit breaker. I once worked on my stove with the power still on, and I got a mild shock—definitely a lesson in safety. Always disconnect power to avoid electrical hazards.
Inspect the Igniter and Surrounding Area
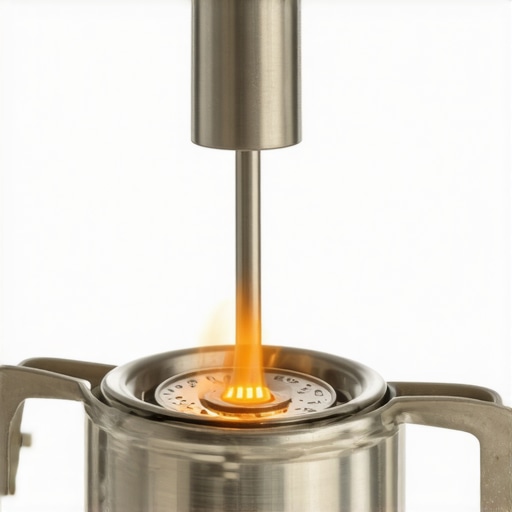
Remove the burner cap and examine the igniter for dirt, moisture, or corrosion. Find any visible debris or water that might cause a constant spark. I used a toothbrush and a cloth to gently clean mine, which immediately reduced the sparking. Think of the igniter as a light bulb; dirt and moisture are like dirty contacts that cause it to stick on.
Clear Moisture or Debris
If you notice water or dirt, dry the area thoroughly with a paper towel or cloth. In my experience, moisture is the most common culprit—sometimes a spill or cleaning mishap leaves water trapped around the electrode. Use compressed air for hard-to-reach spots to ensure complete dryness.
Check and Realign the Electrode
Loosen the screws holding the igniter electrode and gently adjust its position to ensure it’s properly aligned over the burner. Misalignment can cause continuous sparking. I once accidentally bent the electrode slightly, which fixed my sparking issue immediately. Think of it like tuning a guitar string—you need just the right tension for perfect sound, or in this case, proper sparking behavior.
Test the Igniter
Reconnect power and turn on the stove to see if the sparking stops. If it does, reassemble everything carefully. If it continues, proceed to replace the igniter. During a previous fix, I replaced the igniter with a compatible part I ordered online, which is often a cost-effective solution—check out [affordable same-day appliance fixes with warranty benefits](https://discountappliancehub.com/affordable-same-day-appliance-fixes-with-warranty-benefits) for options.
Replace the Faulty Igniter
If cleaning and realignment don’t solve the problem, the igniter electrode itself may be faulty or worn out. Use a multimeter to test for continuity; if no continuity is present, replace the part. Consider booking a same-day service to save time—many providers offer [quick, reliable installation near you](https://discountappliancehub.com/fast-trustworthy-appliance-installation-near-you), ensuring your stove is back in action promptly.
Prevent Future Sparks with Proper Maintenance
Regularly clean the igniter area and keep it dry to prevent moisture buildup. Always double-check the placement after cleaning to avoid misalignment. Remember, a well-maintained igniter not only prevents annoying sparks but also extends its lifespan.
 When it comes to appliance repair and maintenance, there’s a lot of misinformation floating around—much of it rooted in misconceptions that can cost you dearly. Many people believe that scheduling a same-day service guarantees quality work, but in reality, not all quick fixes are created equal. Rushing into immediate repairs without verifying the technician’s expertise or reputation can lead to subpar work, additional problems, or even worsened appliance damage. To truly safeguard your investment, it’s essential to understand the nuances behind these promises.
One common myth is that all warranties are comprehensive coverage. Many assume that if an appliance fails within the warranty period, repairs will be free and straightforward. However, as highlighted in expert reviews, warranties often come with fine print—covering only specific parts or excluding certain types of damage—making it vital to read the terms carefully. For instance, referencing the detailed explanations in [maximizing your warranty during emergency repairs](https://discountappliancehub.com/maximize-your-appliance-warranty-during-emergency-repairs) can prevent costly surprises.
An advanced mistake I’ve seen is homeowners misinterpreting the role of installation precision. Improper setup might not cause immediate problems but can significantly shorten the lifespan of your appliance or cause intermittent malfunctions. For example, incorrect leveling of a washing machine could lead to premature bearing failure, which isn’t often covered under warranty. It’s crucial to follow professional guidelines or consult experts on reliable installation practices—more insights are available in [how to ensure reliable appliance installation](https://discountappliancehub.com/how-to-ensure-reliable-appliance-installation-in-2025).
For the sophisticated homeowner, a key question often arises: How do I verify that a repair service truly understands the nuances of my appliance model, especially when warranties depend on proper installation and repair procedures? This is where understanding the difference between genuine parts and generic replacements is essential. Using non-genuine components might void your warranty, as explained in [warranty-backed appliance services you can rely on](https://discountappliancehub.com/warranty-backed-appliance-services-you-can-rely-on). Moreover, many forget that some third-party repair shops may offer quick fixes but lack the manufacturer’s certification, risking additional issues.
Beware the trap of assuming that bulk or discounted repair services are always reliable—often, this is a ploy to cut costs at the expense of quality. Instead, look for providers with proven certifications and transparent processes, like the [expert guide to appliance repair today](https://discountappliancehub.com/expert-guide-to-appliance-repair-and-installation-today). This commitment to quality ensures your appliance receives not just a quick patch but a lasting fix.
Remember, engaging in a repair or installation isn’t just about fixing the problem at hand—it’s an opportunity to prevent future issues. A detailed check-up by qualified technicians can uncover hidden vulnerabilities, saving you time and money in the long run. And always cover your bases by understanding warranty fine print and choose trustworthy experts. As you navigate these complex waters, keep questioning the common presumptions. Have you ever fallen into this trap? Let me know in the comments.
Staying On Top of Appliance Care
Maintaining your appliances isn’t just about fixing issues as they arise; it’s about preventing problems before they start. Having the right tools at your disposal makes a significant difference. For instance, I personally rely on a digital multimeter for diagnosing electrical issues. It allows me to quickly verify whether a component has continuity or if there’s an electrical short—saving me time and costly repairs. Similarly, a quality screwdriver set with insulated handles helps me tighten or replace parts safely without risking electrical shock.
Tools That Make a Difference
Besides the multimeter and screwdrivers, I recommend investing in a small set of specialized tools like a multispanner or a torque driver. These allow you to tighten bolts and screws to the manufacturer’s specifications, minimizing the risk of over-tightening and damaging components. For cleaning, a soft, lint-free cloth combined with a gentle cleaning solution is vital for maintaining parts like burners or air vents—they prevent build-up that can impair function and cause early failure.
Predicting and Planning for the Future
The trend in appliance maintenance leans heavily toward smart diagnostics and remote monitoring. Future developments aim to offer predictive maintenance alerts, which can notify you via your smartphone about potential issues before they escalate. This proactive approach will undoubtedly save homeowners both time and money, shifting from reactive repairs to scheduled tune-ups.
How do I keep my appliances functioning over time?
Consistent maintenance routines are key. Schedule regular inspections, clean parts prone to debris accumulation, and replace worn-out components before they fail completely. Additionally, keeping an eye on manufacturer updates or firmware patches—especially for smart appliances—can ensure optimal performance and security. Remember, many warranties require proper maintenance to remain valid, so documenting your routine checks helps if a claim ever arises. Consider setting reminders for annual or bi-annual service checks; this small effort can extend the lifespan of your appliances significantly. For more insights, check out [some of the best practices for appliance upkeep](https://discountappliancehub.com/expert-guide-to-appliance-repair-and-installation-today).
Streamlining Maintenance with Professional Support
When DIY isn’t enough, quick access to professional service is crucial. Booking same-day service can prevent small problems from turning into costly replacements. Many providers now offer detailed diagnostics and repairs with warranty support, ensuring your appliances stay reliable for years. To understand what to expect during these visits, I recommend reviewing [what to anticipate from expert repairs](https://discountappliancehub.com/what-to-expect-from-same-day-appliance-repair-experts). Taking advantage of these services ensures that your appliances continue to serve efficiently and safely, and that your investments are protected.
Best Practices for Long-Term Appliance Health
Execute routine cleanings, monitor for odd noises or performance drops, and keep spare parts like filters or seals on hand. Also, consider investing in a maintenance diagnostic app—many brands offer these to track usage patterns and alert you to potential issues early. Combining these proactive measures with professional check-ups guarantees a longer, trouble-free life for your appliances. Remember, the key is consistency and correctly using your tools for each task to prevent unnecessary wear or damage. Want to upgrade your maintenance game? Start by testing your appliance’s temperature regulator with an infrared thermometer, a simple yet powerful tool for early detection of inefficiencies.
Embarking on the journey of appliance repair can be daunting, but the rewards are worth it. From my own experiences, I’ve uncovered invaluable lessons that saved me time, money, and frustration—lessons I wish I had known from the start.
What I Learned the Hard Way About DIY Stove Repairs
- Never underestimate the importance of safety: Disconnecting power isn’t just a recommendation—it’s a necessity. One accidental shock reminded me of the risks involved and the importance of cautious steps.
- Moisture and debris are sneaky culprits: A simple spill or leftover cleaning water can cause continuous sparking. Keeping the area dry and clean prevents recurring problems and prolongs your appliance’s lifespan.
- Proper alignment matters more than you think: Slight misplacement of the igniter can lead to persistent sparking. Realigning the electrode with care made all the difference in my case.
- Diagnose before jumping to parts replacement: Using tools like a multimeter saved me from unnecessary expenses. Testing components first ensures you invest in genuine fixes rather than guesswork.
- Maintenance is a long-term investment: Regular cleaning and inspections prevent issues before they start, making appliance repair less stressful and more predictable.
Tools I Trust for Reliable Repairs
- Digital multimeter: Essential for testing electrical continuity—I’ve used it to quickly identify faulty parts.
- Insulated screwdrivers: Ensuring safe handling during adjustments and replacements.
- Cleaning brushes and cloths: Keeping your igniter and surrounding area spotless helps avoid unnecessary sparking.
- Infrared thermometer: Monitoring oven temperatures for precision—it’s simple but a game-changer for troubleshooting.
Every Fix Teaches Us More Than Just Repair
Each appliance issue I encountered deepened my understanding not just of how these devices work but also of the importance of proactive care. Embracing a mindset of continuous learning transforms a frustrating repair into an empowering experience. Whether it’s reading detailed guides, consulting experts, or sharing insights with fellow DIY enthusiasts, expanding your knowledge makes all the difference.
If you’re considering a repair or maintenance task, remember that patience, safety, and proper tools are your best allies. And when in doubt, professional support is just a click away—booking a same-day service can save you from costly mistakes and ensure your appliance stays in top shape.