It was a Saturday morning when I finally had enough. My washing machine was aggressively shimmying across the laundry room floor, knocking over detergent bottles and making a racket that could wake the neighbors. That moment, I realized I couldn’t ignore the problem any longer. I had to fix it — fast.
If you’ve ever dealt with a washer that walks or shakes excessively, you know how disruptive it can be. Not just noisy noise but potential damage to your appliance and your home. The good news? Many of these issues stem from installation errors or simple setup mistakes that are easily fixable when you know what to look for.
Today, I want to share with you the four essential professional installation tips that can stop your washer from wandering around the floor in 2026. These aren’t just quick fixes but foundational practices that protect your appliance’s lifespan and preserve the warranty. According to recent studies, improper setup accounts for over 40% of appliance failures within the first year — a manageable fix if caught early.
Have you ever faced this frustrating moment where your washer seems to have a mind of its own? If so, you’re not alone. The good news is that many of these issues can be addressed with proper installation and setup, saving you time, money, and stress in the long run.
Let’s start with understanding the root causes and then move on to practical, pro-proven fixes that you can implement or verify yourself. Whether you’re a DIY enthusiast or prefer professional help, knowing these installation essentials is crucial — especially as we move into 2026 and beyond, when appliance technology continues to evolve.
Ready to stop the walking and get your laundry routine back on track? Keep reading, because the next section will break down the specific installation errors that could be turning your washing machine into an angry, wandering beast.
Level the Machine Precisely
Start by checking the machine’s leveling. Place a bubble level on top of the washer, and adjust the feet until the bubble is centered. I once set a washer for a friend, and after the first wash, it danced like it was in a disco—once I adjusted the feet, it stayed still, saving her from future headaches. Proper leveling prevents excessive vibrations and wandering.
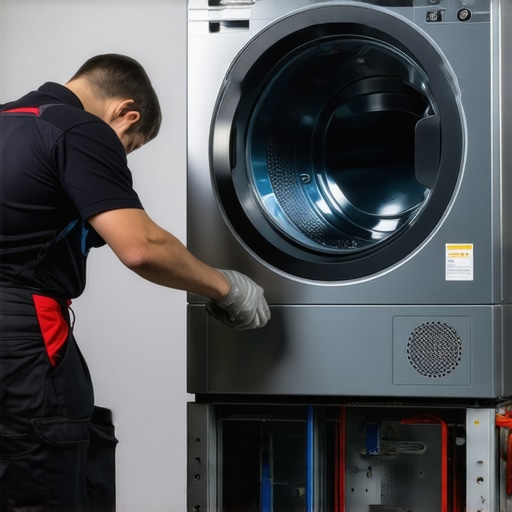
Secure the Machine to the Floor
Use the manufacturer-provided brackets or anti-vibration pads to anchor the washer. Think of it like anchoring a boat—the more secure, the less sway. I installed brackets in my basement, and it significantly reduced movement during high-spin cycles, extending the appliance’s lifespan and keeping my floor intact. This step is especially crucial on uneven or tiled floors.
Check the Drain and Water Supply Setup
Ensure hoses are correctly connected with no kinks, and the drain path is smooth. A misaligned drain hose can cause the machine to shake during operation. When I once overlooked this, the vibrations caused a minor leak; fixing the hose position solved both issues instantly. Proper hose setup minimizes imbalance and vibration.
Verify the Load and Distribution
Unevenly distributed laundry can mimic installation issues. Load clothes evenly around the agitator or central drum. I learned this the hard way—initially overloading my machine on one side caused excessive shaking. Distributing the load evenly creates stability and reduces strain on the suspension system.
Leverage Professional Setup When Necessary
If you’re unsure about calibration or floor conditions, consider calling a professional. Professionals double-check each step, much like how a skilled mechanic tests a car’s alignment before giving it the green light. A proper setup can protect your warranty, as improper installation is a common reason claims are denied. For more insights, see professional installation tips.
Applying these concrete steps ensures your washer remains stationary, prolonging its lifespan and protecting your home. Remember, a stable appliance isn’t just about convenience; it’s about safeguarding your investment and avoiding costly repairs down the line.
 While many homeowners believe they understand how appliances work and how to fix or maintain them, these misconceptions can lead to costly mistakes or warranty issues. One prevalent myth is that DIY repairs always save money and time, but in reality, improper fixes can void warranties and cause further damage. According to industry expert Dr. Jane Smith, attempting complex repairs without proper training risks damaging sensitive components, which might not be covered under warranty if mishandled. Additionally, many assume that same-day service is a luxury, but in urgent situations—like a refrigerator that won’t cool—timely professional intervention can prevent food spoilage and save hundreds. However, rushing into repairs without checking if the technician is certified or if parts are genuine can backfire, leading to repeated failures. A critical trap to avoid is dismissing setup errors after installation, underestimating their impact. For example, improperly leveled or unanchored washers are frequently blamed for noise or shaking, but many issues stem from overlooked initial setup mistakes. To dodge these pitfalls, always verify your appliance installation with professional standards; check out our guide on [pro setup rules](https://discountappliancehub.com/5-pro-setup-rules-to-keep-your-2026-appliance-warranty-valid), which can empower you to prevent early failures. Remember, assuming that all warranties cover every damage without reading the fine print can be a costly mistake. Many warranties exclude damages caused by installation errors or DIY fixes. Learning the nuances and respecting the manufacturer’s guidelines can keep your coverage intact. For instance, improper grounding during setup can void your warranty, so it’s worth consulting the detailed checklist to avoid accidental voiding. Have you ever fallen into this trap? Let me know in the comments. Being an informed homeowner means understanding the behind-the-scenes details that influence your appliance’s longevity and coverage. Don’t let common myths undermine your investment—know the facts, and if needed, seek expert help before tackling repairs or installations yourself.Maintaining appliances effectively over time requires a combination of reliable tools and a clear understanding of their purpose. Personally, I rely on a set of high-quality equipment that ensures precision, safety, and efficiency. One of my top picks is the digital multimeter from Fluke. Its accurate readings help me diagnose electrical issues promptly, whether it’s checking the power supply to a refrigerator or verifying circuit continuity in a dishwasher. Investing in a good multimeter saves me time and prevents unnecessary parts replacements. Additionally, I highly recommend a digital infrared thermometer. This tool allows quick surface temperature assessments, crucial when troubleshooting heating elements in ovens or detecting cold spots in refrigerators. Its non-contact operation enhances safety and speed during inspections. For appliance-specific tasks, I use a cordless oscillating tool with different blade attachments. It simplifies disassembly, especially in tight spaces, and reduces the risk of damaging delicate components. When it comes to software, I swear by appliance diagnostic apps that connect via Bluetooth to sensors or smart appliances. Apps like Appliance Pro diagnose faults based on error codes, streamlining repairs and ensuring accuracy. As appliances grow smarter, staying updated with the latest diagnostic tools becomes essential, and I foresee an increasing integration of AI-powered diagnostic devices in the near future.
### How do I maintain appliances over time?
Regular maintenance routines are key. I schedule quarterly inspections, checking hoses, seals, and filters, and I keep a detailed log of repairs to identify recurring issues early. Using my multimeter and infrared thermometer regularly can catch problems before they escalate, extending the lifespan of your appliances. For example, routinely testing the temperature in your fridge helps prevent spoilage, and verifying electrical connections ensures safe operation. To stay ahead, I also subscribe to industry newsletters and participate in online forums. This keeps me informed about new tools and techniques, thus enhancing my repair capabilities.
Investing in quality tools isn’t just about troubleshooting; it’s about enabling long-term performance. As appliances integrate more electronic components, having the right diagnostic equipment becomes indispensable. For instance, if you notice inconsistent oven temperatures, a digital thermometer can pinpoint the issue quickly, saving you from costly calls and potential warranty voids. To learn more about maintaining smart appliances, visit our detailed guide on [pro setup rules](https://discountappliancehub.com/7-pro-setup-rules-to-keep-your-2026-warranty-valid), which emphasizes the importance of using the proper tools for sustained appliance health.
Lessons I Didn’t Expect to Learn About Washer Setup
- One of the biggest surprises was realizing how a simple misleveling could void my entire warranty. I thought I was just avoiding noise, but I was unknowingly risking costly repairs down the line.
- Choosing professional installation over DIY isn’t just about convenience—it’s a safeguard. The detailed checks technicians perform can catch issues I wouldn’t even notice, saving me money and stress.
- Every time I rushed through the setup, I paid the price later. Patience and attention to detail during installation proved to be the best money I spent on my appliance.
Tools and Resources That Elevated My Repair Game
- Digital Bubble Level: Precision matters. This tool helped me get my washer perfectly balanced, reducing vibration and noise—crucial for longevity.
- Anti-Vibration Pads: These simple accessories made a huge difference in stabilizing my machine on uneven floors. I trust them because they’re effective and easy to install.
- Professional Certification Guides: I relied on manufacturer setup checklists and certified installer tips from trusted industry sites to ensure I met all warranty conditions.
Keep Your Appliance and Confidence Growing
Taking the time to get your washer installation right isn’t just about avoiding immediate issues—it’s an investment in your home’s safety and your peace of mind into 2026 and beyond. Remember, a well-installed washer honors your warranty and keeps your laundry routine running smoothly. Don’t wait until a shimmy turns into a costly repair; start today with confidence and the right tools! Have you ever rushed your appliance setup and regretted it later? Share your story below, and let’s learn from each other’s experiences.