
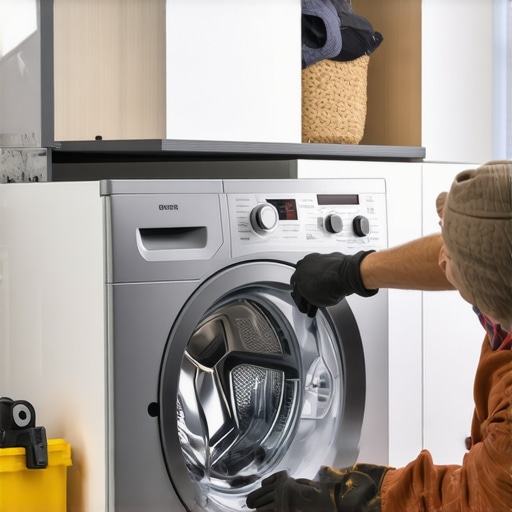
Ever had that sinking feeling when your trusty washing machine starts leaking water mid-cycle or fails to fill properly before a load? I remember the first time I faced this dilemma. There I was, staring at a puddle forming under my washer, realizing that my simple laundry day was about to turn into a troubleshooting nightmare. That moment sparked a lightbulb—if I want my appliances to serve me well, I better learn how to fix them myself, starting with something as fundamental as the water inlet valve.
Why Replacing the Water Inlet Valve Should Be On Your To-Do List
The water inlet valve is the gatekeeper of your washing machine. It controls the flow of hot and cold water into the drum and is vital for proper operation. But it’s also prone to wear and tear, especially if your tap water contains minerals or sediments that can clog or damage the valve. When it malfunctions, you might notice your machine not filling at all, overfilling, or leaking water onto the floor. Ignoring these signs can lead to water damage and higher utility bills.
Understanding how to replace this small yet crucial component can save you hundreds in repair costs and extend the lifespan of your appliance. Plus, you’ll gain confidence in handling future repairs—there’s nothing quite satisfying as fixing your washer with your own hands, is there?
Is Water Valve Replacement Really Worth the Hassle?
At first, I hesitated, worried about making things worse. Early on, I made a common mistake: attempting to repair the valve without turning off the water supply, which led to a minor flood. That taught me that proper precautions are key. Once I learned the correct steps, replacement felt straightforward and empowering. If you’re skeptical, rest assured that with the right guidance, replacing a water inlet valve is manageable and very effective, especially considering the high cost of calling in a professional. According to reliable appliance maintenance sources, tackling this repair yourself can be both safe and rewarding when done correctly.
Are you ready to roll up your sleeves and restore your washer’s functionality? Let’s dive into the step-by-step process to replace that stubborn water inlet valve, and get your laundry routine back on track.
,
Shut Off Water and Power First
Before starting, ensure your washing machine is unplugged from the power outlet and turn off the main water supply to prevent flooding. During my first attempt, I neglected this step and experienced a minor water spray, which taught me the importance of safety precautions. This simple action saves messes and potential electrical hazards.
Access the Water Inlet Valve
Locate the back panel of your washing machine and remove it using a screwdriver. You may need to move or tilt the appliance slightly. Inside, you’ll see the water inlet valve where the hoses connect. Remember, this is a delicate component connected to both hot and cold water lines. Taking care not to damage surrounding parts is crucial.
Disconnect the Hoses and Wires
Use pliers to loosen the hose clamps and disconnect the inlet hoses from the valve. Have a towel or bucket ready to catch residual water. Carefully unplug the electrical connectors attached to the valve. Note their positions, or take a picture, to ensure correct reinstallation. During my repair, I labeled the wires with masking tape for clarity later on.
Example of Proper Disconnection Technique
While working on my own washer, I used a small flathead screwdriver to gently pry off stubborn hose clamps, avoiding damage. A bit of WD-40 on rusty fittings helped loosen them. Carefully noting wire connections prevented errors when I reassembled everything, leading to a successful fix without backtracking.
Remove and Replace the Valve
Unscrew the mounting bolts securing the valve and remove it from the machine. Place the new valve in position, aligning it correctly, and tighten the mounting hardware. Reattach the electrical connections, ensuring each wire is on its original terminal. Connect the inlet hoses, tighten clamps securely, but avoid overtightening to prevent cracking the plastic.
Test the Repair
Before replacing the back panel, turn the water supply back on and plug in your washer. Run a short cycle to verify proper water flow and check for leaks. Watching for drips or spits confirms a successful installation. During my trial, I watched the hose connections carefully and adjusted clamps slightly to prevent minor leaks.
Reassemble and Clean Up
Once satisfied with the operation, replace the back panel and secure it with screws. Clean up any water spills and tools used. Keeping your washer’s water inlet valve in top shape prolongs its life and ensures reliable operation. Remember, if you’re unsure about any step, consulting detailed guides like this expert guide can provide additional confidence.
Many homeowners believe they have a clear understanding of appliance repair, installation, warranties, and same-day service, but the reality is often more complex and nuanced. One common misconception is that appliance warranties fully cover all repairs, leading many to delay addressing minor issues, only to face costly breakdowns later. In truth, warranties frequently exclude certain parts or types of damage, so familiarizing yourself with the specific terms—like in the warranty policies—can save money and frustration.
Another prevalent mistake is overestimating the professionalism of some “instant” repair services that advertise same-day fixes. As I learned from experience, not all quick repairs are equal; some may lack proper licensing or training, which can jeopardize safety or lead to further damage. Always verify their credentials through trusted sources, or opt for providers with verified reviews and transparent policies, such as those listed on trusted local installers.
A hidden trap many fall into involves ignoring the advanced nuances of proper installation. For example, proper leveling, correct wiring, and ventilation are often overlooked, resulting in reduced efficiency or premature failure. This is why consulting comprehensive resources like expert guides can be invaluable. Missteps in these areas can invalidate warranties or cause safety hazards, emphasizing that professionalism extends beyond just having the right tools.
Now, a question that even seasoned DIY enthusiasts often overlook: How do you ensure that your appliance’s warranty remains valid after an emergency repair? It turns out, some simple steps—like documenting the repair process, using authorized parts, and choosing certified technicians—are crucial. According to industry research, follow-through with authorized service providers significantly increases the chances of warranty coverage succeeding in case of future issues.
Are you aware of these hidden nuances? Recognizing the difference between superficial fixes and proper repairs can make or break your appliance’s longevity. Don’t let misconceptions or overlooked details harm your home investments. For more tips on making your repairs reliable and affordable, explore the top strategies for warranty and same-day service. Share your experiences or questions in the comments—I love hearing about your repair journeys! Remember, knowledge is the best tool to keep your appliances running smoothly and safely.
Invest in the Right Tools for Long-Term Reliability
To ensure your appliances stay functional over the years, I recommend investing in a quality digital multimeter. I personally use the Fluke 115 because it offers precise readings, durability, and ease of use. With a good multimeter, I can quickly troubleshoot electrical faults like blown thermal fuses or faulty control boards, saving time and money. Additionally, a digital clamp meter like the Klein CL800 helps me diagnose current draw issues without disconnecting wires, which is invaluable during routine maintenance or before calling a professional. These tools have become essential for both quick diagnostics and detailed inspection, empowering me to catch issues early.
Keep Up with Regular Preventive Maintenance
Scheduling routine checks, such as cleaning dust and debris from ventilation grills or inspecting hoses and wiring, prolongs the life of your appliances. For example, regularly cleaning refrigerator condenser coils with a specialized coil brush improves efficiency and reduces strain on the compressor, according to expert maintenance tips. I set reminders every six months to perform these inspections, which help me catch minor issues before they escalate into costly repairs. Also, monitoring appliance operation with basic tools like a multimeter or a power meter ensures everything runs smoothly.
Utilize Diagnostic Software When Possible
Modern appliances increasingly feature diagnostic capabilities accessible via dedicated apps or built-in codes. For instance, smart refrigerators with Wi-Fi connectivity can run self-diagnostics that pinpoint issues, saving troubleshooting time. I recommend maintaining a log of error codes and repair actions, which streamlines communication with repair services and supports warranty claims. Learning to interpret these diagnostic signals early can prevent minor faults from becoming major problems.
How do I maintain appliances over time?
Consistently reviewing manufacturer recommendations, scheduling professional inspections in addition to regular DIY checks, and keeping tools like multimeters in good condition are crucial. Staying proactive with maintenance not only extends the lifespan of your appliances but also helps you leverage warranties effectively. For more detailed guidance on this topic, explore this comprehensive expert guide.
Looking ahead, I believe the future of appliance maintenance will increasingly integrate smart diagnostics and preventive alerts, making DIY troubleshooting even more accessible. For now, starting with quality tools and consistent care makes a significant difference. Consider trying the tip of regularly checking the electrical connections with your multimeter; it’s an easy step that can save you from unexpected breakdowns and expensive repairs.
,
The Hardest Lesson I Learned About appliance repair,installation,warranty,same-day service
Early in my repair journey, I believed that any appliance problem could be fixed with a quick fix and a bit of elbow grease. But I soon realized that rushing into repairs without proper knowledge often led to costly mistakes, like damaging delicate parts or voiding warranties. The biggest takeaway was the importance of patience and thorough research before diving in, especially when dealing with critical components like water inlet valves or control boards. Taking the time to understand the appliance’s mechanics saved me time, money, and frustration in the long run.
3 Myths About appliance repair,installation,warranty,same-day service That Held Me Back
I used to think that all warranties cover every repair or that professional help always guarantees long-term fixes. Reality check—many warranties have exclusions, and not every so-called ‘expert’ is reliable. Disbelieving these myths initially meant I could have prevented unnecessary costs and delays. Learning to read warranty fine print and vet repair services properly made me more confident and ensured my appliances remained protected and efficient.
What Experts Won’t Tell You About appliance repair,installation,warranty,same-day service
Professionals often withhold details about hidden costs, the importance of correct installation practices, or how to properly document warranty claims. Discovering these secrets helped me avoid scams and get better support from manufacturers. For example, keeping detailed records of repairs and using genuine parts is crucial for warranty success—a tip many overlook. Scouring trusted resources, such as this expert guide, is invaluable for mastering these nuances.
My Essential Toolkit for Appliance Repairs
Investing in quality tools like a digital multimeter (I recommend the Fluke 115) and a digital clamp meter (Klein CL800) has transformed the way I troubleshoot issues. These tools help me quickly diagnose electrical faults without guesswork, making repairs safer and more precise. Reliable tools are a small investment for a significant boost in confidence and repair success—trust me, they’re game changers.
Embrace the Repair Journey and Share Your Wins
Every successful appliance fix boosts my confidence and saves money. If you’re feeling hesitant, start with small, simple repairs like replacing a water inlet valve—you’ll be surprised how empowering DIY can be. Remember, you’re not alone—many experts and communities are eager to support you. Take that first step today, and share your experiences or questions below. Your journey towards appliance mastery begins now!