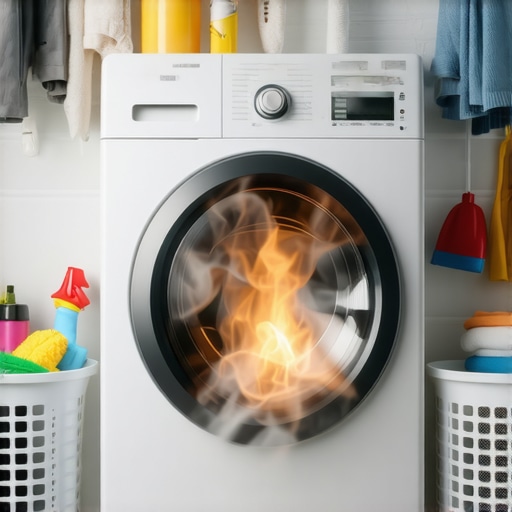
Have you ever tossed in a load of laundry only to catch an unsettling smell—like burning rubber or melted plastic—wafting from your dryer? I remember the first time this happened to me. I was rushing to get a load done before work, and suddenly, an acrid smell filled my laundry room. Panic kicked in. Was my dryer about to catch fire? That lightbulb moment made me realize how dangerous and stressful appliance issues can be, especially when they seem to pop up out of nowhere.
Why Ignoring a Burning Smell Could Cost You Big
That burning smell isn’t just a minor annoyance; it can be a sign of serious trouble. Over time, dryer components like the heating element, motor, or belt can overheat and cause real safety hazards. According to the Consumer Product Safety Commission, electrical fires caused by household appliances are responsible for thousands of fires each year—so it’s no joke. The good news? Many of these problems can be fixed quickly with the right know-how or professional help, often on the same day.
Are You Wasting Time on Repairs That Don’t Last?
Early on, I made the mistake of trying a quick DIY fix without properly diagnosing the problem. I replaced the thermal fuse based on a vague online tutorial, only to find the smell was still there. It took a trusted professional to pinpoint the real culprit—worn-out blower motor bearings—and save my appliance (and my sanity). That experience taught me that rushing in blind can cost you more in the long run. If you’re wondering whether a simple fix is worth your time or if it’s better to call in the pros, I’ll help you sort it out today. Want to skip the stress and get your dryer back to normal fast? Let’s dive into how you can handle a burning smell—just like I did—on the very same day.
Diagnose the Source Immediately
First, unplug your dryer to prevent any electrical hazards. Carefully inspect the vent, lint filter, and around the heating element for signs of burnt debris or plastic. Remember, a burnt smell often originates from lint buildup or melted plastic caught in the exhaust pipe, which can lead to dangerous fires if ignored. I once found a plastic bag melted onto the heating coil during a quick check, and removing it immediately stopped the smell and prevented further damage. Using a flashlight, look for discoloration or burnt spots that indicate overheating.
Remove and Clean Components Thoroughly
Next, access the dryer’s internal parts—consult your device manual for safe disassembly. Remove the lint trap and vacuum out lint from the filter housing. Detach accessible panels to reach the blower wheel and heating element. Clean all parts with a damp cloth, and use a brush for stubborn lint or debris. For more stubborn smells or residues, applying some vinegar solution helps break down grease. Proper cleaning prevents future buildup that can cause overheating and persistent odors.
Inspect and Replace Worn-Out Parts
Identify components showing signs of wear, such as a squeaky blower motor or cracked belt. Worn motor bearings or a failing thermal fuse can cause overheating, which produces that distinctive burning smell. If you notice any damaged parts, replacing them can be a quick fix. For example, I replaced my dryer’s thermal fuse after it blew due to overheating, restoring normal operation and eliminating odors. Always verify compatibility before purchasing replacements, or consult a professional for complex repairs.
Check the Ventilation Path
Ensure the exhaust duct is clear of obstructions. A blocked vent traps hot air and lint, increasing the risk of overheating and smells. Disconnect the vent hose and inspect for lint or debris. Use a long brush or vacuum hose to clear out the duct thoroughly. Regular maintenance of your dryer vent, ideally every six months, keeps airflow optimal and prevents dangerous heat buildup. I learned this the hard way when I ignored vent cleaning, which caused the smell to persist even after internal repairs.
Test and Monitor the Dryer After Repair
Once everything is cleaned and parts replaced, plug the dryer back in and run a short cycle. Pay close attention for any lingering odors or unusual noises. If the smell persists, it might indicate a deeper issue that requires a professional. Similarly, if you prefer to skip DIY troubleshooting, [getting same-day professional repair](https://discountappliancehub.com/3-same-day-appliance-repair-fixes-for-2026-dinner-crises) can swiftly resolve complex problems. Always prioritize safety and don’t hesitate to call experts if you’re unsure about handling electrical components.
Maintain Regular Checkups to Prevent Future Smells
Finally, schedule routine inspections of your dryer’s vent system and internal parts. Consistent maintenance not only prolongs the lifespan of your appliance but ensures safety and efficiency. Setting a reminder every six months helps catch minor issues before they become costly problems. As I did after experiencing this issue, staying proactive saves time, money, and peace of mind. Remember, tackling the problem today keeps your home safe and your laundry routine smooth.While many homeowners assume that opting for same-day repair services guarantees quick fixes and comprehensive protection, the reality is often more complex. A common misconception is that these services are foolproof or that warranties automatically cover all damages caused by installation or repair errors. However, seasoned professionals know that there’s a delicate balance between timely service and safeguarding your investment. For instance, pressuring technicians for rapid repairs may lead to overlooked details, compromising the quality and longevity of your appliance. It’s also a myth that all warranties will cover any repair problem; in truth, improper installation or DIY fixes can void warranties entirely, leaving you with unexpected out-of-pocket expenses. An advanced mistake many fall prey to involves neglecting the fine print—specific clauses in warranties can exclude coverage for certain issues if installation isn’t performed by certified technicians or if the service isn’t documented properly. Experts emphasize that *not all same-day services are equal*, and selecting reputable providers with clear policies is crucial.
How do warranty conditions change with installation quality, and can quick fixes harm long-term reliability?** According to consumer reports, improper installation is a leading cause of early appliance failures, which insurance or warranty policies often exclude from coverage. This underscores the importance of understanding warranty terms and ensuring that technicians follow manufacturer guidelines precisely, especially during installation or major repairs. Cutting corners for immediate convenience might seem tempting, but it can lead to costly repairs down the line or even void your warranty, as highlighted by industry specialists. To avoid falling into this trap, always verify if the service provider adheres to certified standards, and read the warranty terms carefully—many consumers overlook these crucial details. Want to ensure your appliance remains protected? Check comprehensive maintenance tips and warranty hacks to keep your investments safe for years to come. For a deeper dive, see how to get the most out of your warranty plans and prevent costly disputes. Remember, understanding these nuances empowers you to make smarter decisions about repairs and installations, ensuring that your appliance’s lifespan isn’t sacrificed for quick fixes. Have you ever fallen into this trap? Let me know in the comments.Keep Your Appliance Running Smoothly with the Right Tools
Maintaining your appliances for long-term reliability starts with investing in specific tools that allow for quick, effective diagnostics and repairs. I personally rely on a high-quality digital multimeter from Fluke—it’s precise and durable, essential for testing electrical components like thermostats and switchgear. For cleaning, a flexible, long-reaching vent brush helps keep exhaust pathways clear without dismantling entire units, reducing service time. I also use an infrared thermal camera for spotting overheating parts before symptoms become severe, which saves me from costly breakdowns. These tools empower me to identify issues early and perform repairs that last, rather than quick fixes that falter. As appliance technology evolves, integrating smart diagnostic devices is becoming the future of maintenance, enabling real-time alerts and remote troubleshooting.
Methods That Maximize Long-Term Results
Beyond tools, adopting specific maintenance routines enhances appliance longevity. Regularly schedule professional inspections—aim for every six months—to catch potential problems early, especially in HVAC and refrigeration units. Incorporating routine cleaning of filters, vents, and interior components prevents the buildup of lint, dust, and grease, which are common culprits behind overheating and odors. For instance, consistent vent cleaning not only improves efficiency but also reduces the risk of fire hazards, addressing concerns like the burning smell we discussed earlier. Additionally, applying manufacturer-recommended lubricants to moving parts like dryer belts or washing machine gears ensures smoother operation and less wear over time. Remember, DIY checks paired with professional servicing provide a balanced approach—especially when paired with same-day services that address issues promptly, avoiding long downtimes.
How do I keep my appliances working their best over time?
Maintaining your appliances over the long haul involves a combination of preventative care and trusted support when issues arise. Keeping detailed records of repairs and service dates helps track performance and warranties. Moreover, investing in quality parts during repairs—preferably OEM components—ensures compatibility and durability. If you’re ever uncertain about a repair or maintenance procedure, consulting a professional can prevent costly errors; many providers now offer same-day services that can quickly restore your appliance’s functionality without the delays of typical scheduling. Moreover, staying proactive with routine maintenance reduces the likelihood of unexpected breakdowns, saving time and money. Remember, a well-maintained appliance isn’t just about avoiding inconvenience; it’s about preserving the investment and ensuring safety in your home. For advanced care routines, consider scheduling an annual professional check-up—just like a health exam—that can spot issues before they become major problems, ultimately extending your appliance’s lifespan and reliability.
Lessons That Changed My Approach to Appliance Repairs
- Overconfidence Can Backfire: I once thought a quick DIY fix would save me time, but it only delayed the real problem, teaching me patience and proper diagnosis are key.
- Not All Repairs Are Created Equal: Skipping professional inspections for minor issues often leads to bigger, costlier problems—invest in expert advice when unsure.
- Maintenance Saves Money and Lives: Regular checks, like cleaning vents and replacing worn parts, have been the best preventative measure to avoid unexpected hazards.
- Understanding Warranty Nuances Protects You: Reading the fine print on warranties and ensuring proper installation avoid voiding coverage—knowledge is power.
- Tools Are Game-Changers: Having quality diagnostic and cleaning tools, such as a multimeter and vent brush, empowers me to spot issues early and extend appliance lifespan.
My Secret Arsenal for Reliable Appliance Care
- Trusted Same-Day Repair Services: Fast, professional help keeps emergencies from escalating.
- Warranty Hacks and Smart Maintenance Tips: Maximizing coverage saves money and time in the long run.
- Installation Insights: Proper setup ensures optimal performance and warranty validity.
- Pro Tips for Installation: Highlighting common pitfalls to avoid costly repairs.
Your Next Move Starts Today
Taking control of appliance care with informed decisions and the right support guarantees safety, efficiency, and peace of mind. Remember, a little knowledge combined with trusted services can save you from headaches down the road. Are you ready to implement these lessons and enjoy hassle-free appliance performance? Your home deserves it—start now!
What’s been your biggest challenge with appliance repairs—DIY or professional—and how did you overcome it? Share your story below!
,