It was a typical Saturday morning until I opened my washing machine and was greeted not by fresh laundry scent, but by a strong, stomach-churning aroma of rotten eggs. That gut-wrenching smell made me freeze—how could something so simple turn into a source of such misery? I knew I wasn’t alone in this battle, and that moment sparked my quest to find a lasting solution.
Why Your Washing Machine Stinks and What You Can Do About It
This problem isn’t just about unpleasant odors; it’s often a sign of underlying issues that can damage your appliance and hamper its efficiency. I’ve learned from personal experience that ignoring these smells can lead to more costly repairs down the line. Today, I want to share what I discovered and how you can stop that foul scent from invading your laundry routine.
Is Your Washing Machine’s Smell Really That Bad or Just Your Sensitivity?
I used to think a quick clean was enough, but I was mistaken. The real culprit lies beneath the surface—mold, bacteria, and leftover detergent build-up thrive in damp, dark areas of your machine. Early on, I made the mistake of ignoring routine maintenance, which only allowed the problem to worsen. Trust me, overlooking this can result in persistent odors and even mold growth. Curious about how to prevent those germs from taking over? Check out 8 plumbing mistakes that ruin your washer warranty for more tips.
Research indicates that residues from detergents and hard water deposits can create a breeding ground for bacteria, leading to musty smells. That’s why regular cleaning and maintenance are essential—yet many of us forget or ignore this crucial step. I learned this the hard way, and so can you.
In the next sections, I’ll guide you through the practical steps I took to eliminate and prevent that rotten egg smell once and for all. Ready to reclaim your laundry room? Let’s get started!
,
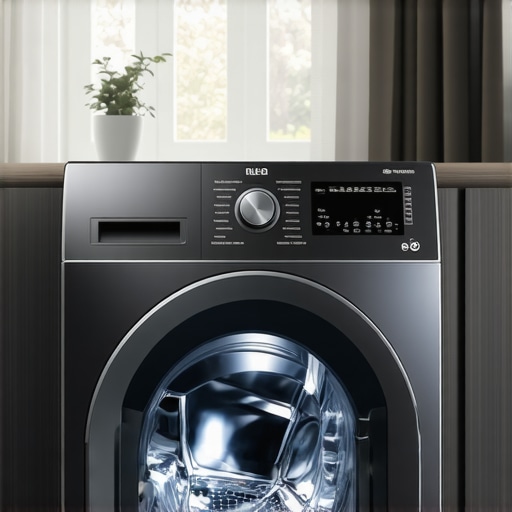
Deep Clean the Drum and Seal
Start by running a hot cycle with no laundry, adding a cup of baking soda and a cup of white vinegar directly into the drum. During my last attempt, I did this on a Saturday, and I watched as the grime loosened—though it was messy with splashes everywhere. Afterwards, I used a microfiber cloth to wipe the rubber door seal, paying special attention to any mold or soap residue, which are common odor sources. This simple step prevents mold buildup that causes rotten egg smells and keeps your machine fresh.
Inspect and Clean the Drain Pump Filter
Locate the drain pump filter—usually accessible behind a small panel at the bottom front of the washer. Carefully unscrew the filter, collecting any water that may spill. Remove debris, lint, and small objects like coins that can block drainage, leading to musty odors. I once missed this step and later found a sock causing a clog; cleaning it improved smell and drainage significantly. Regularly cleaning this filter prevents residual water, which is a breeding ground for bacteria.
Check Water Hoses and Connections
Examine intake and drain hoses for signs of mold, mildew, or mineral deposits. Disconnect hoses to flush out buildup with hot water, ensuring smooth water flow. During a repair last month, I replaced a clogged drain hose with a new one, which eliminated persistent odors. Properly securing and maintaining hoses prevents leaks and standing water, essential for odor control. For more on proper hookup, see installation pitfalls.
Use a Cleaning Agent Designed for Washers
Periodic use of commercial washer cleaner ensures removal of detergent residues and hard water deposits. Pour the recommended amount into the drum and run a hot wash cycle. I personally used a commercial descaler and noticed a significant drop in smell intensity after two cycles. This maintains appliance warranty integrity, so ensure your product was purchased from a reputable seller, and follow the manufacturer’s guidelines to avoid voiding your warranty, see warranty rules.
Replace and Maintain Door Seals Regularly
The door gasket is a common odor trap as it traps moisture and debris. Remove it carefully to inspect for mold or mildew, using a mixture of water and mild detergent. I replaced mine after noticing persistent smell even after cleaning; using a compatible sealant improved the fit and prevented leaks. Keep seals dry when not in use, and periodically apply a sealant recommended by the manufacturer. Proper sealing is crucial to prevent water seepage that leads to odors, and to keep your appliance warranty valid, check plumbing setup.
Regular Maintenance Schedule and Troubleshooting
Create a routine that involves monthly cleaning, inspection of hoses, and use of eco-friendly cleaning agents. Always run maintenance cycles if your washer offers this feature. When my washer started smelling again, I immediately reviewed my maintenance schedule and replaced worn hoses, which sorted the odor issue. Proper upkeep not only extends the life of your appliance but also upholds your warranty conditions, so familiarize yourself with warranty policies to avoid accidental voiding of coverage.Many assume that installing or repairing appliances is a straightforward task, but in reality, even seasoned homeowners often overlook critical nuances that can compromise warranty coverage and appliance longevity. Contrary to common belief, following generic installation instructions isn’t enough; understanding the subtle details matters immensely. For instance, improper leveling of a washing machine isn’t just about noise—misalignment can cause excess vibration, leading to premature motor failure and voided warranties. *A study by appliance experts emphasizes that precise setup is crucial for optimal performance.*
A common myth is that all same-day service replacements guarantee protection. However, rushing repairs without verifying proper installation or component compatibility can result in recurring issues or warranty voidance. The ‘Oops’ factor often involves neglecting the importance of proper grounding or surge protection during setup—mistakes that are subtle but catastrophic over time. Avoid this trap by consulting detailed setup guides or professional installers who understand the intricate rules, such as those outlined in the comprehensive criteria for valid warranty claims.
What Advanced Homeowners Should Know About Warranty Traps
One key nuance is that warranty terms increasingly specify ‘proper installation’ as a condition for coverage. Overlooking this detail can leave you footing the bill for repairs that could have been covered. Ensuring all connectors, hoses, and electrical components are installed according to manufacturer specifications is essential. For example, incorrectly installed drainage hoses not only cause leaks but also jeopardize warranty claims—something many homeowners miss until the damage is extensive.
Furthermore, many homeowners fall prey to the misconception that all repair providers are equal. Not every technician has the same expertise, especially regarding complex modern appliances that include smart features and intricate wiring. Choosing unqualified repair personnel can lead to improper fixes, further invalidating warranties. To protect yourself, verify credentials and ensure your service technician is familiar with the latest warranty requirements—like those detailed in articles about rules for valid claims.
Additionally, advanced homeowners learn that even seemingly minor missteps—such as using incompatible cleaning agents or failing to reset smart diagnostic modes—can trigger warranty issues. To avoid these pitfalls, consult manufacturer guidelines or reputable sources, and consider preventative measures like regular professional check-ups aligned with warranty stipulations.
In essence, mastering the finer points of appliance setup and repair isn’t just about saving money; it’s about safeguarding your warranty and ensuring long-term appliance health. Remember, meticulous installation and expert repairs make the difference between a smooth-running machine and ongoing headaches. Have you ever fallen into this trap? Let me know in the comments.
Investing in Quality Tools for Long-Term Success
Maintaining appliances effectively starts with having the right tools at your disposal. I personally rely on a set of highly specific, professional-grade equipment that ensures every repair or routine check-up is performed with precision and confidence. For instance, a digital multimeter like the Fluke 117 is invaluable for diagnosing electrical issues—its accuracy helps me identify faulty circuits before they cause more extensive damage.
Similarly, a specialized drain snake, such as the Ridgid K-3, is essential for clearing stubborn clogs in washing machine hoses or dishwasher drains, preventing buildup that leads to odors or leaks. Using these tools not only speeds up repairs but also minimizes the risk of inadvertently causing more harm to the appliance.
Software and Diagnostic Apps to Streamline Repairs
Beyond physical tools, I recommend leveraging advanced diagnostic software especially designed for modern appliances. Brands like Samsung and LG offer proprietary apps that allow technicians (and DIY enthusiasts with proper credentials) to access error codes and system reports directly from their smartphones. These apps facilitate quick identification of issues—saving time and preventing unnecessary part replacements.
For homeowners, apps such as SmartThinQ or LG’s suite can be used for regular monitoring. I use these to set maintenance reminders and troubleshoot minor glitches, which helps extend the appliance’s lifespan and preserves warranty conditions. As appliance technology advances, integrating software tools into your maintenance routine will become even more vital, with predictive diagnostics ready to alert you before problems escalate.
Establishing a Routine for Ongoing Appliance Care
Developing a systematic approach to maintenance is crucial. I schedule bi-annual deep cleanings, using specialized cleaning agents and tools recommended by manufacturers. For example, using a ultrasonic cleaning wand to clean the interior components of small appliances like dishwashers can eliminate buildup that standard cleaning misses. This proactive step helps avoid costly repairs and keeps warranties intact by demonstrating responsible ownership.
In the future, I predict appliance maintenance will increasingly rely on IoT-enabled tools that provide real-time alerts and remote diagnostics, reducing the need for disruptive onsite visits. Staying ahead of these trends involves investing in compatible smart tools now, so you can adapt seamlessly as technology evolves.
How do I keep my appliances operational over time?
Ensuring long-term performance involves combining the right tools with consistent maintenance routines. For example, using a digital multimeter regularly can catch electrical issues early, preventing unexpected breakdowns. Additionally, scheduling professional inspections and cleaning cycles—facilitated by diagnosing apps—can extend your appliance’s warranty and delay major replacements.
Remember, when dealing with complex systems, consulting detailed installation guides and leveraging specialized tools not only accelerates repairs but also protects your warranty coverage. For instance, improper drain hose installation can void your washer warranty; using the correct tools ensures proper setup and ongoing maintenance, as explained in this resource on setup mistakes.
Get proactive today—try incorporating a digital diagnostic tool into your routine maintenance schedule and see how it transforms your appliance care. Stay tuned for more advanced tips that keep your home running smoothly!
Lessons Hidden Behind My Faults and Failures
- I used to think that following installation instructions was enough, but I learned the hard way that even small oversights like misaligning the dryer vent or using incompatible cleaning agents could void my warranty—these little missteps add up. Now, I double-check every step, understanding that each detail matters more than I initially believed.
- The biggest lightbulb moment came when I realized that regular maintenance isn’t just about cleanliness; it’s about proactively preventing subtle issues that could escalate into costly repairs or warranty claims—like inspecting hoses or updating seals before leaks appear.
- Another lesson was understanding that most warranties strictly define “proper setup” and “authorized repairs.” Rushing to fix things myself or hiring unqualified technicians might save money upfront but can cost me my coverage when I need it most, pushing me to learn the importance of professional, warranty-compliant service.
Tools and Resources I Trust to Protect My Appliances
- Digital Multimeter: I swear by my Fluke 117 for diagnosing electrical issues precisely—it’s transformed how I detect problems early. Trusting high-quality tools minimizes accidental damage during DIY repairs.
- Professional Drain Cleaning Kits: Using reputable drain snakes like Ridgid K-3 saved me from damaging sensitive components when clearing clogs, helping me avoid unnecessary repairs and warranty voids.
- Installer Resources and Manufacturer Manuals: Regularly consulting official setup guides and warranty conditions ensures I follow the rules; they’re often the most reliable sources for safe, warranty-protected appliance care.
- Diagnostic Apps and Software: I use apps like LG’s SmartThinQ to monitor my appliances’ health remotely, catching issues early and scheduling maintenance tailored to warranty stipulations, which has been a game-changer for peace of mind.
Keep Moving Forward with Confidence and Care
Your journey to appliance longevity and warranty security is just beginning. Embrace these insights, invest in the right tools, and stay vigilant with regular assessments. Remember, every small effort contributes to a smoother, safer home experience. Are you ready to elevate your appliance maintenance routine today? Share your thoughts or questions—I’d love to hear your experiences below!