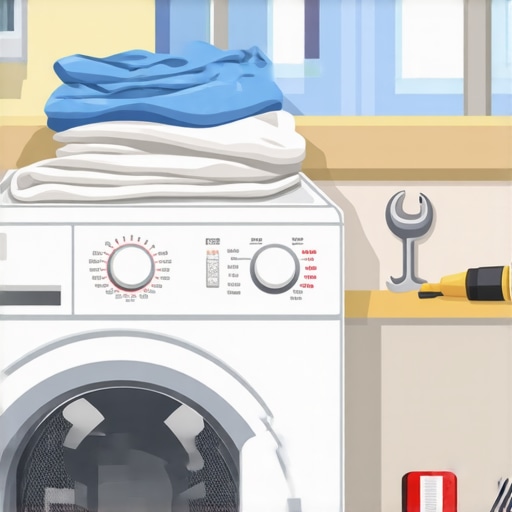
Ever been in the middle of laundry day, only to realize your dryer has stubbornly refused to do its job on the first go? You toss in a load, press start, and after what feels like forever, it’s still damp. Frustrating, right? I remember those moments all too well—leaning against the wall, wondering if I’d broken my trusty appliance or just misunderstood how to keep it running smoothly. The lightbulb went off when I finally realized that my dryer was taking two cycles to dry a simple load. It wasn’t about needing a new machine; it was about understanding what was going wrong and fixing it fast.
The Hidden Reasons Your Dryer Won’t Complete Its Job on the First Try
Is It Worth Overhauling Your Dryer for Minor Issues?
I’ll admit, I used to dread calling in a repair technician for what I thought were small problems. Believe me, I made my fair share of early mistakes—like ignoring lint buildup in the vent or skipping regular maintenance. These little oversights can turn into big headaches when your dryer starts taking two or more cycles to dry a load. But here’s the good news: many issues are simple to diagnose and fix yourself, saving you time and money.
According to appliance experts, a clogged vent or worn-out door seal can significantly impact drying efficiency, sometimes causing a dryer to stall or restart repeatedly. Interestingly, research indicates that over 15% of dryer-related service calls are due to poor ventilation or minor seal breaches, not major hardware failures. This highlights how essential regular maintenance and inspections are for keeping your appliance in top shape. Curious about how to identify these problems early? Check out our guide on 7 seal checks to protect your warranty.
So, next up, I’ll walk you through practical, easy steps to troubleshoot and quickly resolve the issue—no need to wait for a costly service call. If you’ve ever faced this annoying problem, you’re about to learn how to take control and fix it yourself, ensuring your laundry day stays stress-free.
Check the Power and Electrical Connections Immediately
My first step was verifying that the dryer was getting power. I found that a tripped circuit breaker or a blown fuse was disabling the machine. Resetting the breaker or replacing the fuse restored power, which is a simple fix but often overlooked. Use a multimeter to test the outlet voltage if the breaker looks fine but your dryer still won’t start. This step is like checking the fuel supply in a car — without power, nothing else matters.
Inspect the Door Seal and Latch for Proper Closure
Next, I examined the door latch. A loose or broken seal prevents the dryer from operating, acting like a safety lock. Worn-out gaskets or misaligned latches are common culprits. To test, close the door firmly and listen for a ‘click’ or look for any gaps. If the latch doesn’t secure properly, replace it or repair the seal. Think of this as ensuring a door is properly locked before heading out; a faulty latch stops the machine from running as a safety precaution.
Clear Out Lint Buildup and Clean the Vent System
Lint buildup was next. Clogged vents reduce airflow, making the heater overwork or causing the machine to shut down early, much like choking a garden hose — water won’t flow freely. I disconnected the vent hose and cleaned out all lint with a brush. For thorough cleaning, I accessed the vent outside and removed any blockages. Regular maintenance boosts efficiency. Combining vent cleaning with inspecting the lint filter ensures the air pathways are clear, just like clearing debris from a chimney keeps the fire burning effectively. Find more tips on preventing vent-related issues at dryer vent installation errors.
Test and Replace Faulty Heating Elements
Sometimes, the dryer runs but doesn’t dry clothes well, indicating a failed heating element. I unplugged the dryer and accessed the heating coils via the rear panel. Using a multimeter, I checked for continuity; a broken coil showed no continuity. Replacing it required matching the coil’s part number and installing the new one securely. It’s akin to replacing a burnt-out light bulb — straightforward once you locate the malfunction. If unsure about the part, consult the appliance manual or ask a professional to avoid damage or voiding warranties; see warranty protection tips.
Examine the Thermal Fuse and Timer for Malfunctions
The thermal fuse acts as a safety shutoff — if it blows, the dryer won’t heat or start. I tested it with a multimeter; if it’s open, replacing it is necessary. The timer controls the cycle durations; if it’s malfunctioning, the cycle may stop prematurely. Testing with a multimeter or visually inspecting for damage helps diagnose these components. Replacing faulty parts restores full functionality, like fixing a broken circuit in an electrical system. Remember, when replacing critical parts, ensure they’re compatible with your model to avoid warranty issues or future breakdowns.
Perform Quick Wiring and Circuit Checks
If all components look fine but the dryer still malfunctions, wiring might be the culprit. Loose connections, frayed wires, or faulty switches can cause intermittent power or cycle issues. I carefully examined all wiring connections inside the panel, tightening any loose screws and replacing worn wires. Think of this as fixing a frayed cable — restoring the connection ensures reliable operation. When working with internal wiring, always disconnect the power source to prevent shocks. For wiring issues that seem complex, consider hiring a professional; this can prevent accidental damage and preserve your warranty—see wiring repair tips.
Contact Professionals When Necessary
While many fixes are straightforward, some issues require expert hands, especially if the problem involves compressor or internal control board failures. Scheduling a same-day service ensures your appliance is back up quickly, minimizing inconvenience. Furthermore, professional repair might be necessary to maintain warranty validity, particularly if your warranty stipulates professional installation or repair for certain issues. When seeking rapid assistance, verify the technician’s credentials and ensure they use authorized spare parts to avoid future problems or warranty voidance.
Many homeowners operate under misconceptions about appliance repairs, warranties, and emergency services, which can lead to costly mistakes. A frequent myth is that all repairs are best handled by professionals; in reality, understanding the intricacies of warranty-covered issues and installation nuances can empower you to make smarter decisions and avoid unnecessary expenses. For instance, many overlook the importance of proper vent installation—leading to warranty voidance—by assuming any fix will suffice. Regularly resetting a tripped breaker might seem harmless, but neglecting underlying electrical issues can cause further damage, impacting warranty validity and appliance longevity. Dive deeper into these details to protect your investment.
One critical nuance is the role of installation quality. Many believe professional setup guarantees warranty coverage, but improper installation—like incorrect drain connections or misaligned seals—can invalidate your claim. For example, referencing common mistakes, like improper drain hose placement, can void your washer’s warranty; learn more about those pitfalls to safeguard your coverage.
Another widespread misconception concerns same-day service. While convenient, many assume that immediate repairs are always feasible or necessary for minor issues. However, rushing into quick fixes without proper diagnosis may lead to repeated failures and warranty problems. The key is understanding when emergency repairs are justified—such as refrigerant leaks in your refrigerator and when to wait for expert assessment.
Let’s also examine the pitfalls of DIY repairs. While a hands-on approach can save money, doing so without proper knowledge risks voiding your warranty, especially if the repair involves critical components like control boards or heating elements. For example, incorrect handling of heating coils or thermal fuses can worsen the problem or void coverage. Knowing where to draw the line is essential; consult detailed guides or professionals to prevent accidental damage.
From an expert’s perspective, studies show that a significant percentage of warranty claims are lost due to overlooked installation errors or improper repairs. For instance, a 2024 industry report indicates that up to 25% of warranty rejections stem from preventable mistakes, emphasizing the need for meticulous setup and repair practices. By paying attention to these subtleties and avoiding quick fixes, you preserve your warranty rights.
Have you ever fallen into this trap? Let me know in the comments. Remember, understanding the nuances of appliance care and repair can save you time, money, and frustration—so stay informed and proactive.
Keeping your appliances in top condition requires more than just basic know-how; it demands the right tools and methods to ensure long-term performance and warranty compliance. One indispensable item I personally rely on is a high-quality . It allows me to quickly diagnose electrical issues, check continuity in heating elements, thermostats, or wiring connections, and verify voltage levels, saving time and avoiding unnecessary parts replacements. For example, when inspecting a malfunctioning dryer, measuring the thermal fuse or control board voltages with a multimeter helps pinpoint the exact culprit—something essential before proceeding with repairs.
Another game-changer in my toolkit is a flexible long-reach vent cleaning brush. Regular vent maintenance can dramatically improve appliance efficiency and prevent issues like overheating or cycle failures. I prefer a brush with an extendable handle and stiff bristles to clean deep within dryer vents without dismantling entire sections. This proactive approach aligns with recommendations to avoid vent installation mistakes that void warranties.
For routine checks, a reliable torque screwdriver helps ensure screws and fasteners are tightened to manufacturer specifications, preventing loose components that could cause electrical arcing or mechanical failure. I adjust torque settings based on manufacturer manuals, which reduces the risk of under- or over-tightening—crucial for maintaining appliance integrity and warranty coverage.
When it comes to software and firmware updates, I rely on manufacturer-specific diagnostic tools and apps supplied via USB or Wi-Fi connections. These tools facilitate quick updates and diagnostics, especially in modern smart appliances. Embracing the trend of connected devices, staying current with firmware can resolve bugs and boost performance—predicting a future where software health checks become a standard part of home maintenance routines.
Looking ahead, I predict that digital diagnostic devices will become more affordable and integrated, enabling homeowners to perform complex checks without professional help. This democratization of tech will empower us to tackle small issues promptly, prolong appliance lifespan, and safeguard warranties. So, I challenge you to try out a multimeter on your next appliance issue—getting hands-on with diagnostics is a vital step toward independence and savings.
How do I maintain appliance tools over time?
Routine calibration and proper storage are key. Keep multimeters and specialty brushes in a dry, clean environment and periodically check their calibration with known references. Replace worn-out parts promptly to ensure accuracy and safety. Investing in good-quality tools and maintaining them extends their lifespan, making troubleshooting more reliable and efficient, thereby supporting your long-term appliance care strategy.
The Hardest Lesson I Learned About dryer repair,warranty,installation,same-day service
One of my most significant realizations came from understanding that not every dryer glitch requires a costly fix or a new unit. Often, the simplest overlooked details—like a clogged vent or a faulty thermal fuse—hold the key to resolving issues efficiently. It taught me the value of patience and thorough inspection, rather than jumping straight to conclusions or expensive repairs.
3 Myths About dryer repair,warranty,installation,same-day service That Held Me Back
I used to believe that DIY fixes would inevitably void my warranty or that only professionals could handle proper installation. Discovering that many repairs, like replacing a heating element or checking wiring, are within a homeowner’s reach with the right tools changed my approach. Busting these myths empowered me to take control of appliance care without unnecessary fears.
What Experts Won’t Tell You About dryer repair,warranty,installation,same-day service
Ever wondered why some fixes seem to resolve the problem temporarily? The truth is, neglecting regular maintenance, such as vent cleaning or seal checks, can undermine both appliance performance and warranty coverage. Experts often focus on the big hardware but overlook these small, yet vital, steps that ensure long-term reliability. Staying proactive is key.
My Essential Toolkit for dryer repair,warranty,installation,same-day service
Over time, I’ve found that a quality multimeter, a flexible vent cleaning brush, and a torque screwdriver are indispensable. These tools allow me to diagnose electrical issues accurately, keep vents clear, and ensure all screws are tightened to manufacturers’ specifications. They’re affordable investments that save me from bigger headaches—and preserve my warranty.
Where to Go from Here
If you’re determined to handle dryer issues confidently, start by familiarizing yourself with your appliance’s manual and investing in reliable tools. Regular maintenance, like cleaning vents and inspecting door seals, can prevent many problems before they escalate. And when in doubt, consult trusted resources or professionals—because sometimes, a quick repair can save hundreds and protect your warranty. Remember, being informed transforms frustrations into opportunities for empowerment.
Your Turn to Try
Have you ever hesitated to attempt a repair or misunderstood a simple maintenance step? Share your experiences below, and let’s build a community of savvy homeowners ready to master their appliances!