
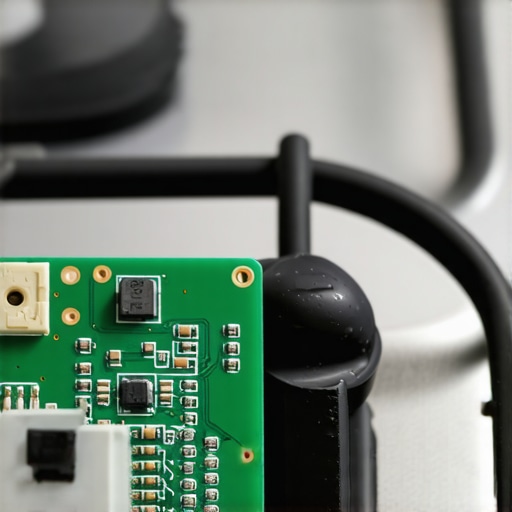
It was 5:15 PM on a Tuesday, and I had three chicken breasts seasoned and ready to go. I turned the dial on my range, expecting that familiar click and glow, but instead, I got a soul-crushing silence followed by a frantic beep. The display flashed a cryptic code, and just like that, my kitchen was out of commission. I remember standing there, staring at a cold oven, feeling that specific blend of helplessness and rage. It’s a moment most of us have faced—the sudden realization that your expensive appliance has decided to quit at the worst possible time. I used to think a dead display meant a dead stove, but after years of tinkering and a few expensive lessons, I discovered the truth: it is almost always one tiny, fractured silver dot on a green circuit board.
The Night My Oven Quit Right Before Dinner
I’ll be honest with you; the first time this happened to me, I panicked. I didn’t know the signs of a failing range control board back then. I immediately jumped on my phone to look for same-day appliance repair because I was convinced the whole unit was toast. I ended up paying a premium for a technician to come out, only to watch him pull out the board, poke it with a soldering iron for thirty seconds, and hand me a bill for $300. I felt like a total amateur. I made the classic mistake of assuming complex electronics required a complete replacement. Today, I want to show you how to spot that specific failure point before you shell out for a new part or a whole new range. We are going to look at why these joints fail and how you can identify if your problem is a simple physical break or something that actually requires expert appliance installation for a replacement.
Is Fixing Your Own Control Board Actually Safe?
I know what you are thinking: “I am not an electrician, and I definitely don’t want to burn my house down.” That skepticism is healthy! Most people assume that once a circuit board starts acting up, it’s a fire hazard. However, many of these issues are just “cold joints” where the solder has cracked due to heat expansion. According to data from The Repair Association, a significant portion of e-waste from home appliances is caused by simple mechanical failures in electrical connections rather than fried components. Have you ever noticed your oven display flickering or felt the buttons getting unusually hot to the touch? If so, you’re likely staring at a ticking clock. My goal today is to help you navigate that gray area between a DIY fix and knowing when to call for affordable same-day appliance fixes. We’ll break down the visual cues of a bad joint and the steps to take to ensure your kitchen stays functional without the unnecessary heartbreak of a $1,000 replacement bill.
Pop the Back Panel and Kill the Power First
Before you even think about touching a screwdriver, pull that range away from the wall and yank the power cord. Working on a live circuit is a one-way ticket to a hospital visit. Once the power is dead, you’ll usually find the control board tucked behind the top console. Think of this board as the brain of your kitchen; if it’s confused, nothing else works. Most modern ovens use a series of black boxes called relays to click the heating elements on and off. These relays are heavy components held onto a thin board by tiny dots of silver solder. Over time, the constant heating and cooling causes the metal to expand and contract until it literally snaps. I’ve seen cases where the grounding mistake that fries smart fridge control boards looks identical to a simple range failure, so checking your physical connections first is vital.
Look for the Tiny Rings of Failure
Once the board is out, flip it over to the side with all the green copper traces. You’re looking for ‘cold joints’—the silent killers of electronics. Imagine a bridge that has a hairline crack right where it meets the road; that’s exactly what a bad solder joint looks like. It often appears as a dull, grey ring around a metal pin. Last summer, my neighbor’s oven started screaming at midnight with a piercing beep. I knew exactly why your range is showing an f1 error code and beeping—it was a relay joint that had finally snapped under the stress. I took a magnifying glass to the board and saw a tiny, dark circle around the pin for the bake element. That microscopic gap was enough to stop the electricity, making the oven think the sensor had died. This is often the single component responsible for oven temperature swings that ruin your Sunday roast.
Apply the Heat with Precision
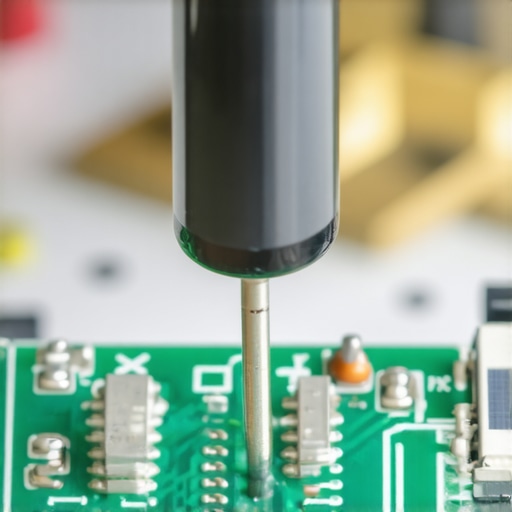
To fix this, you don’t need to be an engineer. You just need a basic soldering iron and a steady hand. You aren’t adding a mountain of new metal; you’re just remelting what’s there to close the gap. It’s like using a hot iron to smooth out a wrinkle in a shirt. If the joint looks particularly crusty or black, add a tiny bit of fresh solder to help the heat transfer. However, be extremely careful—if you accidentally bridge two separate pins together, you’ll create a short circuit that could permanently fry the logic chips. If the board looks scorched or the copper traces are peeling off the fiberglass, put the iron down immediately. At that point, you’ve moved past a simple fix and need warranty-backed appliance services you can rely on to source a professional replacement. Learning to recognize when a part is truly ‘toasted’ versus just ‘disconnected’ is the best way to how to spot a shady appliance repair quote. You’ll know exactly what’s wrong, ensuring you aren’t overcharged for a repair that takes five minutes of actual work.
I’ve noticed a dangerous trend lately: the obsession with ‘same-day’ speed over long-term reliability. Everyone tells you that the faster the tech arrives, the better the service, but in my experience, the opposite is often true. Speed doesn’t inherently equal skill. In fact, a technician rushing to hit their next window might miss a secondary failure point, like a clogged ventilation duct or a failing capacitor, leaving you right back where you started in three weeks. When you are looking for same-day appliance repair, you have to look past the arrival time and evaluate the diagnostic depth. A truly expert technician isn’t just looking for what’s broken; they are looking for what’s about to break.
Speed Isn’t Everything When Your Kitchen Is at Stake
The trap many homeowners fall into is the ‘Diagnostic Mirage.’ You call someone out because you want a affordable same-day appliance fix, they show up in two hours, tell you it’s a bad board, and then inform you the part is three days away. You’re still out the service fee, and your oven is still cold. The nuance most people miss is that true same-day success depends on the provider’s local inventory of OEM parts, not just their driving speed. Knowing what to expect from same-day appliance repair experts means asking upfront if they stock common relays and control components for your specific brand before they even pull into your driveway.
Why do some repairs fail again despite a perfect solder joint?
If you have ever successfully re-flowed a joint only to have the oven die again six months later, you’ve encountered the nuance of thermal cycling. According to a study by the International Electronics Manufacturing Initiative (iNEMI), modern lead-free solder is significantly more prone to ‘tin whiskers’ and stress fractures under high-heat conditions compared to the leaded alloys of the past. When your oven cycles between 400 degrees and room temperature, it creates a mechanical ‘pull’ on those silver dots. If the board isn’t properly seated or if the relay is vibrating, that new solder joint will snap just like the old one. This is why professional expert appliance installation often involves checking the physical stability of the housing—not just the electrical connections.
Watch Out for the Hidden Warranty Killers
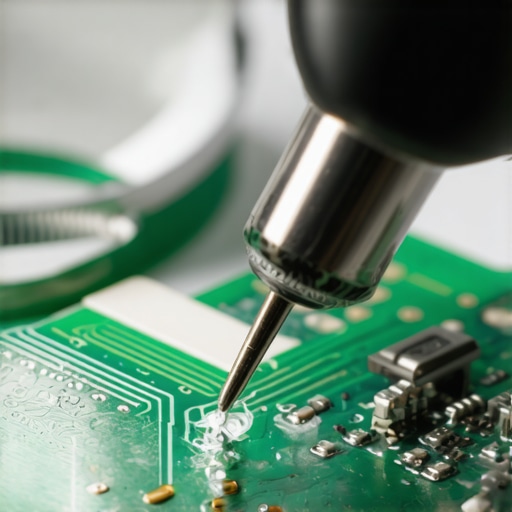
Here is the ‘oops’ factor that most DIY enthusiasts ignore: opening that control housing can be a one-way ticket to a claim rejection. I have seen countless people try a simple fix only to find the reason your warranty claim was denied was a ‘tamper evidence’ sticker they didn’t even notice. If your range is still under its first or second year of coverage, put the soldering iron down. There is often a warranty loophole that could save you hundreds on parts if you let a certified tech handle the initial inspection. They can document the failure as a manufacturer defect rather than a ‘user-induced repair attempt.’ Have you ever fallen into this trap of trying to fix something yourself only to realize you’ve voided your protection? Let me know in the comments. Before you dive into your next repair, make sure you have checked top tips for same-day service warranty coverage to ensure your wallet is as protected as your appliances.
If you have decided that the DIY route is worth the risk, you cannot show up to the job with a $5 hobbyist iron from a craft store. To get a professional-grade bond that resists thermal cycling, I always reach for a Pinecil or a Hakko FX-888D. These tools allow for precise temperature control, which is vital because according to the IPC-A-610 standards—the industry bible for electronic assembly—maintaining a specific thermal profile is the only way to ensure a joint doesn’t become brittle. If your iron isn’t hot enough, you get a ‘cold’ joint that fails in weeks; if it is too hot, you lift the copper pad right off the board, turning a $0 fix into a $400 replacement. I also recommend a bottle of high-quality tacky flux. It’s the secret sauce that makes the solder flow like water and prevents those nasty bridges I warned you about. Mastering these tools is the first step toward becoming your own expert-guide-to-appliance-repair-and-installation-today.
How do I keep my appliance electronics alive for a decade?
Maintenance doesn’t stop once the board is screwed back in. One of the biggest killers of modern kitchen electronics is heat soak combined with grease buildup. When you cook, fine particles of atomized oil find their way into the control housing, coating the components and acting as an insulator that traps heat. Once a year, I pull the back panel and use a can of compressed air to blow out the dust. If I see a layer of grime, I use 99% isopropyl alcohol and a soft brush to gently clean the traces. This simple move prevents the ‘tin whiskers’ and short circuits that lead to a frantic search for same-day appliance repair. I also keep a the maintenance log that saves your fridge warranty policy—or in this case, my oven log—to track when I’ve cleaned the vents and checked the connections. Consistent logging is how you prove to a manufacturer that a failure was their fault, not yours.

Looking ahead, I predict we are entering an era of ‘Software-Locked Repairs.’ We are already seeing manufacturers move toward encrypted parts that require a proprietary handshake to function. This means that even if you solder a joint perfectly, the machine might stay locked until a certified technician enters a code. This is why I stress the importance of knowing how to maximize your appliance warranty during emergency repairs. The physical fix is becoming only half the battle; the other half is navigating the digital gatekeeping that brands are using to keep us out of our own machines. If you want to stay ahead of this trend, start looking for appliances with ‘Open Source’ or ‘Right to Repair’ scores before you buy your next range. It’s the difference between owning your hardware and just licensing it from the manufacturer.
Before you close the back panel on your range, I want you to try one advanced move: check your appliance’s hidden ‘Service Mode.’ Most modern ovens have a sequence of button presses—like holding ‘Cancel’ and ‘Bake’ for five seconds—that reveals the actual real-time temperature of the sensors and a history of every error code the machine has ever thrown. This data is gold. It tells you if your repair actually lowered the operating temperature of the board. If you find yourself in over your head, don’t hesitate to seek out affordable same-day appliance fixes from someone who has the factory diagnostic tools. My challenge to you today: find your oven’s manual online, locate the service mode entry sequence, and write down the last three error codes. Knowing that history is the best way to ensure how to ensure reliable appliance installation in 2025 and beyond.
Three Hard Truths About Range Brains the Manual Skips
After years of staring at green circuit boards, I have realized that the most expensive part of a repair isn’t the hardware—it’s the uncertainty. Most homeowners pay a massive markup because they don’t know that expert guide to appliance repair and installation today often starts with a simple visual inspection. Before you call a pro, take a high-resolution photo of every wire connection. It sounds simple, but it is the document most people forget before calling service, and it will save you hours of guesswork if you have to put the old board back in. Also, remember that ‘Same-Day’ is a logistics promise, not a magic wand. If you are scheduling your appliance repair for same-day service in 2025, always ask if the technician carries universal relays, as those are the components most likely to snap their solder joints.
My Gold-Standard Gear for Precision Appliance Surgery
If you want a fix that actually lasts through a Thanksgiving turkey roasting session, you need the right materials. I personally trust the Hakko FX-888D for its thermal stability—it won’t let the tip temperature drop when it hits a thick copper trace. Pair that with some ChipQuik No-Clean Tacky Flux; it ensures the metal flows exactly where it needs to go without creating microscopic bridges that cause shorts. I also keep a digital multimeter with fine-point probes handy to test continuity across the relay pins before I ever plug the range back in. These tools aren’t just for hobbyists; they are the barrier between a successful DIY project and a scorched control housing.
Reclaim Your Kitchen From the Silicon Graveyard
It is incredibly empowering to hear that relay click back to life and see your oven glow for the first time after a failure. You don’t have to be a slave to planned obsolescence. While it is always worth asking is a manufacturer extended plan actually worth the monthly cost for your next big purchase, mastering a basic soldering iron gives you a lifetime of independence. Taking the initiative to perform your own appliance repair saves hundreds of dollars and keeps perfectly good machines out of the landfill. Have you ever cracked open a ‘broken’ appliance only to find a simple $2 fix? Let me know your biggest win in the comments below!