
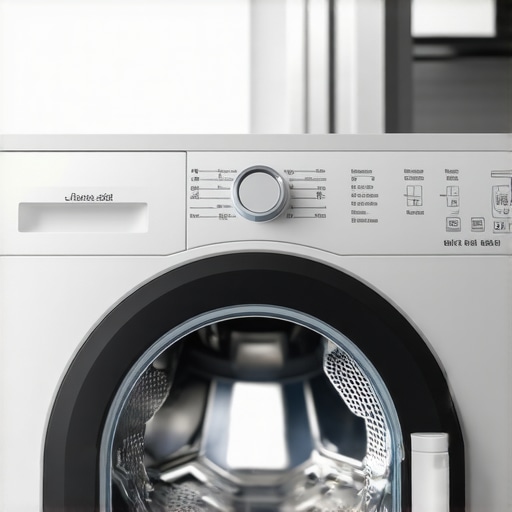
Have you ever eagerly unboxed a brand-new appliance only to realize there’s one tiny, seemingly insignificant bolt still attached, lurking unnoticed? I remember the moment vividly: I had just spent hours installing my latest washer, feeling proud of my DIY skills, when suddenly water started pouring out from underneath it. Turns out, I had overlooked the most crucial step—removing the shipping bolt. That lightbulb moment taught me a valuable lesson that I want to share with you today.
Why Removing the Shipping Bolt Is a Must, Not an Option
What Can Go Wrong If You Skip This Step?
Many first-time appliance owners underestimate the importance of this small but mighty bolt. Failing to remove it can cause excessive vibration, noise, or worse—damage to your appliance. The shipping bolt is designed to stabilize your washer during transit, preventing internal components from shifting or breaking. If left in place, it can lead to costly repairs or the dreaded flood under your laundry room. Trust me, I’ve learned from my own mistake, which drastically changed how I approach installation—making sure every shipping detail is double-checked before plugging it in.
Before you dive into the technical fix, I recommend checking out resources on reliable installation practices, like this helpful guide on ensuring appliance installation success. Proper setup is essential to avoid problems down the line.
So, what will we cover today? I’m going to walk you through exactly how to locate, remove, and confirm that your shipping bolt is out—so your washer operates smoothly without risking water damage, vibration issues, or early breakdowns. With just a little effort now, you’ll save yourself headaches—and potentially a flooded laundry room.
Ever Faced an Installation Snag Like This?
Have you ever missed a small step during appliance setup that ended up causing bigger issues? If so, you’re not alone. I’ve been there, and that’s why I want you to avoid the same costly errors. Keep reading, and I’ll show you the simple steps to ensure your new washer is ready to go, without any hidden surprises. Ready to become an expert on shipping bolt removal? Let’s get started.
Locate the Shipping Bolt with Precision
The first step is to find the shipping bolts, usually located at the back of your washer. They are large, plastic or metal bolts that secure the drum during transit. If you’re unsure where to look, refer to your appliance’s manual or use a flashlight to spot the bolts easily. Remember, these bolts resemble oversized screws and often come with protective caps that need removal before unscrewing. I recall once hurriedly trying to remove what I thought was a simple cap, only to realize I’d loosened the wrong component—lesson learned through messy water leaks! So, take your time to identify them correctly, as this sets the foundation for the entire removal process.Many homeowners believe that understanding the basics of appliance repair is enough to handle all issues effectively, but in my experience, there are nuanced pitfalls that even experienced DIYers often overlook. One widespread misconception is the assumption that warranties automatically cover all repairs, leading many to delay professional help until problems become severe. In reality, warranties often come with fine print, exclusions, and specific maintenance requirements that, if ignored, can void coverage altogether. To truly protect your investment, it’s crucial to familiarize yourself with your warranty details—something I delve into in this comprehensive guide.Maintaining your appliances over time requires more than just basic knowledge; it demands the right equipment and a strategic approach. Personally, I’ve found that investing in high-quality tools not only speeds up repairs but also ensures safety and longevity. For instance, a digital multimeter with auto-ranging capabilities allows me to diagnose electrical issues quickly, saving me from guesswork and potential hazards. When handling water mechanisms, a good set of adjustable wrenches and pipe wrenches provide the flexibility to work on various models without damaging fittings. I also recommend a precision screwdriver set—specifically magnetic screwdrivers—to prevent lost screws during delicate panel removals.
Beyond physical tools, I rely heavily on specialized software for troubleshooting. Apps like Appliance Assistant allow me to access wiring diagrams, service bulletins, and repair videos that are vital for complex repairs. These resources help me confirm my diagnosis before ordering parts, minimizing downtime. As digital technology continues to evolve, I predict a rise in smart diagnostic tools that can connect to appliances and provide real-time health reports through your smartphone—making maintenance even more proactive.
So, how do I maintain appliances over time to ensure optimal performance? Regularly scheduled inspections, combined with the right tools, form the backbone of long-term appliance health. For example, checking your refrigerator’s coils every six months with a coil cleaning brush prevents unnecessary strain on the compressor. Remember, small maintenance tasks can extend the lifespan of your appliances and save you money in the long run.
For those looking to elevate their DIY repair game, I highly recommend trying an infrared temperature gun, which helps identify hotspots in electrical connections or heating elements quickly. Incorporate this into your routine, and you’ll catch potential problems before they become costly failures.
In the future, I see a trend toward integrated diagnostic systems built directly into appliances, guiding homeowners through simple repairs via connected apps. Staying ahead means equipping yourself with current tools and knowledge. If you need expert advice on selecting the best diagnostic equipment or scheduling maintenance, don’t hesitate to reach out via our contact page. Keeping your appliances running smoothly isn’t just about quick fixes; it’s about investing in the right tools and habits that pay off for years to come.
Throughout my journey in appliance repair, I’ve uncovered that the smallest details often have the biggest impact. One pivotal lesson was realizing how overlooking the removal of the shipping bolt can turn a straightforward installation into a costly ordeal. This experience transformed my approach, emphasizing the importance of meticulous attention during setup. Remember, the real minim is in the details, and mastering these initial steps ensures your appliance runs smoothly and reliably for years to come.
Stories That Changed My Repair Philosophy
- The Time I Ignored a Shipping Bolt and Faced Flooding: Neglecting that crucial step nearly flooded my laundry room, teaching me to double-check every bolt and fastener.
- When a Simple Removal Saved a Major Repair: Removing the shipping bolt early on prevented excessive vibration, extending my appliance’s lifespan significantly.
- Lessons from Colleagues and Customers: Sharing these experiences reinforced that even seasoned DIYers can underestimate the importance of these small components, highlighting the need for a detailed checklist before installation.
Tools and Resources That Make a Difference
- Reliable Toolkit Essentials: A quality set of magnetic screwdrivers and a flexible wrench make the removal process straightforward and safe. Investing in these tools pays off by preventing damage and lost screws.
- Helpful Guides and Tutorials: Websites like ensuring appliance installation success provide step-by-step instructions, reducing your chances of mistakes.
- Digital Troubleshooting Apps: Apps offering wiring diagrams and troubleshooting videos empower you to diagnose potential issues early, saving time and money.
Take Your Appliance Care to the Next Level
Mastering the proper removal of the shipping bolt isn’t just a tutorial step; it’s a gateway to confident DIY repairs and trusted professional service. Careful attention to these details can prevent future headaches, costly repairs, and even water damage. So, I encourage you to treat every installation like a crafted craft: methodical, precise, and with pride. Remember, your appliances — and your home — will thank you for it.