
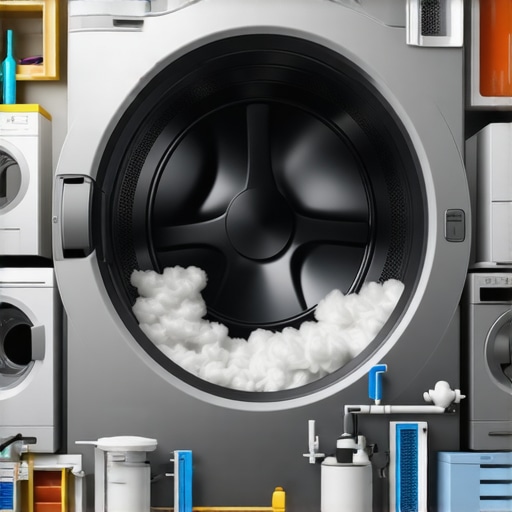
I remember the moment clearly—my laundry room was filled with that stubborn, musty smell, even though I had just spent a Saturday cleaning out my dryer vent. Frustration bubbled up as I realized I’d spent hours scrubbing and scraping, only for the problem to come back within weeks. Ever felt that way? Like no matter how many times you clean, your dryer vent stubbornly remains clogged? Well, you’re not alone. Many homeowners face this frustrating cycle, and I used to be one of them.
The Hidden Reasons Behind Persistent Dryer Vent Clogs
It’s tempting to think that a thorough cleanout should solve the problem permanently. But here’s the truth: dryer vent build-up isn’t just about lint; it’s often influenced by factors you might overlook. I once believed that simply removing lint from the vent was enough, until I discovered a crucial mistake I was making early on—neglecting the vent’s internal bends and the overall ventilation path. That oversight allowed debris to accumulate far more rapidly, leading to repeated blockages.
Scrubbing out the vent without inspecting the entire length can be like trying to patch a leaky pipe without finding the actual crack. Over time, lint and debris stick to the inside of the duct, especially if the venting route is long, has multiple turns, or is improperly installed. Sometimes, even a clean vent can become clogged again because of unseen issues like inadequate airflow or trapped moisture.
External factors play a role too. For instance, birds and rodents often build nests near vent openings, introducing additional debris. Plus, depending on your home’s design, some vents are more prone to trapping lint—particularly if the ductwork isn’t correctly sized or sealed. The bottom line? A one-and-done clean isn’t enough.
If you’re tired of repeating the same cleanout routine with little long-term success, it’s time to look deeper. I’ve learned that the key to keeping those vents clear is understanding the entire system—inside and out.
And the good news? There are proven strategies to ensure your vent remains free-flowing for good, and I’ll share those shortly. But first, have you ever experienced the frustration of cleaning your vent only to find it clogged weeks later? It’s a common problem, and recognizing your specific situation is the first step toward fixing it permanently.
By addressing the root causes and doing a comprehensive inspection, you can avoid wasting time on futile cleanings. That way, your dryer will work more efficiently, your home stays safer, and those pesky clogs become a thing of the past. Ready to get to the bottom of this once and for all? Let’s dive into the practical steps that will transform your vent maintenance routine and keep your dryer running smoothly—long after your next cleanout.
Inspect the Entire Vent Path
Start by disconnecting the dryer from its power source and pulling it away from the wall. Remove the vent cover outside and check for obstructions like nests or debris. Use a flashlight to peer into the duct for any visible lint clogs or blockages. In my experience, I once found a bird’s nest blocking almost half of the vent, which—once cleared—improved airflow dramatically. To prevent this, install a protective vent cap with a bird guard.
Clear Lint Buildup Deep Inside the Duct
Insert a dryer vent brush, which typically has a long, flexible handle, into the duct. Attach a vacuum hose to the outside vent opening to suck out loosened lint and debris. For stubborn buildup, consider using a high-powered air compressor or hire a professional for a thorough cleaning. When I cleaned my vent, I used a combination of a brush and a wet/dry vacuum, which eliminated years of lint that my regular cleaning missed. Regularly scheduled deep cleans can prevent the recurrence of blockages.
Inspect and Maintain Vent Angles and Seals
Ensure the ducting maintains a gentle slope away from the dryer without any dips where lint can accumulate. Check that sealing clamps are tight and that no sections are crushed or kinked. Improper sealing or crushed sections force the dryer to work harder, increasing lint build-up and energy consumption. I remember replacing a kinked duct with smooth, flexible aluminum foil ductwork, which improved airflow and reduced drying times.
Address External Factors and Preventative Measures
Examine the vent exterior for signs of damage or obstruction. Trim back foliage or debris that might restrict airflow. Install a vent cover with a louver or damper to prevent ingress of pests and debris. Also, consider installing a lint trap on the inside to catch loose lint before it reaches the vent. My personal experience involved adding a screen filter, which reduced outdoor debris and made every cleaning easier. Regular visual inspections every six months ensure all components stay in top condition.
Leverage Professional Assistance for Long-Term Safety
If you’re unsure about your inspection or cleaning skills, don’t hesitate to contact a professional. A certified technician can perform a comprehensive assessment, including using specialized tools like high-resolution cameras or duct testers. They can also advise on proper venting standards—like those outlined in [a reliable guide](https://discountappliancehub.com/how-to-ensure-reliable-appliance-installation-in-2025)—ensuring your system meets safety and efficiency requirements. I once hired a pro who identified a tiny crack in my duct that could have eventually led to carbon monoxide leaks. Regular professional checkups are a smart investment in home safety.
Many homeowners assume that opting for same-day appliance repair or warranty coverage automatically guarantees a hassle-free experience. However, in my experience, the real nuances often go unnoticed, leading to costly mistakes and unmet expectations. One common misconception is that all repair services offering same-day solutions provide equal quality or transparent warranties. While quick turnaround is appealing, many services hide fine print or don’t clarify warranty limitations, which can leave you vulnerable when issues reoccur. In fact, trusting a repair company solely based on their advertised speed without verifying their warranty backing can be a costly oversight.
A critical trap I’ve seen many fall into involves misconception about warranty coverage. Some believe that warranties cover all repairs or replacements, but the truth is more nuanced. According to appliance repair experts, many standard warranties exclude issues like accidental damage or parts failure due to misuse. Additionally, repairs performed by non-authorized technicians may void your warranty entirely. This mistake often results in paying out of pocket for services that should be covered, simply because the warranty wasn’t understood properly. For example, rushing to schedule the nearest available repair without confirming if the provider is authorized can jeopardize your warranty rights.
Another common myth is that installation and repair services are interchangeable. While some providers might offer both, the expertise required differs significantly. Poor installation can cause long-term appliance issues, such as energy inefficiency or safety hazards, which amateur installers may overlook. Conversely, a professional knowledgeable about the intricacies of reliable installation standards understands how proper setup prevents future breakdowns. Skipping professional installation and trying to DIY or hiring a general handyman might seem cost-saving initially but can lead to more frequent repairs and warranty disputes down the line.
Ever wonder about the distinction between urgent repairs and scheduled maintenance? Many believe that urgent or same-day repairs are always the best route. However, rushing into a quick fix without proper diagnostic checks could mask underlying issues. For example, a quick repair for a leaking dishwasher might temporarily stop water overflow but ignore a clogged drain line that needs addressing. This oversight may cause recurrence and warranty complications if the root problem isn’t properly managed. My advice? Always ask if the technician provides diagnostic clarity and if the repair aligns with expert standard practices.
In summary, the pitfalls in the realm of appliance repair and warranty coverage stem from misconceptions about service scope, quality assurance, and installation standards. To avoid falling prey to these errors, I recommend checking provider credentials, understanding warranty fine print, and ensuring that installation follows safety standards [as outlined here](https://discountappliancehub.com/how-to-ensure-reliable-appliance-installation-in-2025). Remember, a well-informed homeowner is the best safeguard against unnecessary expenses and frustration.
Have you ever fallen into this trap? Let me know in the comments. Staying savvy about these nuances can save you significant money and stress in the long run.Maintaining appliances for long-term performance demands more than just basic knowledge; it requires the right tools and a strategic approach. Over the years, I’ve refined my toolkit to ensure each repair or installation is not only effective but also lasting. One indispensable item I rely on is a high-quality digital multimeter, specifically the Fluke 117. Its precision allows me to quickly diagnose voltage issues or faulty sensors, saving time and minimizing guesswork. Pairing this with a digital infrared thermometer helps me verify temperature irregularities, particularly when troubleshooting ovens or refrigerators; accurate readings prevent unnecessary part replacements. For cleaning and debris removal, I favor a flexible, long-handled dryer vent brush, which enables me to reach deep into ductwork without dismantling the entire system—this is vital for ensuring airflow efficiency and preventing future clogs. When inspecting vent lines, I also use a compact inspection camera with a flexible cable, granting me a clear view of internal bends and potential obstructions that aren’t visible externally. I never skip using a high-strength, retractable duct tape designed for HVAC systems to seal connections securely, avoiding leaks that compromise efficiency and safety. Additionally, a reliable socket set with both metric and standard sizes is essential for swift component replacements. For software diagnostics, I rely on manufacturer-specific apps that connect via Bluetooth, providing real-time data and error logs, which significantly speed up troubleshooting. Looking ahead, I predict the trend toward integrated smart diagnostic tools will grow, combining hardware sensors with cloud analysis to pre-empt issues before they manifest. This evolution will make proactive maintenance more accessible to attentive homeowners and professionals alike.
**What We Need to Know to Keep Appliances Working:**
How do I maintain these tools over time? Regular calibration of your multimeter every six months is crucial for maintaining measurement accuracy. Store your devices in a dry, temperature-controlled environment to prevent moisture and corrosion, especially for sensitive electronics. Keeping the inspection camera’s lens clean with a soft microfiber cloth ensures clear visuals during internal inspections. Updating your diagnostic apps when manufacturer updates are available helps keep diagnostic capabilities current, preventing misdiagnoses. It’s also worthwhile to periodically test your infrared thermometer on known temperature sources to verify its accuracy. As appliances evolve, so does the importance of staying current with the latest maintenance techniques. Check the manufacturer’s guidelines for specific calibration procedures, such as those recommended by Fluke. Adopting these practices extends the reliability of your tools and, by extension, your appliances.
**Advanced Tip:** Utilizing a combination of a digital multimeter and inspection camera can dramatically improve diagnostic speed and accuracy. For example, if your refrigerator isn’t cooling properly, you can quickly verify power supply and sensor outputs while visually inspecting internal components, pinpointing issues without unnecessary disassembly. This method reduces downtime and repair costs—try integrating it into your maintenance routine today.
**Query for You:** Ever wondered how to optimize your appliance troubleshooting with minimal tools? Discover the best way to combine these techniques by visiting our expert guide to appliance repair and installation today. Remember, staying proactive is key to avoiding costly repairs and ensuring your appliances last longer. For more detailed strategies, check out [our comprehensive repair tips](https://discountappliancehub.com/expert-guide-to-appliance-repair-and-installation-today).
What I Learned the Hard Way About Overlooking Tiny Details
One of the biggest lessons I’ve had to learn is that reliable dryer vent health depends on attention to tiny, often ignored details. For instance, I used to focus only on lint buildup without considering how improper vent angles or small animal nests could quickly cause blockages. That mistake taught me that insulation, sealing, and external obstructions play just as crucial a role as lint removal. Missing these factors meant I was fighting a losing battle with repeated clogs, wasting time and risking safety. Now, I constantly check the entire pathway and external vent conditions to prevent issues before they start.
The Power of Routine Deep Checks and Device Upgrades
Another insight I’ve gained is that scheduled, comprehensive inspections combined with strategic upgrades have transformed my approach. Regularly using tools like a flexible inspection camera revealed hidden problems, such as internal duct damage or minor critter intrusions—small issues that can escalate if ignored. Upgrading old vent components with corrosion-resistant clamps and proper vent caps also drastically improved airflow and reduced maintenance frequency. For homeowners tired of recurrent problems, investing in quality components and setting reminders for professional inspections can save hundreds in repairs and enhance home safety.
Underestimating External Threats Can Be Costly
I once underestimated how external threats like bird nests or neighborhood debris could undermine my efforts. Installing protective vent covers with bird guards and trimming nearby foliage not only kept pests out but also maintained optimal airflow. This preventative step prevented emergency cleanings and costly repairs. Recognizing that external factor control is as vital as internal cleaning has been a game-changer—I now view external maintenance as an integral part of vent care rather than an afterthought.
Don’t Wait Until It Cracks Your System
My final takeaway is the importance of proactive action over reactive fixes. The moment I noticed a slight decrease in airflow, I made it a point to investigate thoroughly instead of delaying. Early diagnosis with the right tools and timely upgrades keep the entire vent system running smoothly, preventing emergency failures or safety hazards. This approach has given me peace of mind and significantly extended the lifespan of my dryer and its venting system. If you’re serious about avoiding recurring clogs, start thinking of vent maintenance as an ongoing relationship—not a one-time chore.