
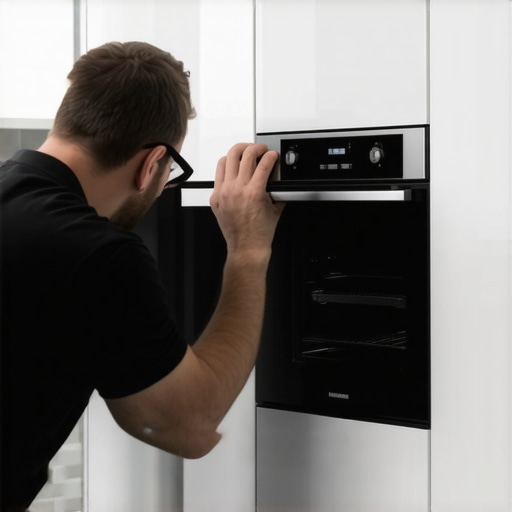
I remember the first time I tried installing my brand-new wall oven. I was eager to get it perfect, envisioning that sleek, flush finish that makes any kitchen look modern and clean. But as I carefully slid the oven into place, I realized something was off. It was slightly crooked, and I could see gaps around the edges. Frustration crept in because I knew I hadn’t fully understood how crucial proper anchoring is for a flawless, professional look. That lightbulb moment made me dig deeper—and what I discovered changed everything about how I approach appliance installation.
The Real Reason Wall Oven Flush Finish Matters (And Why You’re Probably Doing It Wrong)
Achieving that seamless, flush appearance isn’t just about aesthetics. Proper anchoring ensures your oven stays secure, operates safely, and maintains its sleek profile over time. It’s a detail that often gets overlooked, leading to uneven installs, gaps, or even damage. And honestly, the difference between a well-anchored oven and a half-hearted attempt can be subtle—yet hugely impactful. Take my word for it: investing a little time upfront to learn the best anchoring methods is worth every penny, especially if you’re like me and want your kitchen appliances to be both functional and visually pleasing.
Is Overcomplicating Installation Actually Worth It?
Early on, I made the mistake of rushing through the anchoring process, assuming it was straightforward. Turned out, I overlooked some critical steps. This oversight resulted in an uneven finish and even caused the oven to shift slightly during use. That experience taught me that proper anchoring isn’t just about screwing in a few panels; it’s about understanding your specific appliance, the cabinetry, and the wall structure. If you’ve ever wondered whether you can skip this step or cut corners, I’ll tell you now—perfection demands attention to detail. And for a comprehensive guide, I recommend checking out our expert guide to appliance installation.
Securely Mounting the Oven for a Perfect Finish
Start by measuring the space carefully to ensure your oven fits snugly. Use a level to mark the exact position on the cabinetry, ensuring the oven will be flush with surrounding surfaces. When I installed mine, I placed shims under the mounting brackets to adjust the tilt precisely, preventing any crookedness later. Attach the brackets to the wall or cabinet frame using the manufacturer’s recommended screws, tightening them firmly but carefully to avoid damaging the structure. Remember, an unstable mount can cause gaps or tilt, marring the sleek look you desire. Try to make contact with the pilot holes to avoid overdriving screws, which might crack the cabinetry.
Leveling and Alignment for a Seamless Look
Proper leveling is crucial. After securing the brackets, test the oven’s alignment using a bubble level across the top edge. If it isn’t perfectly level, insert thin shims behind the brackets or beneath the oven’s base. I once overlooked this step, and the door wouldn’t close properly, leading to gaps that compromised both functionality and appearance. A well-leveled oven will sit flush with surrounding surfaces, eliminating gaps and ensuring the door seals correctly. For accuracy, double-check measurements from multiple angles before proceeding.
Connecting Electricity Safely and Efficiently
Ensure the electrical wiring complies with local codes. Turn off power at the breaker box before proceeding. Use a voltage tester to confirm no power is flowing. Connect the oven’s wiring harness securely, matching color-coded wires: black to black, white to white, and ground to ground. Use a connector block or follow the manufacturer’s wiring diagram religiously. I once improvised a connection, which caused intermittent power issues, requiring a redo and delaying the project. After reconnecting, turn the power back on and test the oven for proper operation. Always double-check connections to prevent safety hazards later.
Sealing and Finishing Touches
Fit the trim or faceplate to hide any gaps between the oven and cabinetry. Use a silicone sealant around edges to prevent dust or moisture ingress, which can degrade the installation over time. When I installed my own oven, applying a bead of sealant around the trim gave it a professional appearance and protected the cabinet interior. Clean excess sealant immediately to avoid smudges. Ensure the trim is seated evenly and screws are tightened securely. This final step not only enhances aesthetics but also contributes to the durability of the installation.
Testing and Troubleshooting
Power on the oven and check for proper operation: heating elements, timers, and control panels. Observe for any abnormal noises or error messages. If something isn’t right, revisit your wiring connections and leveling. Taking these steps ensures your oven looks professional and functions safely. For further guidance, consulting the expert guide to appliance repair and installation can be invaluable. Remember, meticulous attention during installation saves time and money in the long run, especially when appliances are warranty-backed, ensuring your investment is protected.When it comes to warranties and same-day appliance repairs, many homeowners operate under common myths that can cost them dearly. The most prevalent misconception is that a warranty will cover all repair costs without exceptions. In reality, warranties often have fine print that excludes certain damages or components, leading to unexpected expenses. Professionally, I’ve found that understanding the specific coverage details is crucial—don’t rely solely on the salesperson’s assurances. Check out our warranty-backed appliance services to ensure reliable coverage.
Another myth is assuming that same-day service equates to a quick fix. While many providers advertise rapid responses, the truth is that a fast appointment doesn’t always mean a thorough repair. Rushing through repairs can overlook nuanced issues like faulty wiring or hidden internal damage that aren’t immediately visible. To truly benefit from swift and reliable service, understand what qualifies as a comprehensive diagnosis—this is where experts excel. For in-depth insights, explore our expert guide to appliance repair.
Beware the trap of thinking your repair is guaranteed if it’s done quickly. Quick fixes might temporarily solve symptoms, but they often neglect root causes, leading to recurring problems. For instance, a technician might replace a broken hose without inspecting internal corrosion, which can cause leaks again soon after. My advice? Always ask if the repair includes a comprehensive inspection of the underlying issue—this reduces the chance of repeat failures.
Ever wonder if extending your warranty or choosing a same-day service provider really delivers value? Studies show that many consumers underestimate the importance of provider reputation and experience, often opting for the cheapest or fastest option. But reliability and thoroughness are essential, especially with complex appliances. You can learn more about how to evaluate your options in our top tips for same-day service warranty coverage.
A sophisticated concern often overlooked involves the fine nuances of technician training and part quality. As experts, I’ve seen how subpar parts or inadequate training can turn a quick repair into a long-term problem, even if the initial fix appears successful. This aligns with findings from industry studies emphasizing that quality components and technician expertise are critical to durable repairs. Hence, investing in reputable service providers ensures your appliance’s longevity and your peace of mind.
In sum, being aware of these hidden nuances—details about warranty exclusions, the depth of repair, and technician expertise—can save you time, money, and frustration. Don’t fall into the trap of superficial fixes or overestimating warranty coverage. Take proactive steps to understand your rights and options, and choose professionals committed to quality and transparency. For a comprehensive overview, check out our guide to reliable appliance installation and repair. Have you ever fallen into this trap? Let me know in the comments.
Investing in Reliable Tools for Long-Term Maintenance
When it comes to maintaining your appliances efficiently, having the right tools makes all the difference. I personally swear by a high-quality multimeter like the Fluke 115, which provides precise voltage readings crucial for diagnosing electrical issues safely. Additionally, a digital infrared thermometer helps identify overheating components without disassembly, saving time and preventing damage. For more complex tasks, a cordless power drill with various driver bits ensures secure and efficient mounting or dismounting of appliance panels. Personally, I find that using a brushless drill reduces wear-and-tear and provides consistent torque, which is vital during repetitive maintenance routines.
Streamlining Repairs with Smart Software
Beyond physical tools, I recommend adopting specialized diagnostic software compatible with modern appliances. These programs can interpret error codes, run system diagnostics, and even suggest targeted fixes—saving you from trial-and-error approaches. For example, many smart refrigerators and washing machines are integrated with apps that provide troubleshooting guidance. I regularly use the manufacturer-specific apps because they are updated with firmware insights and error-specific tests, enabling quick and accurate repairs. As technology advances, connecting diagnostic tools via Bluetooth or Wi-Fi is becoming standard, making maintenance faster and more reliable.
How do I maintain appliance performance over time?
Routine checks are essential to keep appliances in top shape. Schedule preventive maintenance every six to twelve months, including cleaning filters, inspecting seals, and testing critical components with your multimeter. Keep a detailed maintenance log—note dates, issues identified, and parts replaced—to track performance trends. Adopting this disciplined approach not only prevents unexpected breakdowns but also preserves warranty coverage, which is vital during long-term use. Remember, a proactive stance on maintenance often costs less than emergency repairs. For comprehensive guidelines, consult our expert guide to appliance repair and installation.
Preparing for Future Trends in Appliance Maintenance
Looking ahead, the integration of AI and IoT is set to revolutionize appliance care. Predictive maintenance algorithms will notify you before issues arise, allowing for preemptive action. To stay ahead, consider investing in smart diagnostic devices like the Samsung SmartThings Station, which can monitor appliance health continuously. These innovations are likely to streamline repair workflows further and extend appliance longevity. Embracing these tools now will prepare you for a future where troubleshooting becomes faster and more intuitive. Stay informed by following updates from industry leaders and tech reviews—anticipating these trends will ensure you’re always prepared for hassle-free appliance ownership.
What I Never Expected About Warranty Pitfalls
The biggest lesson I learned was that warranties often come with hidden exclusions that can surprise even seasoned homeowners. Relying solely on warranty promises without reading the fine print left me vulnerable to costly repairs I thought were covered. Now, I always scrutinize the warranty details or consult reliable guides to ensure my appliance is genuinely protected. This proactive step has saved me money and headaches in the long run.
Why Proper Installation Can Make or Break Your Kitchen
I realized early on that a flawless flush finish isn’t just about looks—it’s about safety, efficiency, and appliance longevity. Investing time in leveling and secure anchoring prevented future issues like uneven operation or leaks. Trust me, a small extra effort at this stage pays off with a kitchen that functions smoothly and looks stunning for years to come. Remember, professional installation advice or reputable guides can be lifesavers in achieving perfect results.
The Secret to Saving Time During Repairs
Having the right tools and diagnostic software transformed my approach to repairs. Discovering how a high-quality multimeter, infrared thermometer, and smart diagnostic apps can quickly identify issues has been a game-changer. Not only does this reduce downtime, but it also helps me address the root cause, preventing recurring problems. Investing in these tools is a decision I wish I made sooner—your future self will thank you.
Reconsidering Quick Fixes and Rushed Repairs
My lightbulb moment was realizing that rushing through a repair might seem efficient, but often leads to incomplete fixes and repeat visits. Taking the time to thoroughly diagnose and understand the problem—sometimes with the help of expert guides—ensures long-lasting solutions. It’s worth avoiding the temptation of quick fixes that only mask symptoms, especially when your appliance is warrantied and warrants proper attention.
How a Little Knowledge Can Protect Your Investment
The deep dive into appliance repair taught me that being informed—knowing what parts are likely to fail and understanding repair processes—can significantly extend the lifespan of your appliances. Staying updated through trusted resources like our expert guide to appliance repair and installation empowers you to make smarter decisions and handle issues more confidently. It’s about turning DIY challenges into opportunities for smarter ownership.